Monday, January 14, 2019

Dummies

When I started out building railroad models the dummy locomotive was a common way to add power to your train without it taking power away from your transformer or throttle pack. I would guess that at one time the entire Athearn product line could be had as a powered or an unpowered model. Everything from trainset quality "double header" two packs to brass diesels were sold in powered and unpowered pairs. Even into the 90s when Life Like came out with their Proto2000 EMD E7s, E8s and Alco PA-1 models, the B units came as unpowered dummies.

But at some point the manufacturers seemed to decide, almost all at once, that the cost difference between a powered model and an unpowered model just wasn't worth it when modelers expected to pay much less for the unpowered model. And so seemingly overnight the dummy was a thing of the past.

Back when I started building my fleet in the 80s, dummies were a big part of the roster. Once I lost the space to operate my models I began to focus on the model building and detailing aspect thinking I'd worry about powering the models later. By the early 2000s I had almost given up on buying powered models and chose to buy the cheaper dummies when I could, especially when starting with an Athearn locomotive as the base model.

Recently I've been going through my locomotive roster looking for unfinished projects, which hasn't been that difficult. Most of them need decoders, some of them are half-finished kitbashes, some are custom build and paint jobs that are waiting on a day of good weather for painting, and some just need something minor, like a handrail repair or headlights installed. But that list covers almost all of the models. It would be easier to list the ones that are done.

As I've been auditing the roster trying to come up with a plan for some of these models, the idea of not powering a few models has become more appealing. Some models seem like a no-brainer, such as a Burlington Northern B30-7AB cabless booster. Others might be more surprising, like a Union Pacific SD40-2.

What determines whether a model has a motor in it really comes down to how the model will be used. Typical heavy freight trains of the 80s might have four to six locomotives on the head end, compared to modern trains with two or three. Two or three model locomotives with efficient motors won't draw too much current, but four to six -- especially any that are sound equipped -- will start to drag the power supply and control system down, especially if any other locomotives are operating elsewhere in the power district.

Still, any trains I operate don't really require more than two powered locomotives to get over the road. Anything in the consist over two, especially more than three, is overkill. So for those consists that should have four, five or six locomotives, adding dummies to the mix can help keep power consumption down as well as the cost needed to build those models.

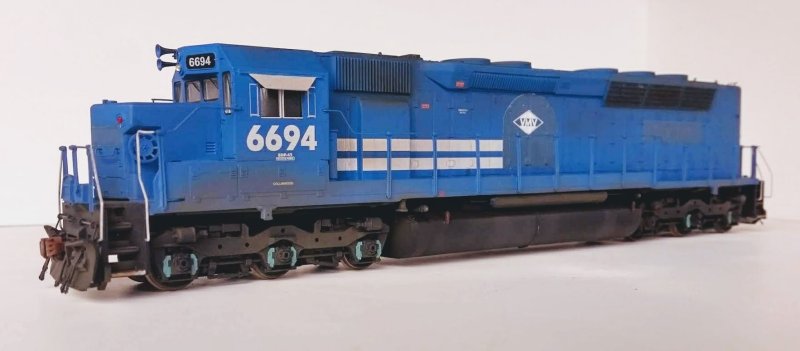
A few years ago when the Athearn Genesis SDP45 was announced, a modeler on the Diesel Detailer offered for sale an unpowered Conrail SDP45 he had built from Athearn and Rail Power Products parts. I picked it up thinking it might work with my N&W or UP power. As it turns out these Conrail units went to VMV and could be found on the Southern Pacific in the late 80s. When I received the model I was surprised at the quality of workmanship. It looked good in the photos he posted but even better in person. I replaced the Kadee couplers, did a little detail painting and added the patches to the Conrail name and logo following photos of the prototype.



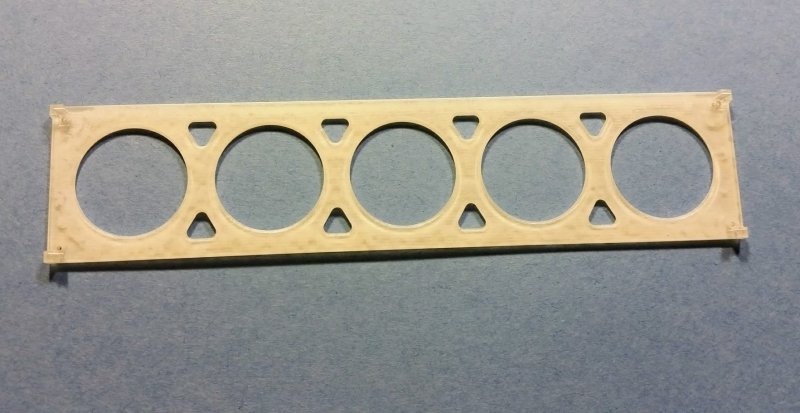
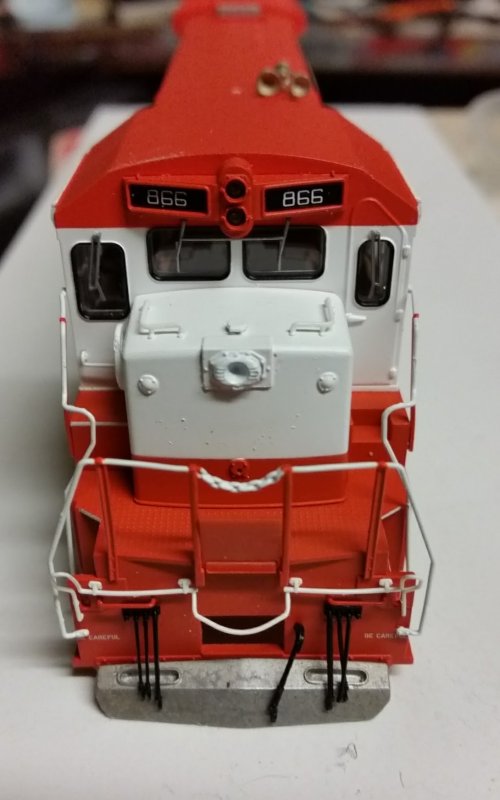
Some time later an Atlas B30-7 shell decorated for Frisco was posted for sale somewhere for cheap. I remember thinking it would go nicely with my Genesis GP38-2 in Frisco red and white. Anyway, I picked it up as a someday project. After a quick look for a matching Atlas drive failed to turn up any results, I began to wonder if it would be possible to 3D print a new frame for this shell. I had printed reversers out of Shapeways' white strong and flexible nylon and they are very robust, so why not print a frame using the same material? It's not a smooth or detailed material; in fact, it has a rough, grainy texture. But just as poplar is often a substrate for a more attractive or expensive veneer wood in the furniture world, it seemed like the printed nylon material could work well as a substrate underneath a veneer of other manufacturer's parts or even printed parts.


After measuring the Atlas shell as carefully as I could, recreating the Athearn bolster, designing a coupler interface that would use the Atlas SD35 coupler box and a fuel tank core that would accept an Atlas GE B30-7 fuel tank, I printed the first test frame:
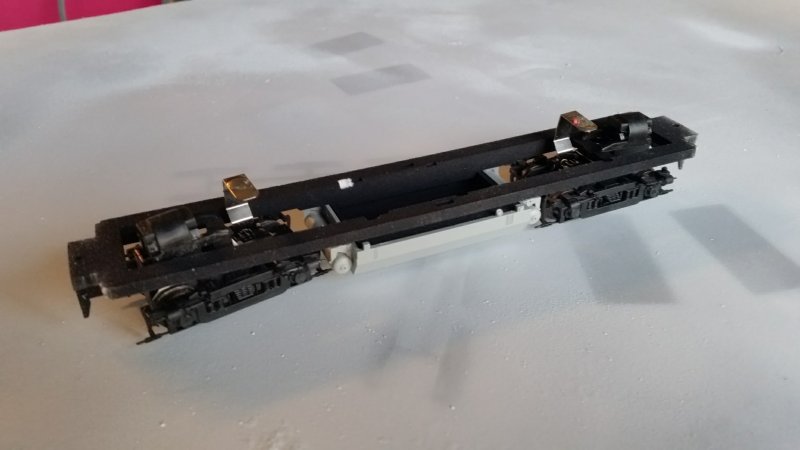


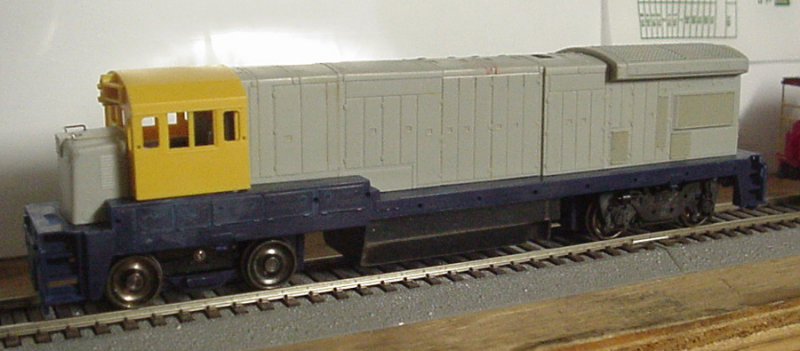
This first attempt had a few errors: the bolsters were mounted too low, causing it to ride high, it didn't have recesses for all the shells interlocking tabs, and the cutouts for the steps weren't large enough. Another test print resulted in this frame:


By this time it occurred to me there's no reason I couldn't design a frame to accommodate a motor and drive components. I could spec the frame to use my motor of choice, the Kato HM-5 with hex flywheels. Kato's flywheels are a perfect fit for Athearn's dog bone drive shafts, and since Athearn has such a large variety of models using this drive system many different lengths of dog bones are available as spare parts. In fact, Athearn seems to market their current drive line components as an upgrade to older models, so everything from trucks to gears to motors with hex flywheels are available almost all the time. This realization led to the development of the B39-8, B32-8 and B36-7 Phase 3 frames. And two locomotives I had only hoped to build as dummies -- the Santa Fe B39-8 and the Southern Pacific B36-7 -- actually ended up getting Kato/Athearn drives.
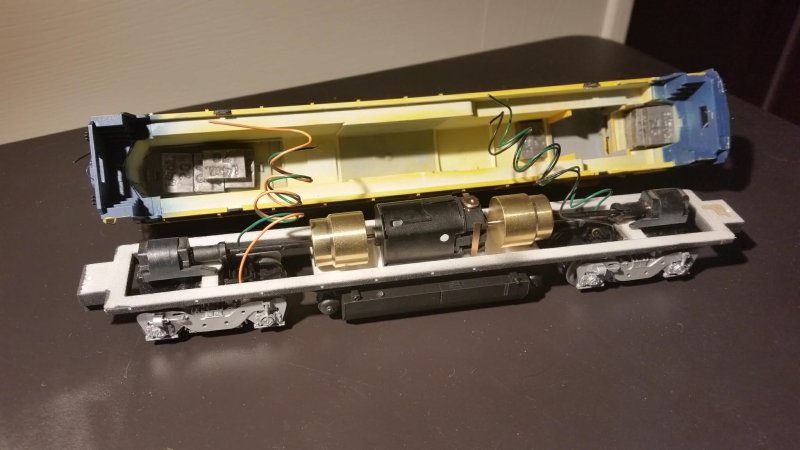


As I picked through the boxes at the bottom of the stack, the boxes that contained the oldest of the models in my collection, I looked for drive parts I could harvest from models that would probably never see the light of day again for whatever reason. I came across two dummies I'd had high hopes for years ago. One was a Burlington Northern F45 and the other an early Athearn SD40-2 I'd custom painted for Chicago Northwestern with some spurious detailing choices. Both had last been touched in the 90s.

The F45 never really had a chance. Just as the details from the blue box were being applied a couple drops of super glue collected on the rear of the engineer's side carbody blemishing the model. I tried to remove the dried glue, but I didn't have much success. Back into the box it went and there it stayed for 25 years.

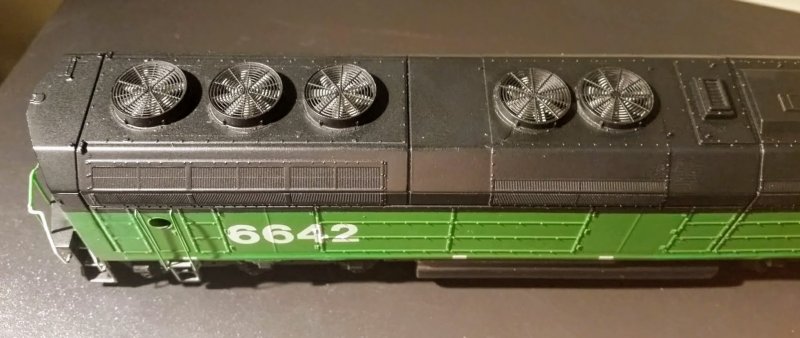
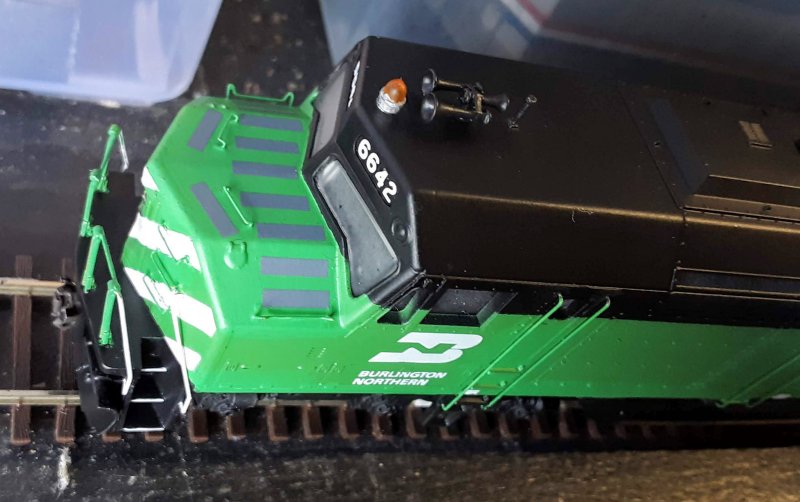
When I opened that box a few weeks ago I thought I might be able to save the blemished area. So I began working it over and the better it started to look the more I began to wonder what I could do with it. This wasn't something I wanted to spend a lot of money on, just use what I had on hand. Awhile back I bought some Athearn fans on ebay with a bunch of other parts to test with some dynamic hatch parts I was 3D printing and to see if they were comparable to the Cannon & Company fans (spoiler alert: they aren't). But for a project like this they would improve the looks of the model without getting started down the slippery slope of Cannonizing a blue box shell. I also had some spare handrails from an Athearn SD40-2 snoot nose set and they turned out to be a good fit for the anticlimber.

Installing the new fans wasn't without problems. I don't have a long tapered reamer, which I can only imagine is a great tool to remove the existing molded fans. Instead, I have a couple reaming bits for a power drill, which are tapered much less gradually than the reamers I've seen others use for this purpose. I was afraid these might destroy the shell at high speed so I decided not to try them. I also have several drill bits of various sizes that I thought might work if I gradually step up in size from small to large. That seemed to go pretty well until I got to the fourth fan. I was cutting slowly with the drill bits but I wasn't slow enough to catch the bit biting into the shell and tearing it between the dynamic and radiator fans. I backed the bit out of the hole/tear and finished the fifth fan. Later I glued the shell back together. The damage is still evident, but it's not horrible. I'll probably come back to it later when I weather the model.


The other place surgery was required was at the stylized front pilot. I cut it off and replaced it with a new end sheet made by tracing the rear end sheet onto a piece of styrene sheet. I also filled in the gap under the rear coupler making both front and rear pilots more or less the same. The body was originally held to the frame by two pair of pins on the frame that fit into corresponding holes on the carbody sides. I removed the pins from the frame, filled the holes on the shell and modified the frame to accept couplers. The couplers are installed in Atlas SD35 coupler boxes, which are secured to the frame with 2-56 screws. These coupler boxes fit in the openings in the end sheets and secure the body to the frame.


The rest of the details were pretty straightforward: Tangent drop grabs, Details West plow, signal hoses, horn and firecracker antenna, Detail Associates flasher beacon and wire for grabs and vertical railings, some Microscale trimfilm for nonskid material on the nose and Sergent Type F couplers. Finally, I ended up spending a little money and installed AMB Laserkit acrylic windows.



After this successful project, I turned to the other dummy I found in that box, the Athearn SD40-2 in Northwestern paint. At some point back in the 90s I had rounded up several detail parts and got the idea to paint a dummy SD40-2 in CNW paint to go with my UP coal train power. I still think this is a good idea, since CNW diesels and even cabooses could be found on coal trains passing through Tower 55 in the 80s. Anyway, I didn't know much about CNW power other than the paint scheme, so I put the wrong plow, bell and flasher beacon on there, and for good measure I installed an all-weather window and a winterization hatch (yeah, those aren't right either). I got the horn right, though, so there's that, but this model was either dropped or crushed under something over the past 25 years and the only evidence of this was a flattened horn.

I didn't do a great job on the paint and decals. It was probably the best paint job I had done at the time, but the decals were silvered and the masking wasn't great in the difficult to reach areas. It looked fantastic everywhere else, which is why I say it was probably the best I had done at the time. But this was not a model I'd be very proud of today, even if I could correct the detail errors. On top of all that, it was the old pin style body with solid fans and molded on grabs. You can get a much nicer version of the Athearn SD40-2 shell these days for very little money. In fact, many of them come with Athearn's plastic handrails, which aren't always terrible.

So I started looking on ebay for an Athearn SD40-2 shell decorated for CNW and handrails to match. I couldn't find anything cheap enough to make rescuing this old dummy worthwhile so I broadened my search criteria. Eventually I found a Kato shell decorated for Union Pacific and a set of Athearn handrails that might work for less than thirty bucks. Again, this would be a budget project utilizing only what I already had on hand if possible.

The Kato shell and Athearn frame aren't a fit for each other right out of the box, so I had to do some cutting and grinding. I also had to figure out a way to mount couplers to the frame since my previous CNW build had shell-mounted couplers and the frame's coupler mount had been cut away to clear the Kadee box. The cast on fuel tank details were removed, the tank profile was reshaped and Cannon fuel tank details were added.
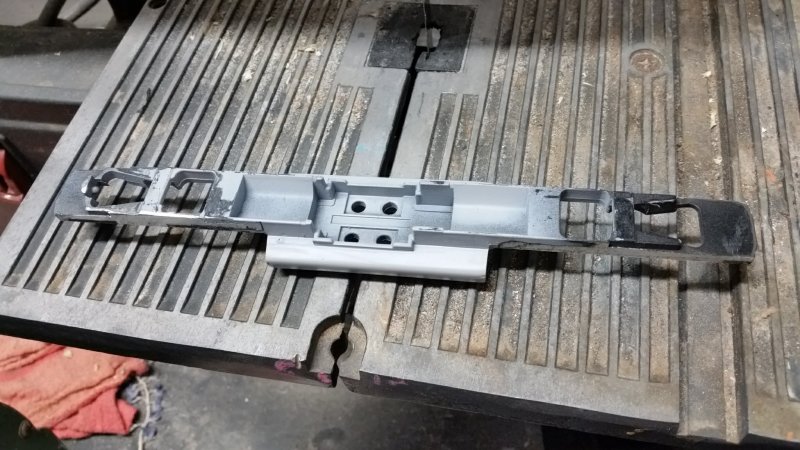
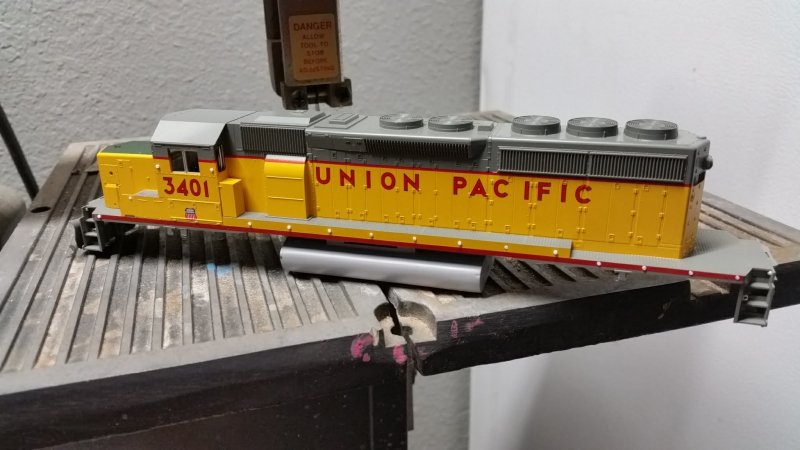


I attached a styrene plate to each end of the frame then built up a little pad for the coupler box. A block of styrene was attached to the shell then tapped for a 2-56 screw to hold the coupler box in place.


The shell didn't require much work, other than a little grinding on the inside to clear the modified Athearn frame. I had to plug all the oversized holes for the Kato handrails. No matter, since they don't line up with the Athearn handrails anyway. I added a Detail Associates flasher beacon, drop steps, a Cannon brakewheel, jack pads and air reservoirs, a Details West firecracker antenna, horn and signal hoses.
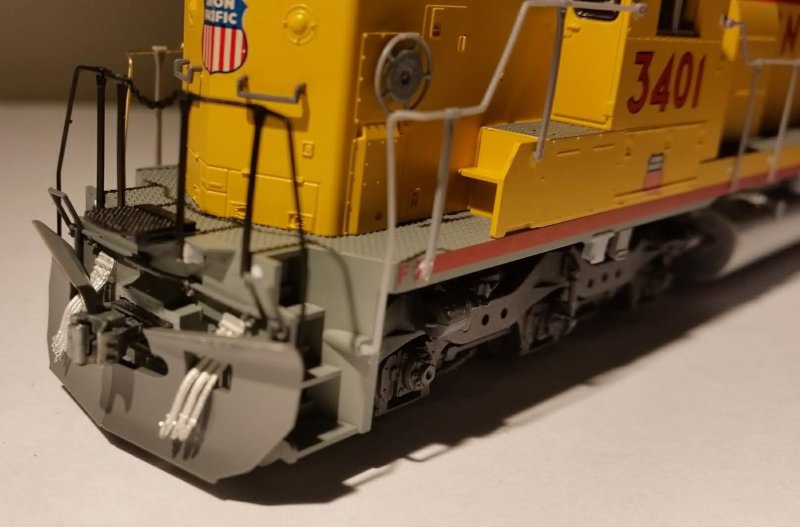
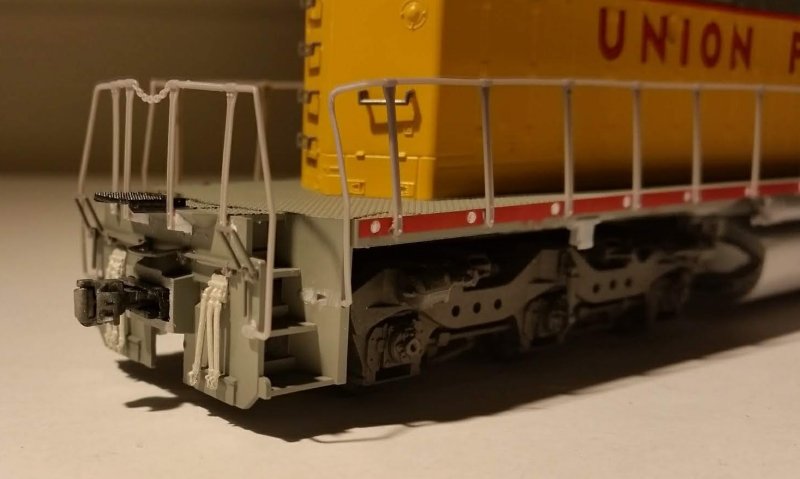

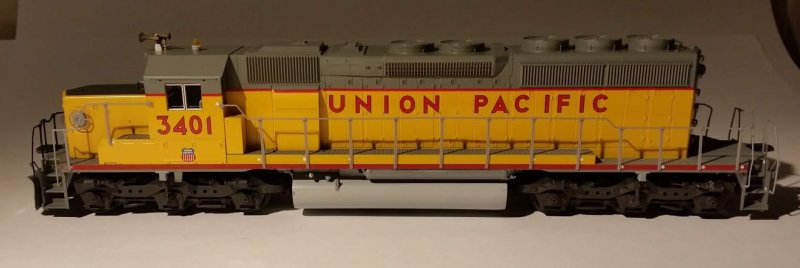


I wanted to preserve the model's paint as much as possible, so I mixed up a gray color to paint the trucks, frame, handrails and other details. A little detail and touch up painting finished the model off.


Highball!

Monday, April 9, 2018

Innovative Intermodal Service

The 1980s saw lots of change on the railroad. The Staggers Act deregulated railroads to a large extent and allowed them to compete with long-haul trucking companies. The Surface Transportation Assistance Act of 1982 allowed trucking companies to run longer tractor-trailer rigs on interstate highways. New crew consist agreements eliminated the brakeman from road trains and a Presidential Emergency Board decision recommended railroads eliminate cabooses. Economic pressures, including high unemployment, stagflation and high fuel costs, forced railroads and carbuilders to get creative in an effort to curb costs.

Keith Hapes' beautiful scratchbuilt Southern Pacific ACF five-unit stack car

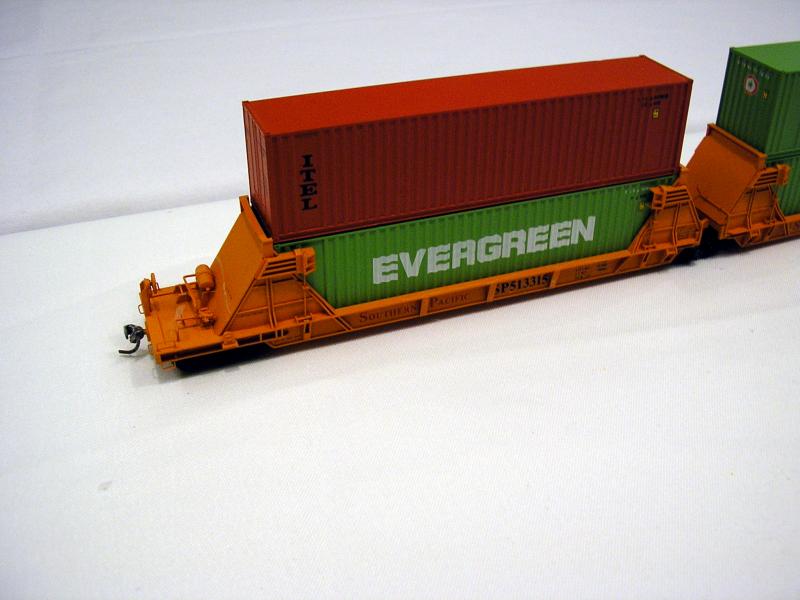
Some of the greatest opportunities for innovation were in the rapidly growing trailer-on-flatcar and container-on-flatcar services. Longer trailers allowed nationwide meant many existing railcars weren't capable of handling more than one trailer without modification. In the late 1970s, Southern Pacific and American Car & Foundry developed the first car designed to carry two stacked containers loaded in individual wells less that two feet off the top of rail. This development ushered in an entirely new kind of car that has been built by nearly every builder since.

Santa Fe Fuel Foiler from Athearn Impack kits with Trainworx and Athearn trailers

Around the same time, Santa Fe developed the six and later ten-unit articulated "Fuel Foiler" flatcars for carrying trailers. These cars were not like traditional flatcars with a deck running the full length of the car. Instead, several reinforced central spines with a hitch at one end and wheel decks for the trailer tires at the other end were connected with articulation joints over single trucks. The weight savings -- not to mention the fuel savings -- was significant. Santa Fe licensed its design to Itel, who developed it further as the Impack car. Other builders were quick to offer their version of the articulated spine car. Southern Pacific and Cotton Belt were notable users of both four and eight unit versions of the Impack car.

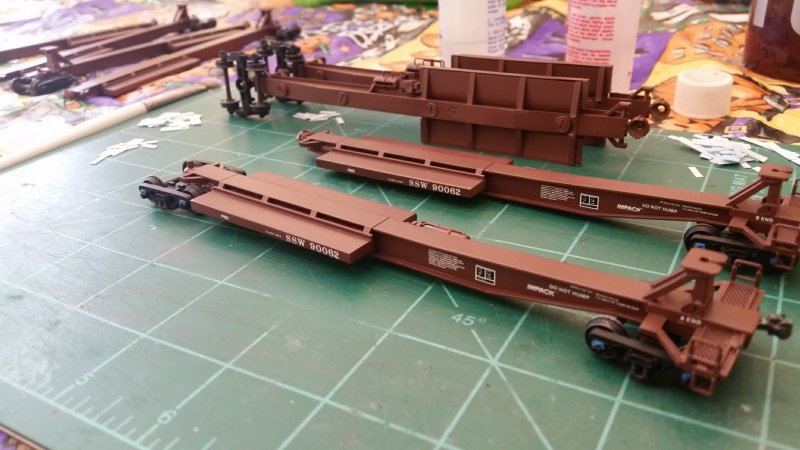
Cotton Belt Impack cars under construction. From Athearn's Impack spine car kit with 3D printed hitches

Trailer Train began a massive program to convert its fleet of 89'-4" flatcars to carry a pair of 45' trailers, with the resulting flatcars known as Twin45s. 45' trailers were being added to the nation's highway carriers faster than these flatcars could be converted, which caused the railroads to seek out their own solutions. At the same time, the decrease of boxcar traffic led to a surplus of boxcars. Southern and Chicago & Northwestern were among the railroads that established programs to convert boxcars to flatcars equipped to carry a single trailer. In addition to boxcar conversions, some of Santa Fe's bulkhead flatcar fleet was modified for TOFC service and some for COFC service.

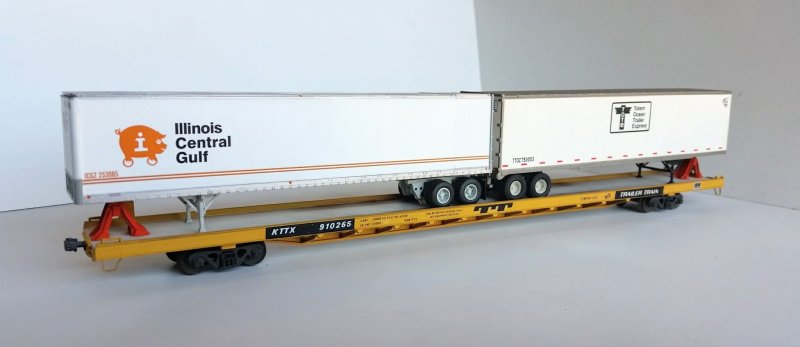
Upgraded Walthers F89F flatcar as KTTX 910265 with trailers from Athearn and Walthers

Southern 151048 and 151268 from modified Front Range kits with Hubert Mask decals

Aside from the Twin45 program, Trailer Train developed the Four Runner, a four unit drawbarred car consisting of two-axle spine cars. These were later developed as the Front Runner, single two-axle spine cars capable of carrying a single trailer. Trailer Train also began to build its own articulated spine car fleet.

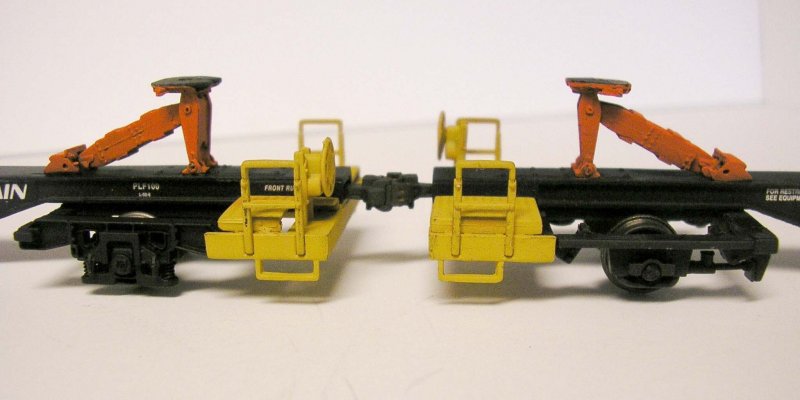
Walthers Front Runner spine cars as modified with Details West hitches and 3D printed National Uni-Truck II trucks (on left)

Just as the real railroads were gearing up for intermodal service, some of the model manufacturers joined in. One of the more ambitious manufacturers to take on modern freight cars of the 80s (not just intermodal) was Front Range. Unfortunately many of their kits had serious design issues making them unpopular with modelers who didn't have the skills to correct the problems. Since their competition was comprised mainly of simple and reliably easy to assemble "shake the box" kits from Athearn and Model Die Casting they didn't last long. I don't know the whole story, but apparently Front Range became McKean Models at some point and some of the kits lived on while other new kits were introduced. Between Front Range and McKean two different styles of boxcar to flatcar conversions were offered, as well as models of the Four Runner/Front Runner and the Pacific Car & Foundry articulated spine car.

A-line was another manufacturer to get involved in intermodal models early on. A-line produces a line of trailers, containers and well car kits along with a line of decals. The container and well car kits were later offered assembled and decorated by Intermountain. The trailer kits are now offered assembled by Athearn.

During the late 80s innovation in intermodal equipment design continued. The focus shifted from the new concepts of the late 70s and early 80s to building efficiency and dialing in designs that had been proven in practice. Subtle changes were made to the increasingly common articulated spine and well cars, from accommodations for containers on spine cars to wells that could carry a pair of 48' containers. If a pair of 45' trailers on an 89'-4" flatcar was a stretch, a pair of 48' trailers on the same car was impossible. However, three trailers could fit on a pair of permanently connected flatcars, and so Trailer Train's Long Runner was born.

Custom painted Athearn Gunderson Maxi-III articulated well car as BN 64138

Walthers and Athearn both introduced a line of intermodal models in the 90s that corresponded with the explosive growth of container traffic. Walthers produced F89F flatcars, Thrall 48' well cars, a Front Runner (a much improved take on the model compared to the poor Front Range model) and a five-unit spine car. Athearn released the Impack spine car in end and intermediate kits, enabling the modeler to build any of the four, five, eight or ten unit prototype cars. Athearn also released the Gunderson Maxi-III articulated well car as well as the single unit version, the Husky Stack. Athearn had previously released a model of an All-Purpose flatcar, but it was shortened to fit the existing frame of their 85' piggyback car. A modeler could sacrifice one of the All-Purpose flatcars to cut into sections to splice into another flatcar to achieve the correct 89'-4" length (I did a few of these myself).

In the 2000s Atlas, Walthers and Athearn Genesis introduced another round of intermodal equipment, this time much improved in detail from the models of the 80s and 90s. For those desiring models of the various 89'-4" flatcars of Trailer Train, finally some nice models were available.

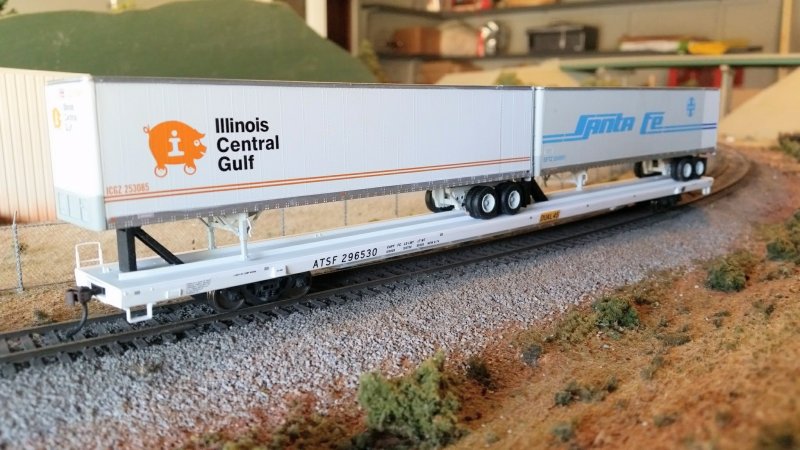
Walthers Bethlehem 89'-4" TOFC flatcar as ATSF 296530

Atlas ACF 89'-4" flatcar as SFLC 901323 (ex-Texas Mexican)

With all these models available, it's possible to build pretty accurate replicas of those innovative designs of the 80s without much effort. Just buy the models and plop 'em down on the layout. It wasn't always that easy, but for the skilled and motivated modeler, there was a source of drawings, photos and how-to articles readily available from several sources. With some basic tools and supplies, you could build some pretty impressive models just by following the directions. Having seen some of these models up close and personal -- Keith Hapes' Southern Pacific articulated stack car up above is a prime example -- they hold up, even today.

In the early 80s Model Railroader, Railroad Model Craftsman and other magazines ran several articles with prototype drawings of intermodal equipment, including Southern Pacific's first well cars, Santa Fe's Fuel Foilers and wallboard to TOFC conversions as well as supporting equipment like piggyback loaders and container chassis. These articles were an excellent resource for modeling some of the railcars, trailers and containers of the time.

In those days even mainstream magazines like Model Railroader considered scratchbuilding part of the hobby. I don't want to get on a high horse and lament that nobody scratchbuilds anything anymore, that we're just a bunch of collectors, how it was better in my day, blah blah blah. That's ridiculous and far from the truth.

I will allow that the greater variety has made it a lot easier to leave those skills behind for those who want to focus on other things, like building a layout perhaps or operating a layout more realistically. It's a double-edged sword, obviously. Let those skills dull long enough and they may vanish forever. If you're always trying to build specific models from scratch you won't have time for much else.

A few years ago I transitioned from scratchbuilding things the old-fashioned way to a new and improved way, well, to my way of thinking anyway. It started with a Missouri Pacific caboose. Several years ago I bought a resin model of a Mopac SL-1 slug hood from Sam Lloyd. Sam and I talked back and forth and he shared with me some other projects he was working on, including a Mopac extended vision caboose. Mop's version of the extended vision caboose had the cupola offset way toward one end, like an old wooden caboose. Sam came up with the elegant solution of cutting an Atlas caboose in a couple places then rotating the cut out section and reassembling the shell to get an offset cupola. He also drew up plans for the double-hung conductor's window in the rebuilt caboose side.

I built one of these following Sam's methods as close as I could. And I couldn't be happier with the results. But without modifying the cupola windows you really could only do the as-built version. And on top of that, you could only do the earlier cabooses, not the later ones with X-panel roofs. So, figuring I might want to have one of the later cabooses with the sharp-corner cupola windows, I made drawings of the Atlas caboose body modified to match the four versions Mopac had: early as-built, early rebuilt, late as-built, and late rebuilt. Faced with the prospect of scratchbuilding one X-panel roof, I decided to explore 3D printing. If I can do a Mopac caboose, why not a Cotton Belt caboose, or a Frisco caboose and so on. As they say, the rest is history.

So now we've come to an interesting question: is modeling in a virtual environment, i.e. on a computer, actually scratchbuilding? Like building a physical model, I start with simple shapes - in this case outlines of parts with depth and width - then I add the third dimension of height to them. This is similar to using thin layers of styrene to build up a block. One key difference is that I can make the process of giving height to the outline - that is, the act of extruding the shape - a straight or curved or complex shaped path to follow. I can create some interesting shapes this way. I can also take two overlapping objects and fuse them together into one new object without having to carve and cut and fit the parts together. So there are certainly some serious shortcuts to virtual modeling compared to physical modeling. But the process of working out how primitive shapes and objects will go together is the same.

So is it scratchbuilding? I don't know. It feels very similar to me. I experience the same emotions as I work my way through the problem of building the model whether it's a physical model or a virtual model. I get the same satisfaction out of building a model from styrene as from polylines.

Now here's the game changer: with 3D printing I only have to scratchbuild a model once to have multiple copies of it. Just like the X-panel roof or the National Uni-Truck II, it's cool to build one of these things, but to really get anywhere you need to build more than one.

Besides going through my own personal list of things I want to build and doing the research and making the 2D drawings and then the 3D drawings, I have decided to go back to those articles and take another look at scratchbuilding them virtually.

One area I found lacking in models is appropriate hitches for certain car types. Details West makes some excellent pewter hitches but not every variation of the prototypes are covered. Those old articles really broke down the details like hitches into simple parts you could make using only styrene strip and wire. Using the drawings from Model Railroader's Fuel Foiler article, I've created replacement hitches for Athearn's Impack car to match the Santa Fe prototype. Emboldened by success and ease of this simple solution, I worked up my own drawings of fixed hitches for Santa Fe's Dual 45 flatcars and Southern Pacific/Cotton Belt Impack spine cars, then 3D printed those as well.

3D printed intermediate hitch for Athearn Impack spine car as Santa Fe Fuel Foiler

3D printed hitch set for Cotton Belt Impack spine car

Another problem I decided to address is the fit of older Walthers, Athearn and A-line containers in each others' well cars. Basically, the problem is the pins representing IBCs on these containers aren't the same size, shape and location from brand to brand. I decided to standardize on the Athearn pin size and placement. In order to do this I needed a tool to locate the drill holes for the pins consistently from container to container. I could have cut some sheet styrene to make it and been pretty close. But another issue I'm always trying to resolve is thickness vs. strength as it pertains to Frosted Ultra Detail plastic, so I decided to print the tool. And it actually holds up pretty well. I've drilled new pin holes on a dozen or more containers and so far no wear in the holes that I can tell.

3D printed container pin drill tool

I've mainly focused on parts, but I have gone so far as to design entire cars, like the Santa Fe wallboard flats that were converted to TOFC and COFC service in the early 80s. I'm toying with the idea of drawing up some of the early experimental, short-lived or lesser-known designs that helped shape intermodal service as we know it today. I'm hopeful that I'll be able to get enough photos together to build the original Trailer Train UTTX spine cars, for example. Not there yet, though.

Saturday, March 10, 2018

Bottineau Grain Train

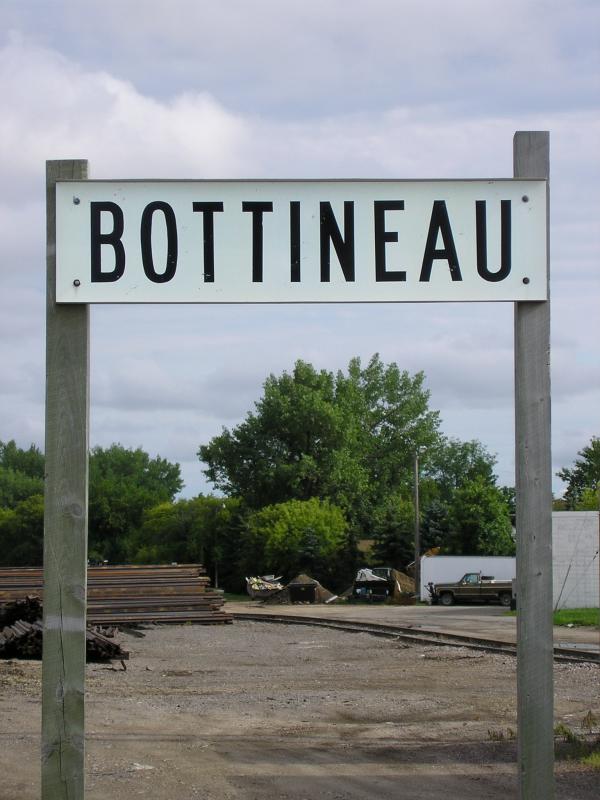
Station sign Bottineau

In the summer of 1991 I took a trip to North Dakota with my brother, sister, mom and stepfather to visit my grandparents at their home in the quiet town of Bottineau. We caught the county fair, played at the lake, visited the family farm and played lots of card and dice games. Even thinking back to the pre-internet world that probably sounds boring, but my grandparents were a fun couple who loved to laugh and dote on their grandkids.

After our vacation concluded and we were about to leave, I chose to stick around and hang out with my grandparents for another week. I had graduated high school and didn't have anything pressing to do that next week, so why not? I'm really glad I was able to spend that time with my grandparents and get to know them as a young adult about to start college.

Anyway, there wasn't a whole lot going on during the lazy days so I chose to grab my sketch book and draw. I was going to be starting on a degree in fine arts in a few weeks so I was determined to draw what I could around town.

Like many small towns in North Dakota, Bottineau is home to a grain elevator complex situated alongside a railroad branchline. It wasn't long before I was drawn to the facility and began to study it. I took in the cylindrical and prismatic structures, the piping and wires connecting the various buildings, the contrast of the older sheet metal clad wooden elevator and the modern slipformed concrete silos and head house. Some things I can still remember clearly: the coolness of the shadows against the radiant concrete in the high sun and the ripples and waves in the slipformed walls when the evening sun set the buildings afire with red light.

And then one morning a train arrived.


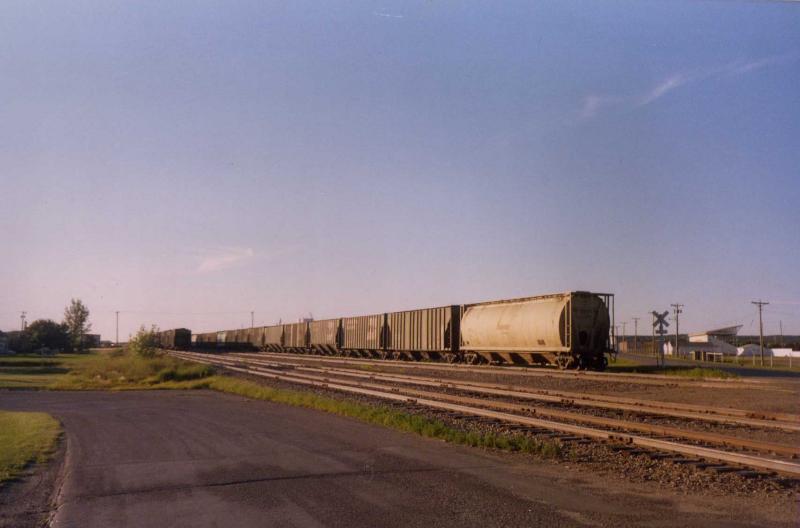
Two geep thirty-eight types pulled fifty-two empties into town followed by a caboose. The train rolled into town quickly, then paused and started off again. The crew cut the crossings and tied the train down in four cuts, then stashed the power behind the depot. Before I knew what was going on the crew hopped in a taxi for a ride back to Minot.

In Texas I was used to the trains near my house flying by on the main, or coal trains struggling up the hill, or when things would get congested holding off crossings waiting for a light to get into town. The trains I'd see in Saginaw seemed static as we'd fly over the yards on the freeway. Even the jobs working the elevators and mills seemed to always be at lunch. I certainly hadn't seen anything like this.

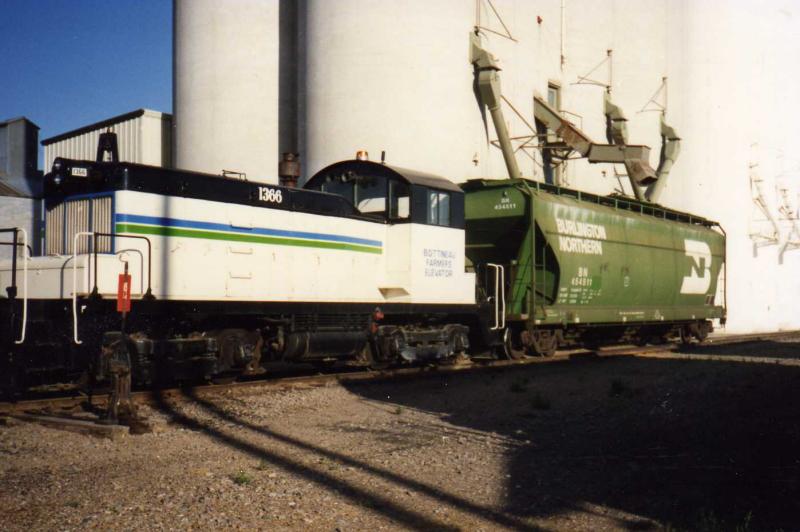
ILSX 1366 and BN 454511

There wasn't much down time before the elevator crew fired up the old SW1 and started spotting cars in cuts of three at the barley house and at the durum house. As each car was loaded the switcher shoved them down the storage track, filling it up and eventually having to cut the crossings. Throughout the day and into the next the process repeated until the loaded train was set up in four cuts ready to be put back together and air tested.

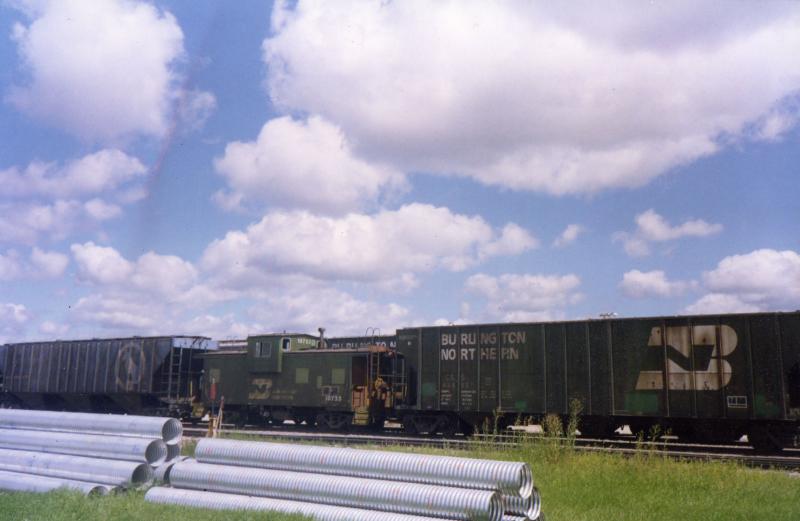
I missed the train getting put back together, but I did see the caboose roll away behind the train and disappear into the twilight as the crew dragged it through the fields of grain down to Rugby to rejoin the main line.

It occurred to me that this process repeated itself over and over again. There was no time to rest, not for the rail crews that brought the empties in or took the loads out, not for the drivers bringing tractors, pickups, wagons and semi-trailers full of grain to the elevators, and certainly not for the switch crew at the elevator, who now had given up their switch engine duties to join in the effort to refill those silos.

Trucks lined the streets waiting for their turn through the head house. Fans and motors and machines made a constant droning sound around the complex. Clouds of grain dust floated in the air tinging everything with gold. The town was filled with that warm scent of cut summer grass.

21 years after the merger and still seeing Big Sky Blue

I had sketched and I had photographed and I had taken notes. I had a record of the locomotives, the railcars and the caboose that came to town and left. As many times as this process must have happened in towns across the midwest every day it seemed really insignificant. But those are the things nobody ever seems to take down, and soon they fade away as if they never happened. Two small town elevators combine into one complex. One town thrives and one fades away. Whatever would happen I wanted a record of that week.

Besides pre-merger hoppers, BN was grabbing every retired co-op car they could

It wasn't long before I began to make models based on those photos and notes and sketches. I soon became aware that exact models simply weren't available for most of the cars. And by exact, I mean as far as I knew there were rib side three bay hoppers and there were cylindrical shaped three bay hoppers. I could tell there were differences between many of them - some "missing" ribs in key places, some with high or low sides, some with a barrel shaped body and others almost completely cylindrical like a tank - but I didn't know how the differences broke down into capacity or manufacturer. But over time two things happened: I learned who made which car and manufacturers like Accurail, Intermountain and Model Die Casting brought out models to supplement the Athearn Pullman Standard and ACF hoppers that made up my first attempts at this train.

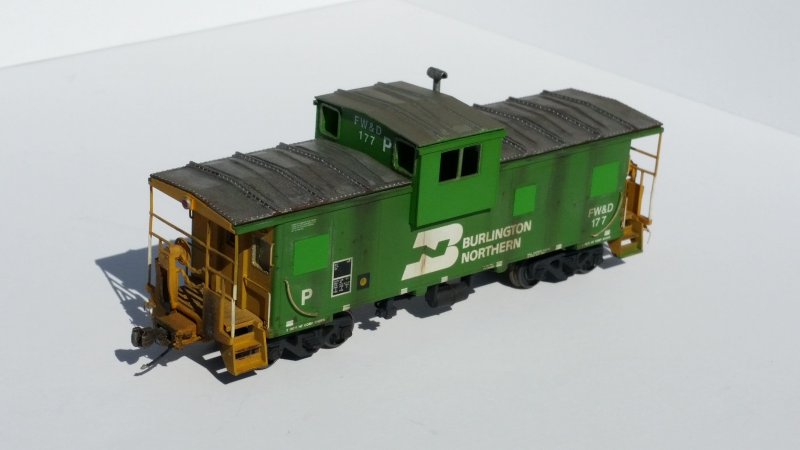
I took a crack at the caboose using a factory painted Athearn model. I eventually realized the Athearn model is too short, that it's a flawed model of a Rock Island caboose and not much of a match for the BN caboose I saw. Eventually I bought an Atlas caboose. Much better!

Atlas caboose modified with one of my 3D printed cupolas

Same thing with the locomotives. I bought two Athearn GP38-2s, one in BN green and one in Conrail blue. I fired up my airbrush and coated everything with a cloud of mud colored dust. It was brutal. Those locomotives eventually got stripped and repainted, then again stripped and cut up to become a pair of Mopac GP38-2s I still need to finish... I found a shell at a train show that looked pretty much how I remembered the ex-Conrail geep, so I bought it and found a drive for it. I picked up an Atlas GP38 decorated for BN later on.


Time for some updated photos!

Over the years I've replaced nearly every car I originally bought to make a model of this train. Some of them have been repurposed into models for this train and some for other subjects. More manufacturers have produced even more models, so I'm able to dial in the models closer and closer to the real thing. I even became a manufacturer myself of sorts when I worked up parts to model the caboose more accurately. I've covered some of the cars modeled in my blog previously, here, here and here.

To this day, nearly twenty-seven years later, this train remains a work in progress. I'll probably never finish modeling it. But by pursuing it, I keep it alive. I keep that summer alive. Making big bets at the card table in my grandma's house doesn't seem that far away.

My brother and I, both of us are engineers now

Now that I've been an engineer for some time, I can relate so much to that crew that tore into town, cut that train up and flew back to Minot in the cab. How many times have I done the same thing itching to get out of the seat and make it home for some time with the wife and girls before they go to sleep? Yes, you still have to dot all the I's and cross all the T's and do it safely, but an experienced and motivated railroader can do it quickly.

The older I get the less I rush like that. There's too much you can miss if you do. You end up doing it twice or more unless you take your time and move with purpose. You only learn that the closer you get to finishing something, when you can finally see your mistakes, missteps and oversights.

Who knows? Maybe one day I'll eventually get it right.

Friday, March 2, 2018

GE Kitbashes

I have a soft spot for GE locomotives if it isn't already clear. This comes from operating them for a living. The Dash 9s and GEVOs I run every day are powerful, responsive and reliable. It wasn't always that way, though. I don't think anyone disputes the bad reputation GE's Universal series and to a lesser extent the Dash 7 series earned. But once GE started listening to customers report problems, especially as they became involved in solving these problems, things started to turn around.

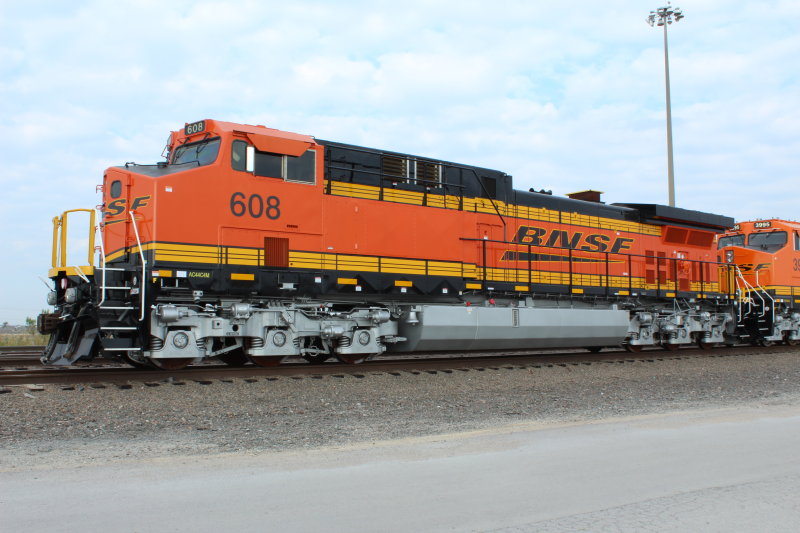
Real life kitbash: AC4400C4M AC four motor conversion from C44-9W ATSF 608

A big change in railroading was effective dynamic braking. As long as there was an occupied caboose at the rear of the train, train handling meant keeping the slack stretched to avoid throwing your conductor and brakeman out of their seats. To accomplish this the engineer would make a minimum reduction and drag the train over hogbacks and shallow valleys. As dynamic braking technology improved the timing couldn't have been better. New crew consist labor agreements and legislation made cabooses go away for most Class I trains. This freed up the engineer to control the slack without dragging brakes, something the railroads were very interested in because of the massive fuel savings potential, greater average speed, and a lower risk of sticking brakes, flat spots, hotboxes and other problems with the train.

Dynamic brakes had previously been more of a mountain grade feature to augment air braking on long downhill runs than a tool you'd use to control speed on flatter terrain. By themselves they weren't enough to keep heavy trains under control. But through the 70s and 80s the technology was developed to increase their effectiveness and to lower the minimum speed they were effective. With these new capabilities engineers were able to transition between throttle and dynamic braking frequently.

Back when dynamic brakes were used primarily on long descending grades, there weren't many scenarios where the diesel engine would be running hot and demanding cooling from the radiators at the same time the dynamic brakes were dissipating braking force in the form of releasing heat energy through the resistor grids. Therefore it made sense to locate the resistor grids near the radiator where you already had a large fan and intake grilles. But once the ability to transition frequently between throttle and dynamic braking was available, the diesel engine didn't have time to cool while the resistor grids kept the radiator hot. This led to relocating the dynamic brake resistor grids and cooling fans ahead of the diesel engine, first seen on Burlington Northern's second order of B30-7A cabless booster units and C36-7s delivered to Missouri Pacific and Norfolk & Western.

As the use of dynamic brakes moved outside the realm of mountain grades, they became more powerful and more cost-effective to use. Along with the adoption of computer control systems of the diesel engine and electrical systems, design elements of the locomotive had to change to hold up under the new normal extreme operating conditions. These improvements in part led to the Dash 8 series, the wildly successful Dash 9 series and finally to today's Evolution series.

GE wasn't alone in innovation. EMD also computerized their engine and electrical systems around the same time. Like GE, EMD took a new approach with the dynamic brakes on their 50 series locomotives and again with the 80 and 90 series, relocating and improving them each time.

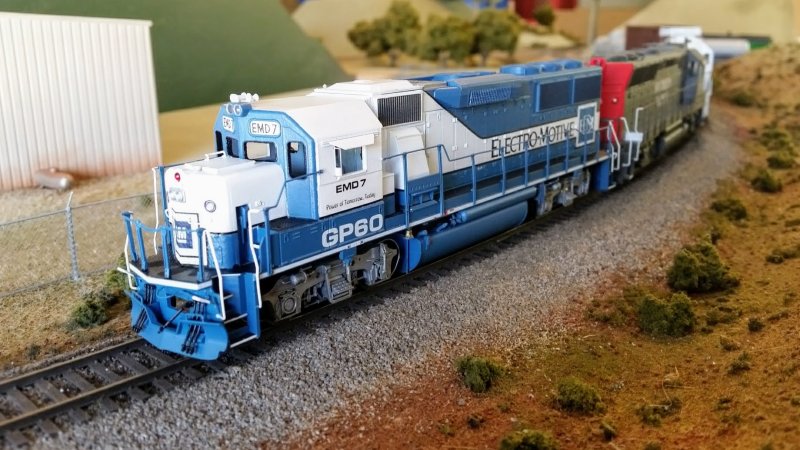
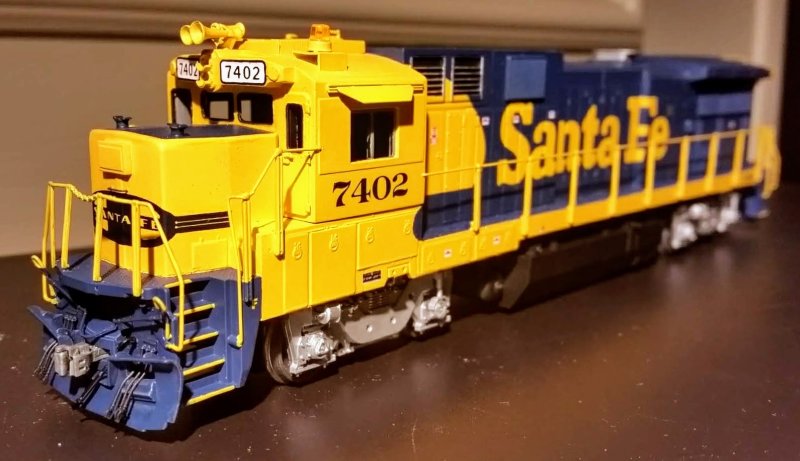
When GE unveiled a new locomotive series it looked like each new design was nothing more than the old Universal series locomotive under layers of bolted on parts. Let's face it: aesthetics were never part of GE's design philosophy when it came to locomotives. Form follows function period. Compare this to General Motors' Electro-Motive Division, where styling was part of the identity of the company from the Corvette to the Cadillac. Look at the homely hodgepodge of a locomotive, the GE B39-8 demonstrator. Compare this to the sleek and aerodynamic EMD GP60 demonstrator, its direct competitor. If looks matter, it's not even a fair fight. But when it came to achieving fuel efficiency, higher horsepower and putting that horsepower to the rail, GE won.

EMD 7 GP60 Demonstrator

ATSF 7402 GE B39-8 Demonstrator

As a modeler it always looked to me like GE simply kitbashed their latest design using parts from previous models. The basic Universal series locomotive had a distinctive cab with a rounded roof, a snub nose and a plain long hood with a rounded roof contour echoing the lines of the cab. This plain hood was punctuated with the occasional grille and a large radiator at the rear. The improved Dash 7 series was just like the Universal series, but with the largest of the large U33 radiators extending out over the walkway. As production carried on Dash 7s had the dynamic brake housing separated from the radiator and moved to a "bump" in the auxiliary cab roof. This bump carried through to the early Dash 8 series and was incorporated into a boxy hood between the operator cab and the engine compartment. U33 radiators were changed out for larger angled Dash 8 radiators.

The Dash 9 series saw the end of the four axle diesel, the standard cab, and the simple angled fuel tank with reservoirs at each end. But with that end came the adoption of large outside coil spring trucks and optional AC traction technology. In the midst of all that was the old Universal series hood covering the engine compartment. Everything else had changed, but that hood was still there (though angled instead of rounded). That feature finally went away with the Evolution Series, along with the Dash 8 radiator, but still around were the comfort cab, the Dash 8 auxiliary cab, the big trucks and the Dash 9 fuel tank.

The apparent modular nature of GE locomotives makes them ideal modeling subjects, especially with so many nicely detailed and great running models from Atlas. The U23B drive and body shell can be combined with the U33C drive and shell to build a U33B, U36B or a U23C. Before Atlas released the B23-7 and B30-7 models, I cut down a C30-7 shell into a B23-7. I had enough trouble with the Bachmann drive -- in particular the trucks -- that I stopped work on the model. The release of the Atlas B23-7 model finally stuck a fork in this project. But the concept was proven, that with enough slicing and dicing the raw materials were there in the Atlas shell parts to build a variety of models.

GE B23-7 from Atlas C30-7 long hood and nose, Atlas U23B cab and Bachmann B23-7 frame and sill

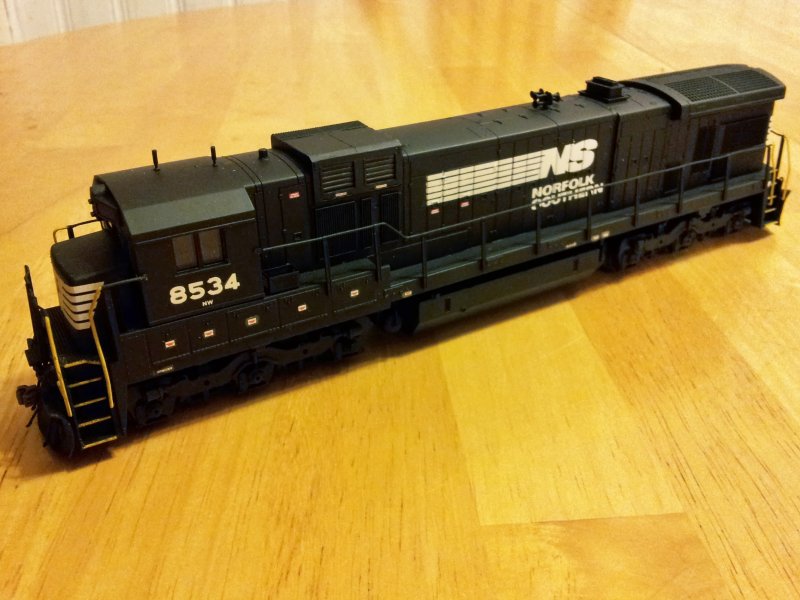
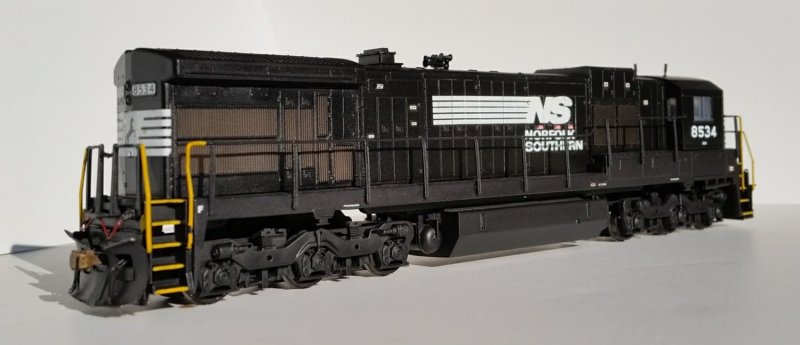
Of course 3D printing has opened up an entirely new set of possibilities using modular components to either cut into the Atlas shell or even replace entire parts. I mentioned building a model of a late C36-7 in my Norfolk & Western clasp truck blog. At the time I didn't address the stacked horizontal radiator intake grilles because there was no good source of the grilles. I couldn't figure out how to scratchbuild them or where I might get something reasonably close to cut in. Besides, the model is painted black. Who can even tell? I finished the model in January 2014 and moved on.

GE C36-7 as NW 8534 from Atlas C30-7, Smokey Valley and Hi-Tech Details parts

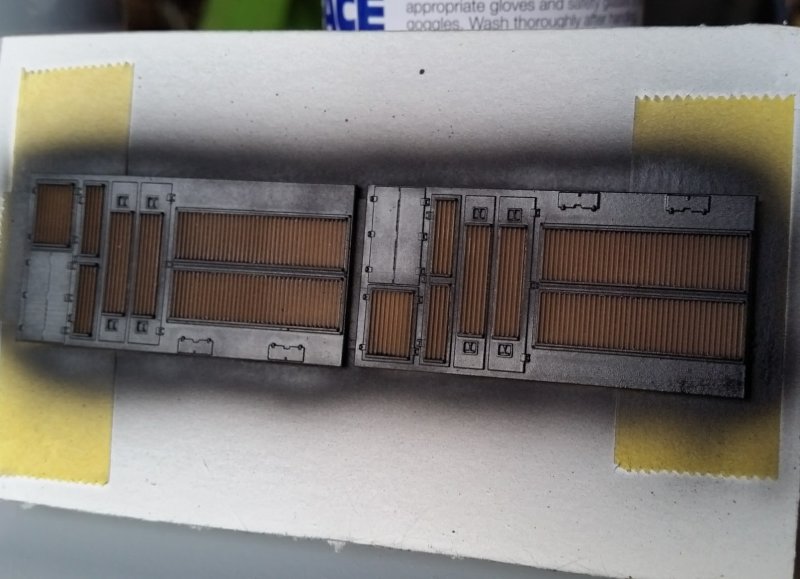
A couple years later it occurred to me I could use the translucent nature of 3D printed acrylic parts to model the see-through nature of the corrugated screen grilles on GE locomotives. I drew up some replacement panels for the area under the radiators on the Atlas model and printed them. I painted them lightly with a dirty brown color, just enough to tint the grilles, then I masked the grilles front and back and painted the rest of the parts the black body color. Installed on the model they look great. If you hold the model up to a light you can see the light come through the grilles. Of course the large metal weight mounted to the frame blocks most of the light, but as a concept it's solid.

NW C36-7 radiator parts available from my Shapeways store


Since then I've designed other hood parts, fuel tanks, air reservoirs, cabs and frames. I'm even working on a body kit for Burlington Northern B30-7A booster units. Where will this end? Who knows? But I'm pretty far from the end right now. There are a lot of models and variations to cover -- and kitbash -- yet.