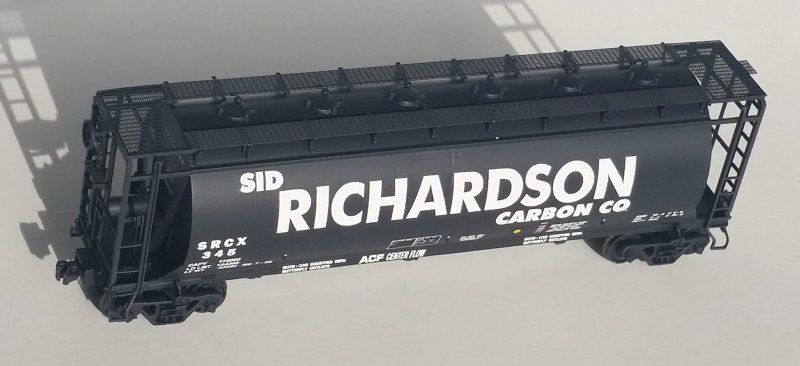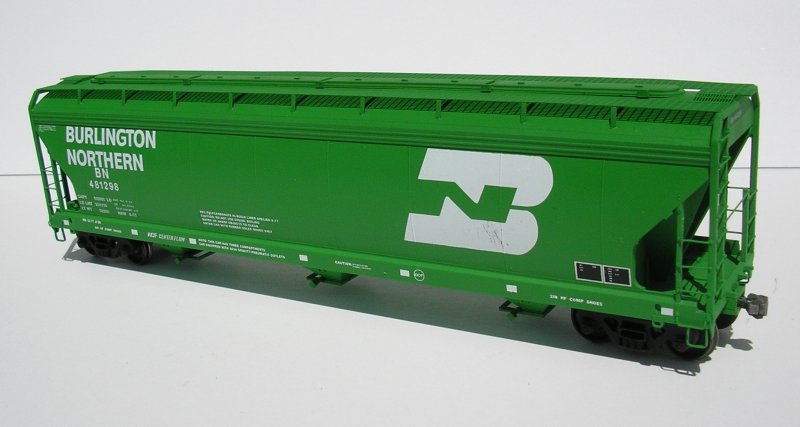
Showing posts with label ACF. Show all posts

Wednesday, August 28, 2019

Upgrading Accurail's ACF 4600cf Covered Hopper


For many years the only option to model an ACF 4600cf covered hopper has been Accurail's model. This model came along between the "shake-the-box" era of well-designed but marginally detailed models from the likes of Athearn and MDC Roundhouse and the early superdetailed era of much more detailed but complex and difficult to assemble kits from Intermountain and Proto2000.

The Accurail kits are neither superdetailed nor too basic. Even the molded on details are crisply rendered and can look good with weathering. But sometimes molded on detail just isn't good enough. I'll admit to using several Accurail cars as-is where I'm modeling unit grain trains, but for those cars that will be spotted and pulled from elevators and feed mills I'd rather have something a little more detailed.

Athearn Genesis released a very nice model of the ACF 4600 in several versions, so it's easy to get cars of this type that are already detailed and painted nicely. Arrowhead Models has also announced the ACF 4600 in what promises to be the ultimate fine detail version. The Athearn models can be found between $40 to $50 and the Arrowhead model will likely be priced above the Athearn model.

Accurail's ACF 4600 kit is comparatively cheap at $19.98 and it can be found even cheaper on the secondary market, such as at train shows and on ebay. I already had several of these on hand from many years before the Athearn release or Arrowhead announcement back when they were the only game in town, so in my case the cost was irrelevant. But if you're going to upgrade the Accurail model to fit in with similar models from Athearn Genesis, ExactRail or Scale Trains, keep track of the cost and decide if it's worth it to you. By the time you've upgraded the wheels, stirrups, grabs, running boards, paint and decals, you'll end up pretty close to the cost of the already upgraded Athearn model. So it's helpful if you already have the models on hand or can get them less than retail.


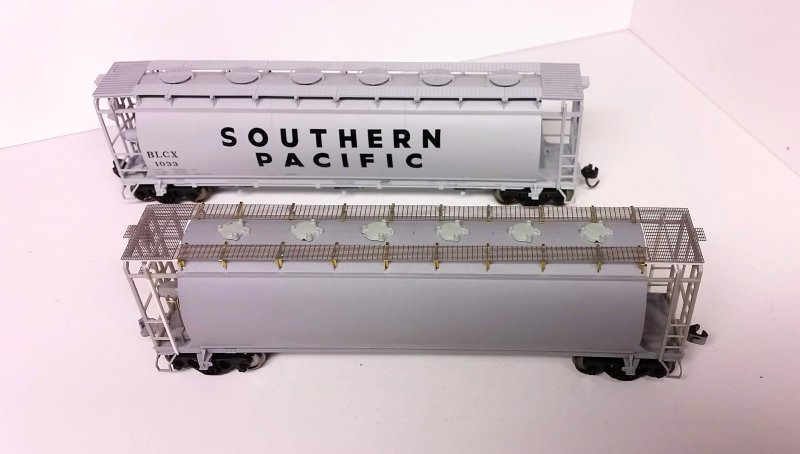
The worst part of the Accurail model is the molded on running board. It's not horrible, but it's solid plastic so no light shines through onto the roof. Fortunately, Plano Model Products has designed some products specifically for this model. And you can use Plano's part no. 119 with any of those running boards if you want to model an earlier car. I did exactly that for one of my pre-BN merger cars below. Even if you only replace the molded running boards with the etched Plano parts, you've made a huge difference to the model.

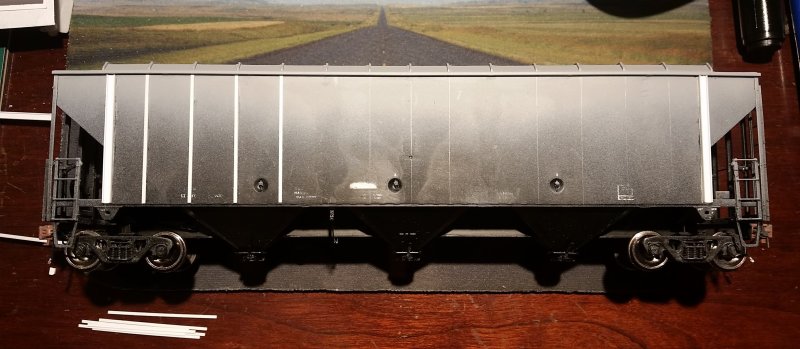
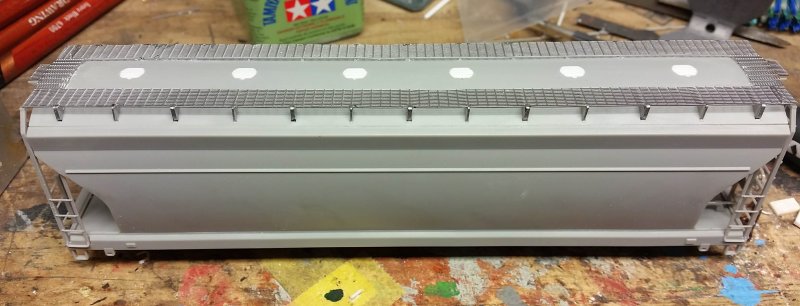
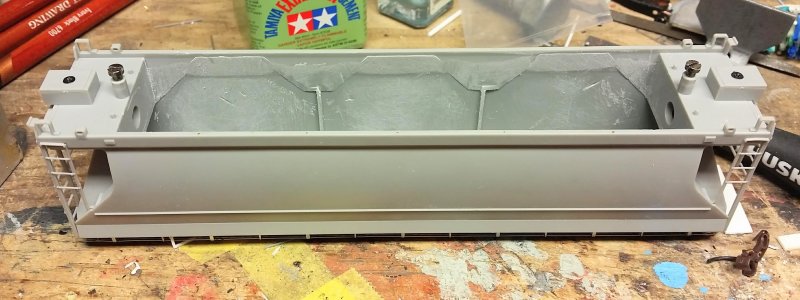
So the first step to replacing the running boards on the Accurail model is removing the molded parts. It's pretty easy to trim off the vast majority of the running boards using rail nippers. But you're still going to be left with the portion of the running boards that's in line with the trough hatch at each end. There's no easy way to remove that part except by sanding or filing or a combination of the two. I don't recommend carving this part off because you can easily gouge the roof. Instead, remove the trough hatch and set it aside, then start sanding taking care not to damage the end cage. You'll want to check periodically as you sand that you're following along with the profile of the roof as seen at the end taking care to match the contour under the trough hatch. Best practice here is to sand a little then check the model. Adjust where you're sanding and repeat. If you go too long you might find yourself having to build up the roof.


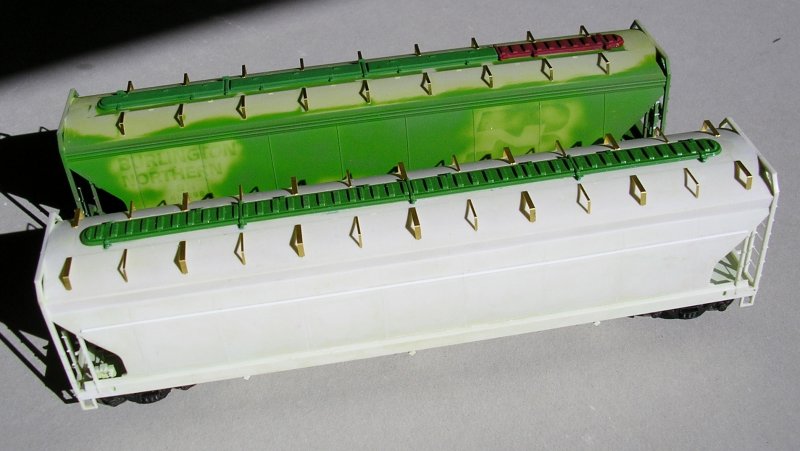

After the heavy work is done, clean up the rest of the roof where the supports were trimmed. Use the drill template from the Plano kit and install the supports. I like to attach the running board to the supports from the inside working outward toward the ends. I have always used Loctite liquid super glue, but lately I've started using DAP RAPIDFUSE. Either one works fine.


Another area you can address using the Plano kit is the crossover platforms. I like to carve the molded parts up into supports for the etched crossover platforms that are included in the Plano upgrade kit. A sharp no. 11 blade makes quick work of the solid crossover platform.

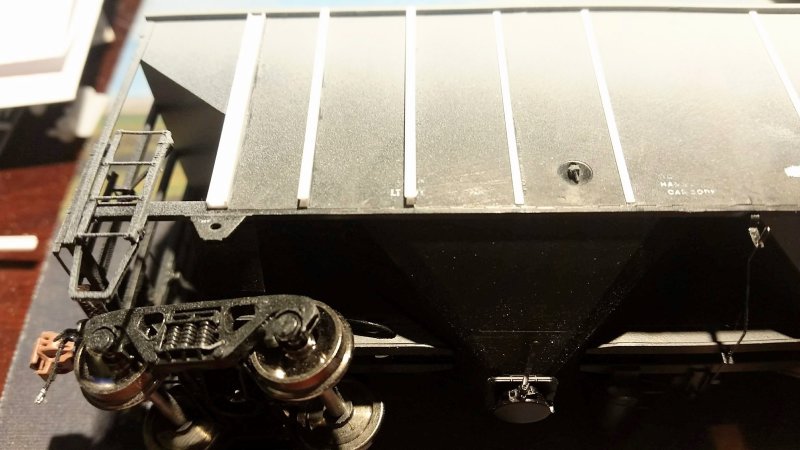
The ladder rungs on this model aren't as heavy as on some other models, but these are also easy to upgrade. First, using that sharp no. 11 blade, slice off the grabs taking care to run the blade along the inside of the ladder stile. Once all the ladder rungs are removed, cut Plastruct 0.010" styrene rod to length and attach using liquid plastic cement. Make sure the styrene rod lines up with the remaining ends of the molded ladder rungs still on the stiles.

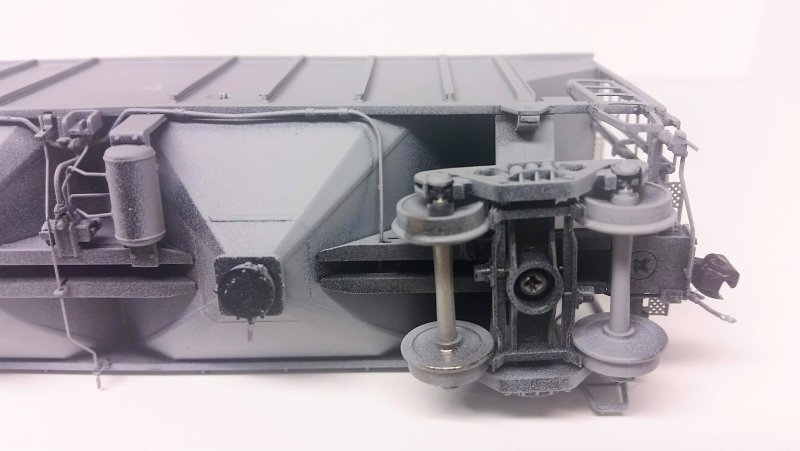
It's also a good time to replace the cast on drop grabs at the corners with wire parts (I like the drop grabs from Tangent) and the stirrups with A-line's Style A part. If you like, plumb the reservoir using some 0.012" brass wire bent to fit between the reservoir and control valve.

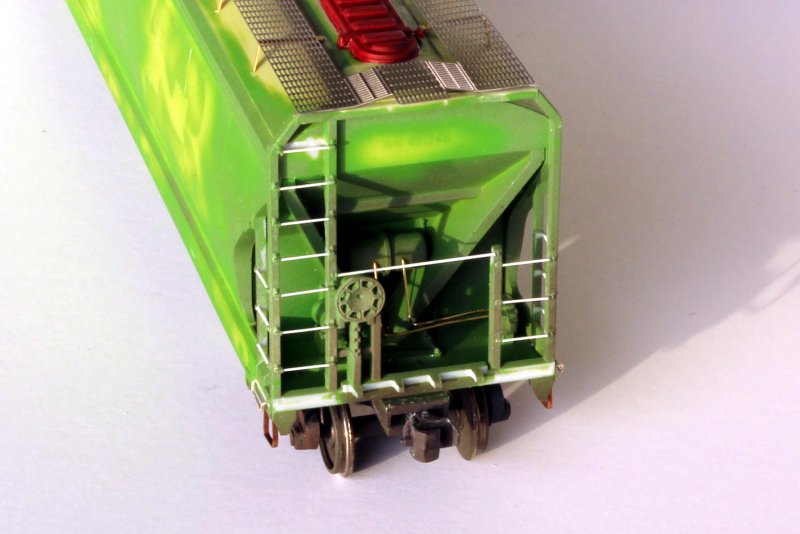


For these Burlington Northern cars the paint and decals are pretty straightforward. I damaged the BN logo on mine, but that's not really a problem since the cars I'm modeling were pretty well worn by the late 80s.
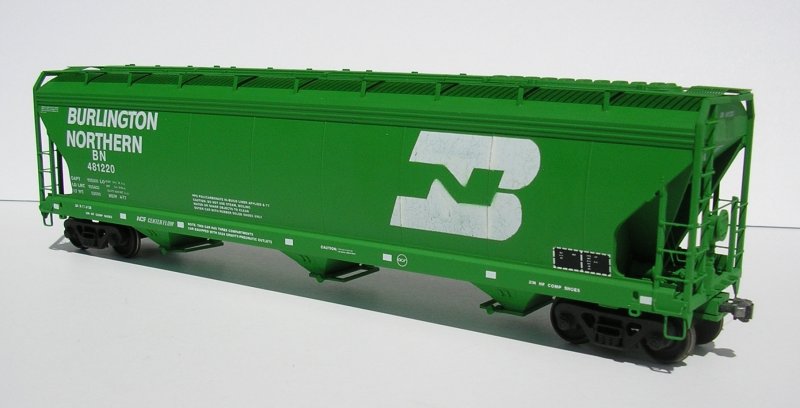


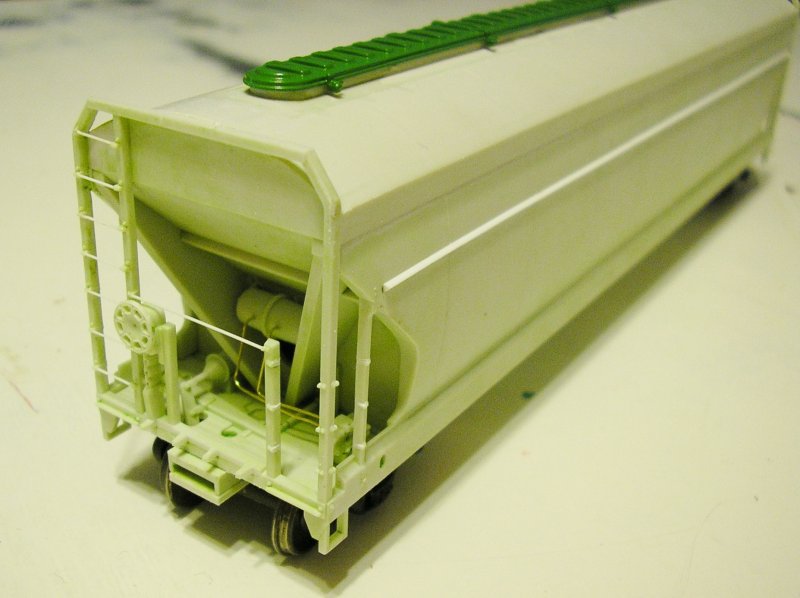

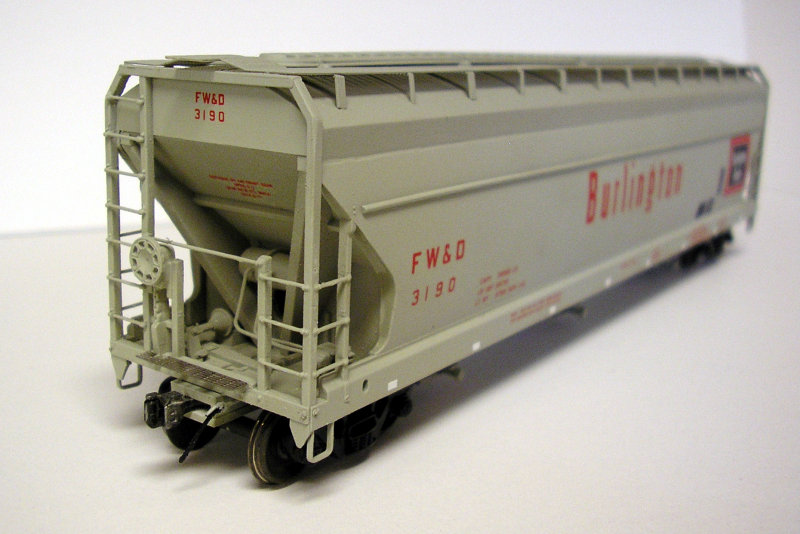
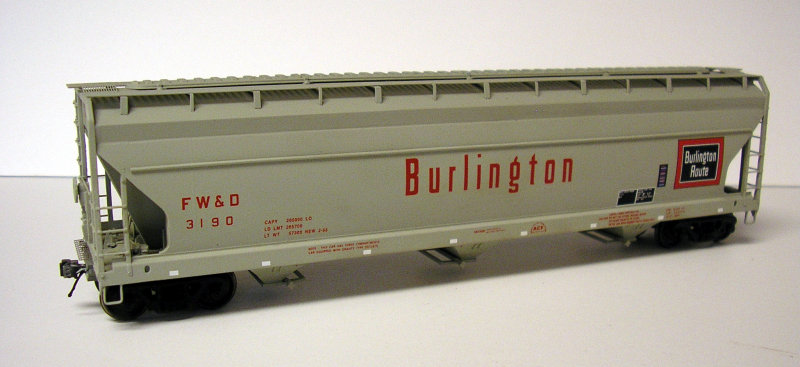
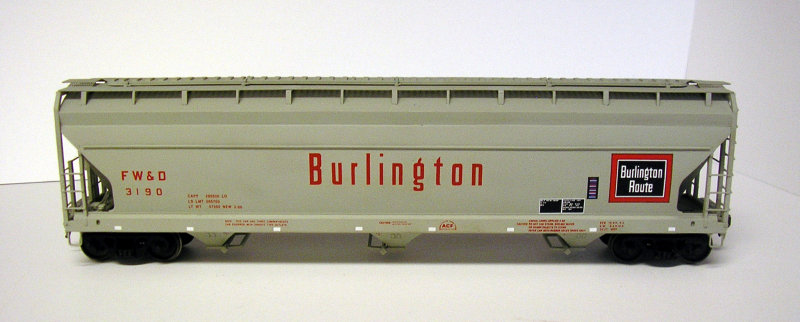
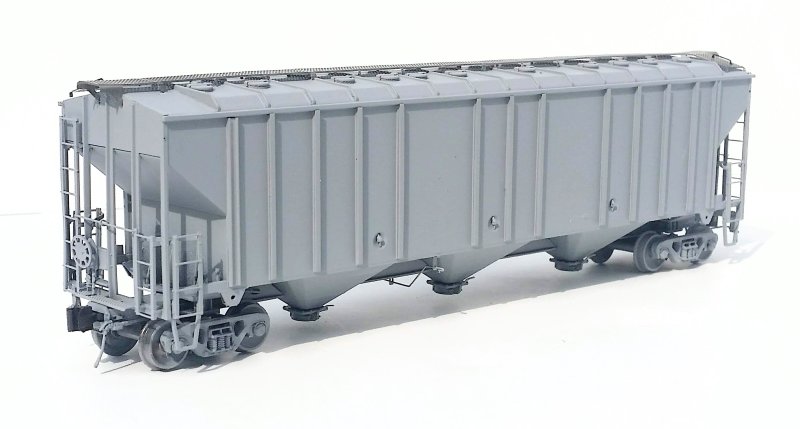
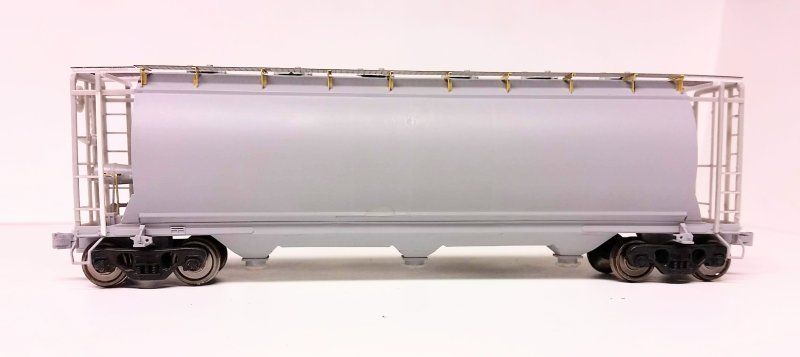
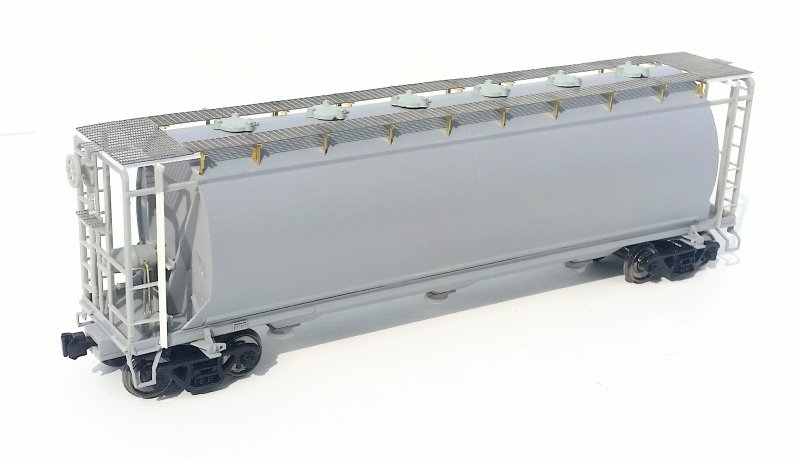
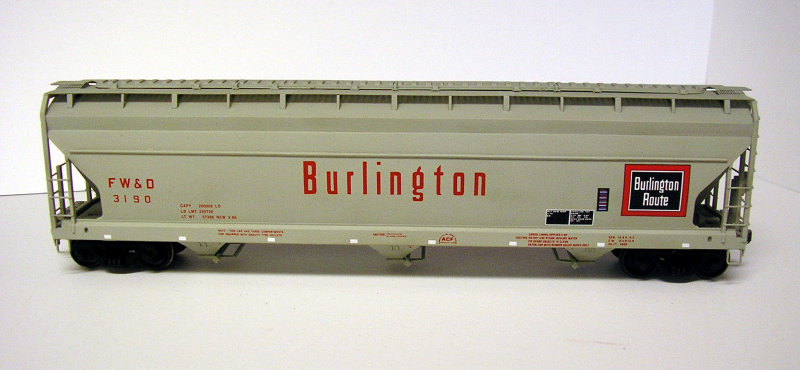
The Accurail ACF 4600 represents a late production model. Since Fort Worth & Denver is my home road, I also wanted to build one of their cars. This was made difficult because they are all of the early type with a single triangular stiffener rib on the carbody. The pressed plate that's present just under the car eaves on the Accurail model is correct for the late production model but it must be removed to represent an early model.


After those modifications were made, building this model was just like the others. I substituted the early style running board supports (Plano no. 119) for the supports included in the Plano kit. 

It's worth mentioning that I swapped the Accurail fiberglass type trough hatch with one from an Athearn (ex-MDC Roundhouse) Gunderson 4700 covered hopper. The hatch from the Gunderson hopper represents one of the early stamped metal trough hatches these cars were originally equipped with. 


The model was painted with Model Master Flat Gull Gray then lettered with Microscale decals. I haven't found a good match for the red-orange lettering and frame around the Burlington Route logo, but when I do I'll paint out the weight data and replace it per the prototype. 


I have a few more of these cars that are going to need similar upgrades. Santa Fe's ACF 4600 hoppers had Gypsum expanded metal running boards, which are thankfully available from Plano. I'd like to avoid repainting those cars, so I'll have to find a good match for the paint. But if that doesn't work out the one color dip paint job certainly isn't difficult to recreate.

Next time I'll go over some of the upgrades and modifications I made to MDC Roundhouse Gunderson 4700cf covered hoppers. MDC Roundhouse was acquired by Athearn, who later released these models as upgraded RTR versions and they are quite nice. It doesn't take much more effort than shown here to upgrade the older MDC Roundhouse kits to match Athearn's RTR model.

Friday, August 16, 2019

Carbon Black Hoppers

A few years ago I posted a blog covering Thrall 5750cf carbon black hoppers. At the time I had completed CAD drawings of all the variations on the Granuflator-equipped Thrall car from 1968 to the 1979 version that was built into the 90s. I designed the CAD files so that the car could be 3D printed as a flat kit with details added by the modeler. No doubt it would have been an expensive kit to print, not to mention expensive to procure all the detail parts, then assemble the model and apply paint and decals.

So I was relieved when Scale Trains announced they'd be producing the 5750cf carbon black car in the 1977 version and the 1979 version. I was hopeful they'd tool up body variations to offer some of the earlier cars, but that didn't happen. Since these are by far the most common carbon black hopper I was used to seeing I ordered six. I figured I probably spent as much on those six as I would have on two of my 3D printed kits.

Scale Trains also announced a Thrall 4727cf carbon black hopper at the same time. Unfortunately for me, this car represented a mid 90s prototype. But I wondered if it might be possible to backdate this model to the 1974 version. Of all the carbon black hoppers Thrall built in the 70s and 80s, this one actually looked like a covered hopper instead of a boxcar.

With six of the boxcar-like covered hoppers in my hands I had the makings of a substantial fleet for the carbon black producers and customers off either end of my dream layout. I have to hand it to Scale Trains, these cars are exquisite. I don't think I could have done as nice a job with my 3D printed kits no matter how much I was willing to spend.

But the uniformity of these six cars got me thinking about some of the ACF built carbon black cars the late Wade Griffis had built. He offered decals through his Black Swamp Shops and had a kitbashed or scratchbuilt models to show off each of the decal sets he designed. He was really a pioneer and his models were quite good. I'd looked over these models a dozen times or more and figured I'd build one of each someday.

Back in April someday finally arrived. I figured while I was at it I'd take a crack at a modernized version of the old Rail Shop ACF 3000cf carbon black hopper. And for good measure I bought one of the Scale Trains Thrall 4727 hoppers to backdate. So if six was a good sized fleet, four more new carbon black cars would be even better.

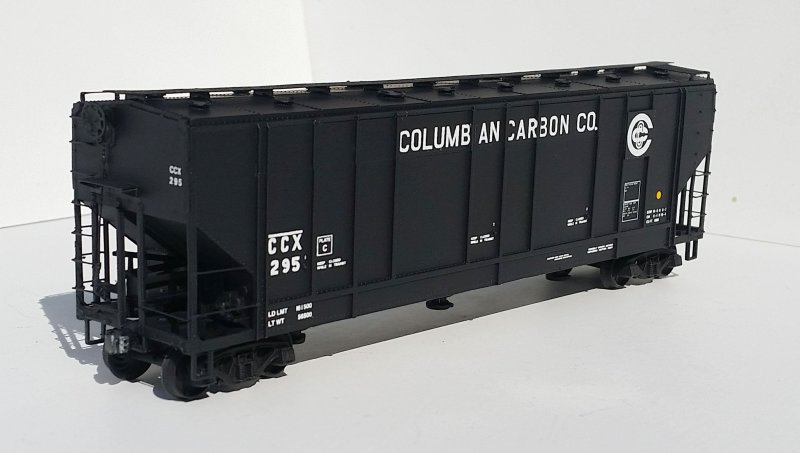
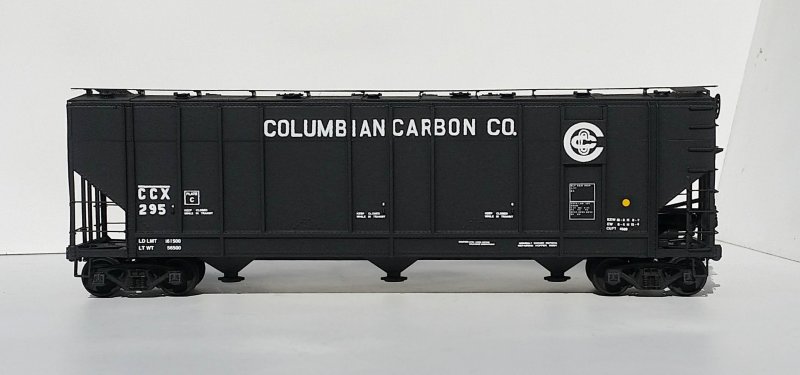
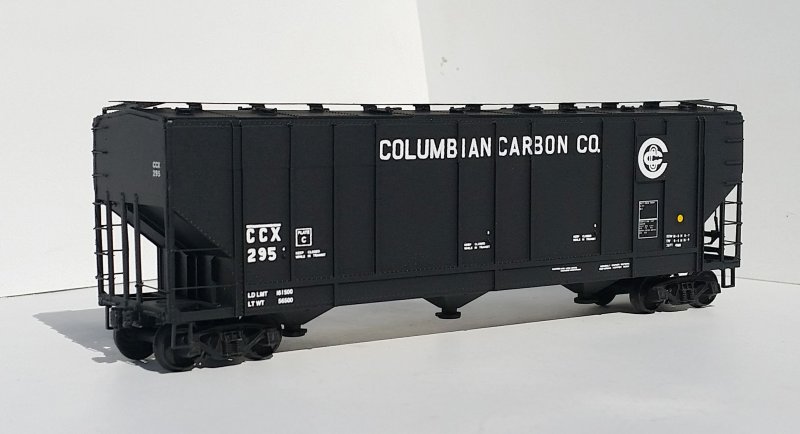
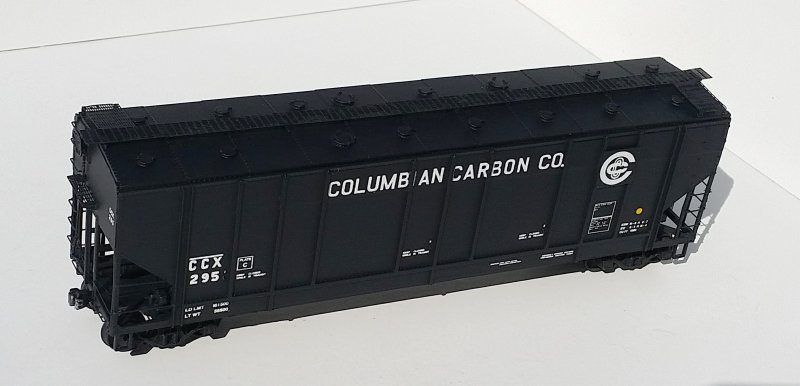
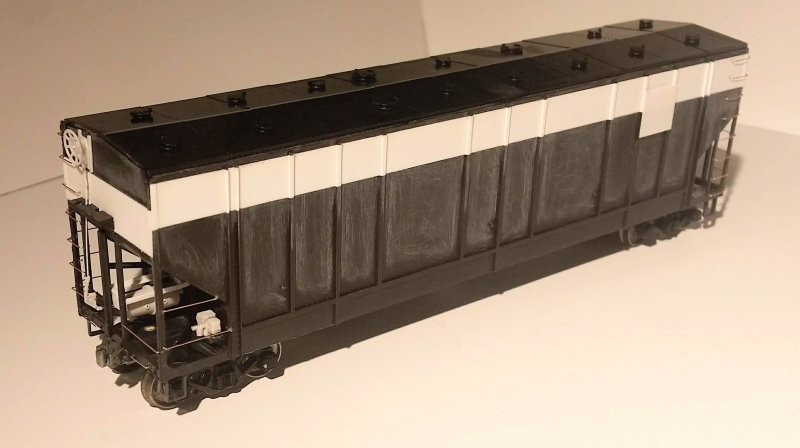
First up was the Rail Shop car. This model began as an ACF 3000cf carbon black hopper. The prototypes were built between 1933 and 1949. In the 1960s many of the cars were enlarged to 4000cf by raising the roof 28 inches. The modification also included replacing the staff handbrake with a horizontal brake mechanism, partial removal of the A end side ladder and replacement of the wooden running boards.

The kit was built per the instructions with a few exceptions. To replicate the taller prototype, the sides were cut along the base of the riveted zee at the top of the side stakes. New side extensions were built from styrene sheet and strip. Likewise the ends were cut and extensions were added. Brake gear components were replaced with Moloco parts, other than the brake cylinder/lever part, which is from the kit. The trucks were replaced with some from a Proto2000 gondola kit. A placard was added to each side to display the Columbian Carbon logo. A Plano running board was installed along with a platform below the handbrake. I lettered the model with Wade's Black Swamp Shops decals. I ended up replacing the kit's outlet gates with some 3D printed gates and covers I made, but these aren't shown in the photos.


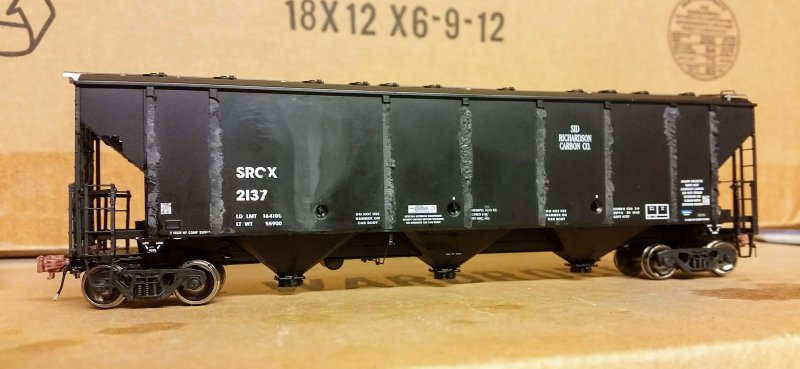
Next up was the Scale Trains 4727cf hopper. I removed the side stakes using a Dremel tool, a chisel, then finer and finer grit sanding sticks. The roof and hatches were replaced with a 3D printed part adapted from my original Thrall 5750cf CAD file redesigned to fit the Scale Trains model and reuse the etched running board. I built up new side stakes from tee and strip styrene to create the columns used by Thrall in the early 70s. Once again I used some of Wade's decals, though the decals were intended for a model of a 5750cf car.


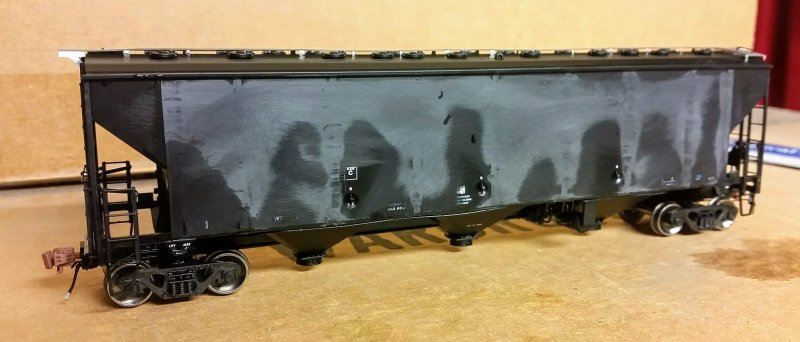
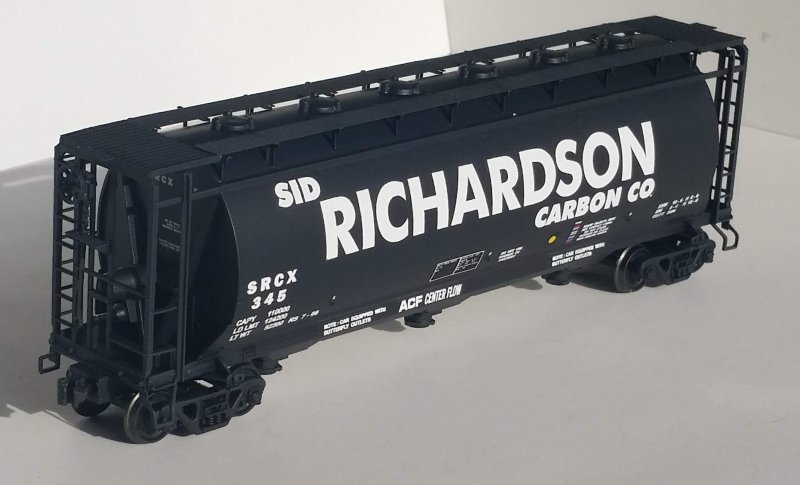
Continuing the trend of ramping up the difficulty of the build, I took on an early ACF 4589cf car. The prototype is a Plate C car, so I started with a 1970 and earlier Atlas ACF 4650cf hopper. The length is pretty close with the Atlas car being just a little too long, but not long enough to jump out. The slope sheets on the 4589 are closer to the rail making the vertical portions of the car ends taller. I chose to live with the difference on this model but in the future I may start with a car that's a better match for the ends. One unique feature of the early high-handbrake 4589 is the area behind the tall side ladder. It's recessed to allow some space behind the ladder rungs. The holes on the roof were plugged and new 3D printed hatches were installed. This car received new Kato 70-ton trucks. Black paint and Black Swamp Shops decals set no. 104 were applied.


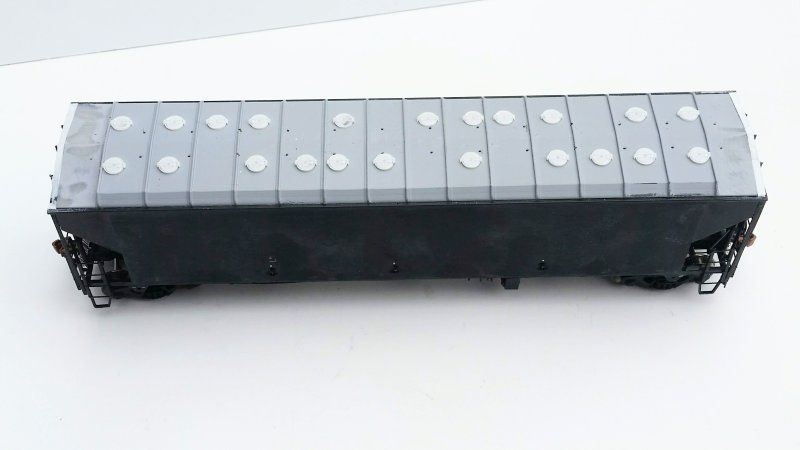
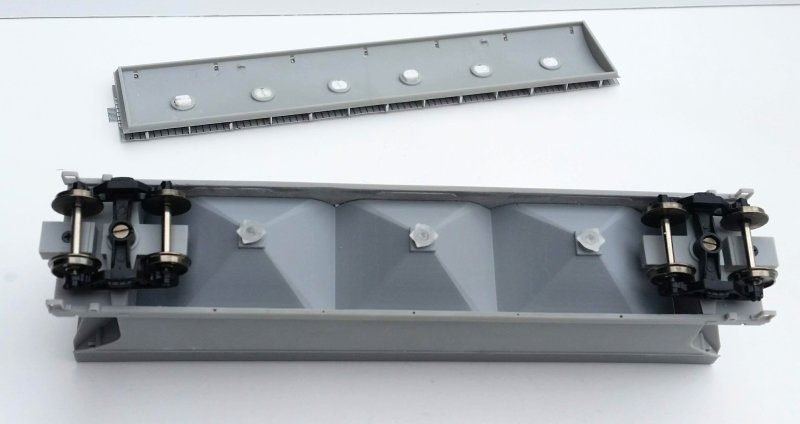
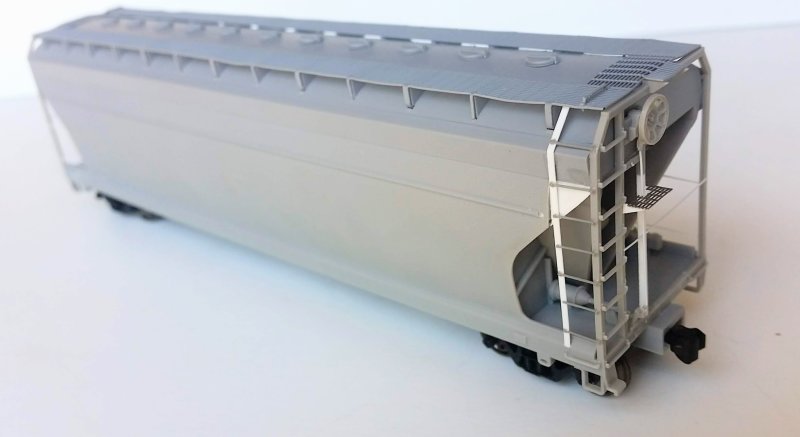
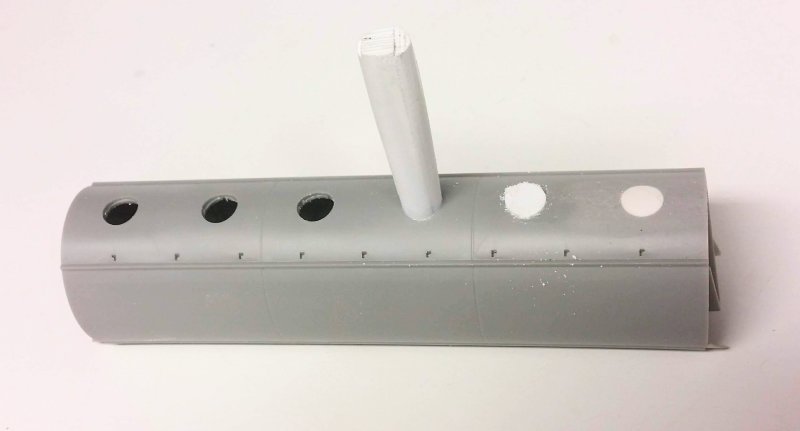
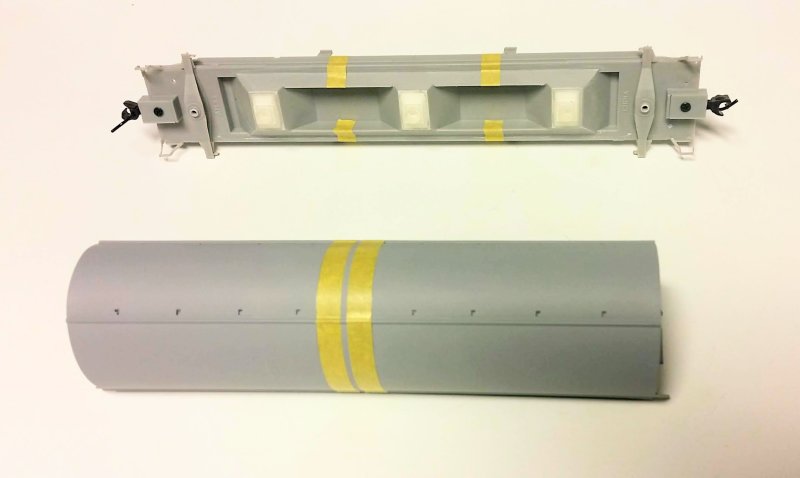
Finally, I kitbashed an ACF 3390cf carbon black hopper from the Atlas 3-bay cylindrical hopper. Again the first step was to plug the roof holes and blend the plugs into the roof contour. Next I filled in the seams in the body and primed it. The entire car was shortened by four scale feet with a single section taken from the middle of the body and two two-foot sections taken from the underframe between the bays in order to obtain 12-foot hopper outlet spacing. I added new 3D printed hopper outlets, modified the end cages and installed the Plano running board set. The trucks were replaced with Exactrail 70-ton trucks and the roof hatches with some parts from an Athearn ACF 5250cf covered hopper I had originally intended to use for this model. Again, Black Swamp Shops decals were used.