Phase 3

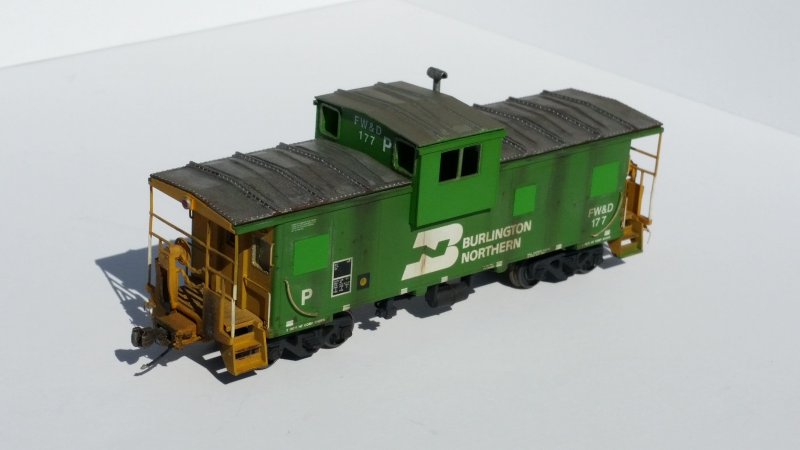
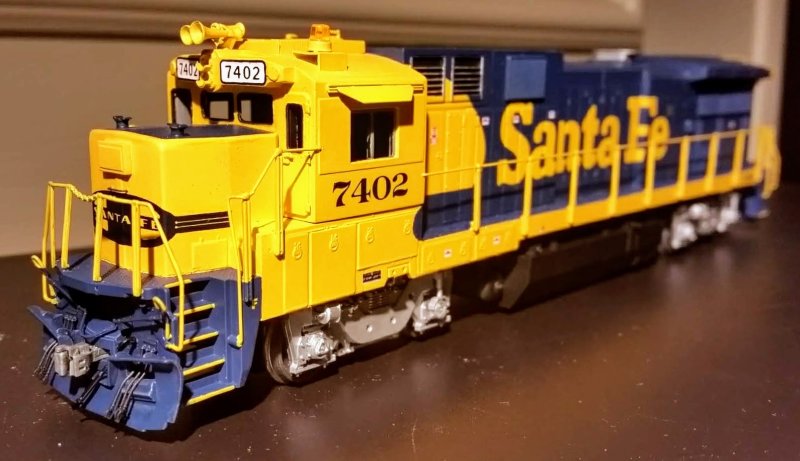
Not the Rapido B36-7
Now that Rapido has delivered the B36-7 in HO scale, the Phase 3 Bxx-7 frame is a reality. Atlas already covered both Phase 1 and Phase 2 frames with their B23-7 and B30-7 models. So what exactly are the differences between the Phases? The big change is the frame length and truck centers, even though it's a pretty small change as locomotives go.
Michael Eby's Dash 7 Phases page contains a wealth of information. Michael cites Will Davis and David A. Davis' blog for some in-depth prototype information. To recap Michael's data, the Phase 1 frame is 62'-2" over the pulling faces with truck centers at 36'-2". The bolsters in Phase 1 are 13'-0" from the pulling face of each end. Phase 2 kept the same length frame, but moved the rear truck one foot closer to the coupler for 62'-2" overall, front truck 13'-0" from the pulling face, rear truck 12'-0" from the pulling face and 37'-2" truck centers. Phase 3 shortened the frame by one foot overall, bringing the pulling faces, pilots and stepwells six inches closer to each end and and bringing the rear truck in a corresponding six inches for 61'-2" overall, front truck 12'-6" from the pulling face, rear truck 12'-0" from the pulling face and 36'-8" truck centers.
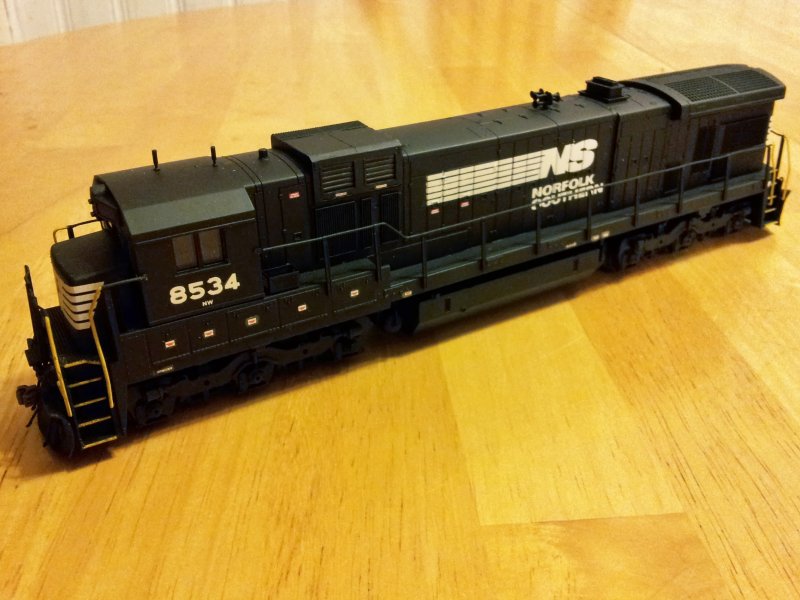
What does the Phase 3 frame do for us in HO scale? Aside from the B36-7, with the Rapido model there is now a frame for late B23-7, B30-7, B30-7A and B30-7AB models. The Southern B30-7A1 is its own thing on a frame different from everything else, but the Burlington Northern B30-7A1B units share a Phase 3 frame with the earlier B30-7AB.
Michael Eby's Dash 7 Phases page contains a wealth of information. Michael cites Will Davis and David A. Davis' blog for some in-depth prototype information. To recap Michael's data, the Phase 1 frame is 62'-2" over the pulling faces with truck centers at 36'-2". The bolsters in Phase 1 are 13'-0" from the pulling face of each end. Phase 2 kept the same length frame, but moved the rear truck one foot closer to the coupler for 62'-2" overall, front truck 13'-0" from the pulling face, rear truck 12'-0" from the pulling face and 37'-2" truck centers. Phase 3 shortened the frame by one foot overall, bringing the pulling faces, pilots and stepwells six inches closer to each end and and bringing the rear truck in a corresponding six inches for 61'-2" overall, front truck 12'-6" from the pulling face, rear truck 12'-0" from the pulling face and 36'-8" truck centers.
What does the Phase 3 frame do for us in HO scale? Aside from the B36-7, with the Rapido model there is now a frame for late B23-7, B30-7, B30-7A and B30-7AB models. The Southern B30-7A1 is its own thing on a frame different from everything else, but the Burlington Northern B30-7A1B units share a Phase 3 frame with the earlier B30-7AB.
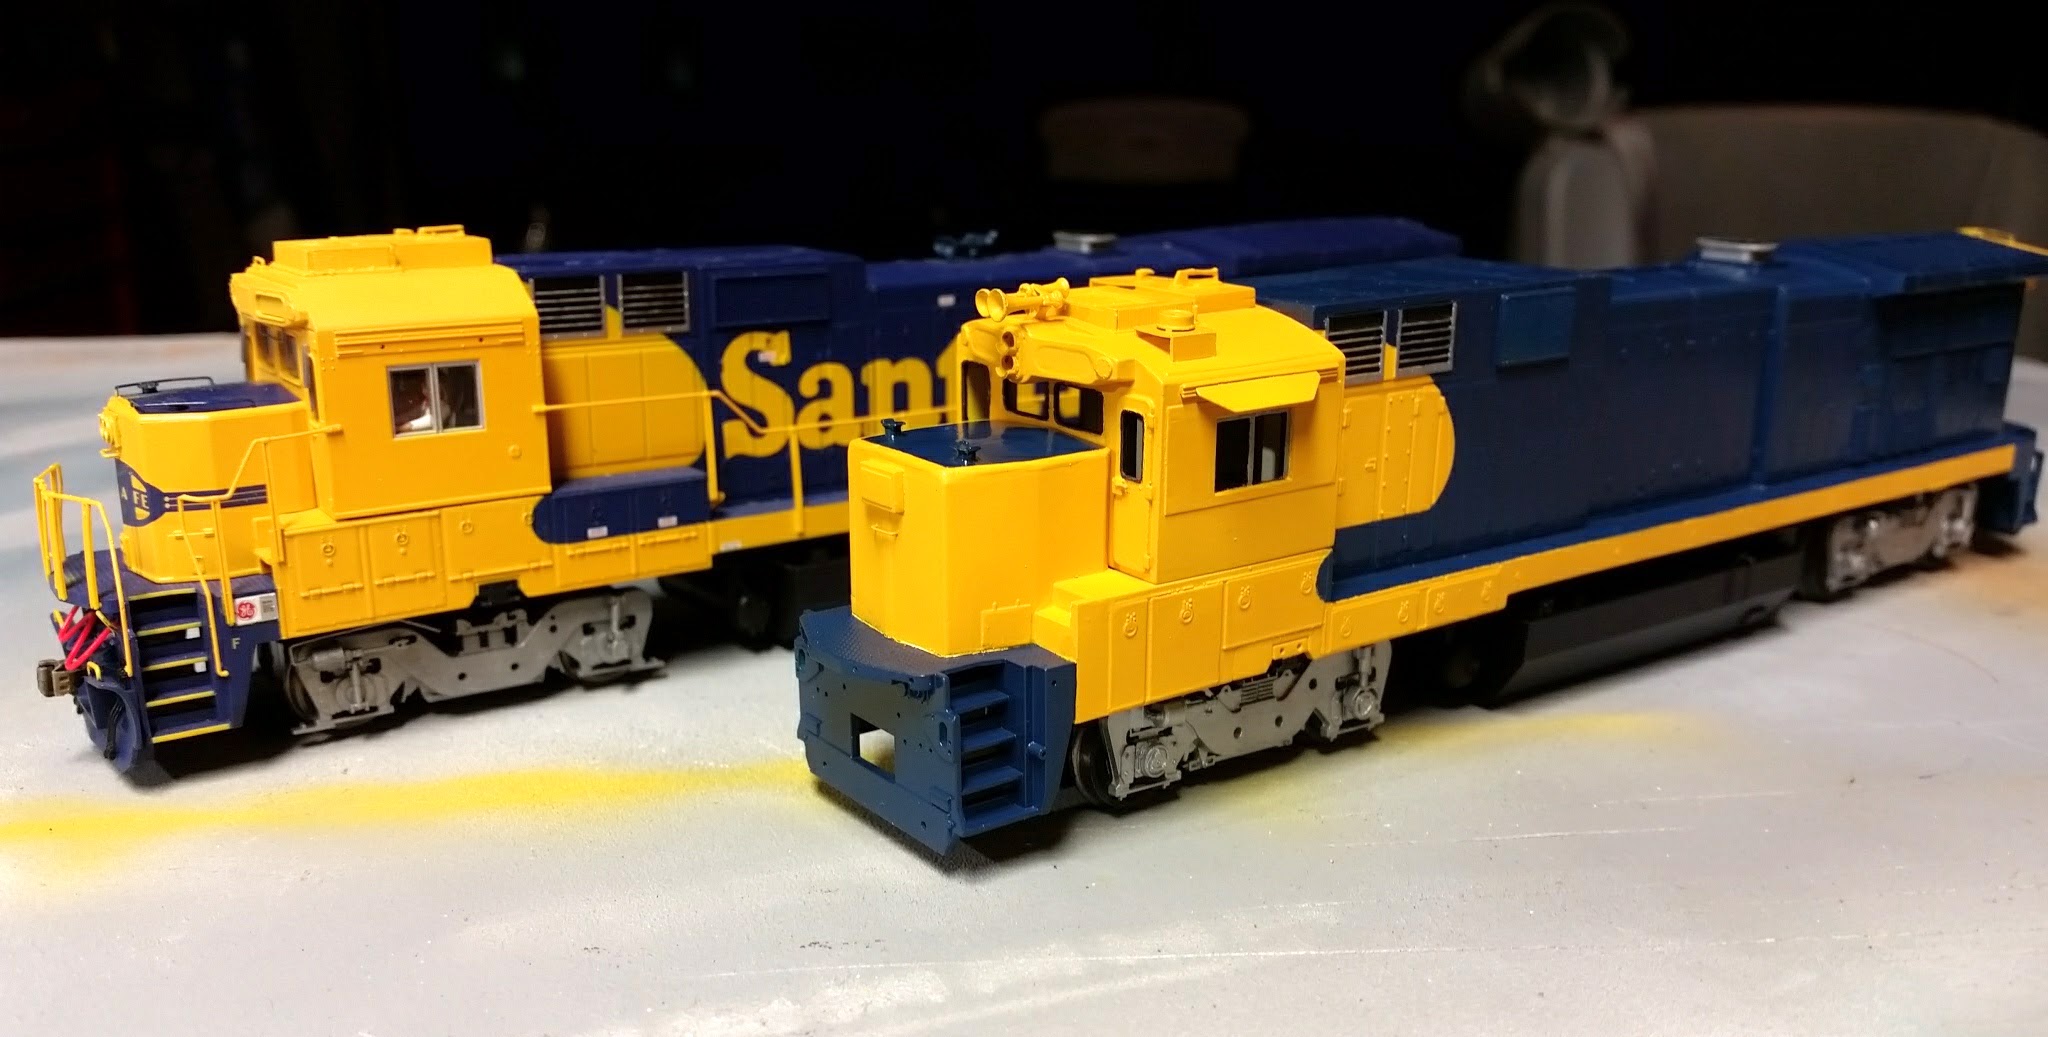
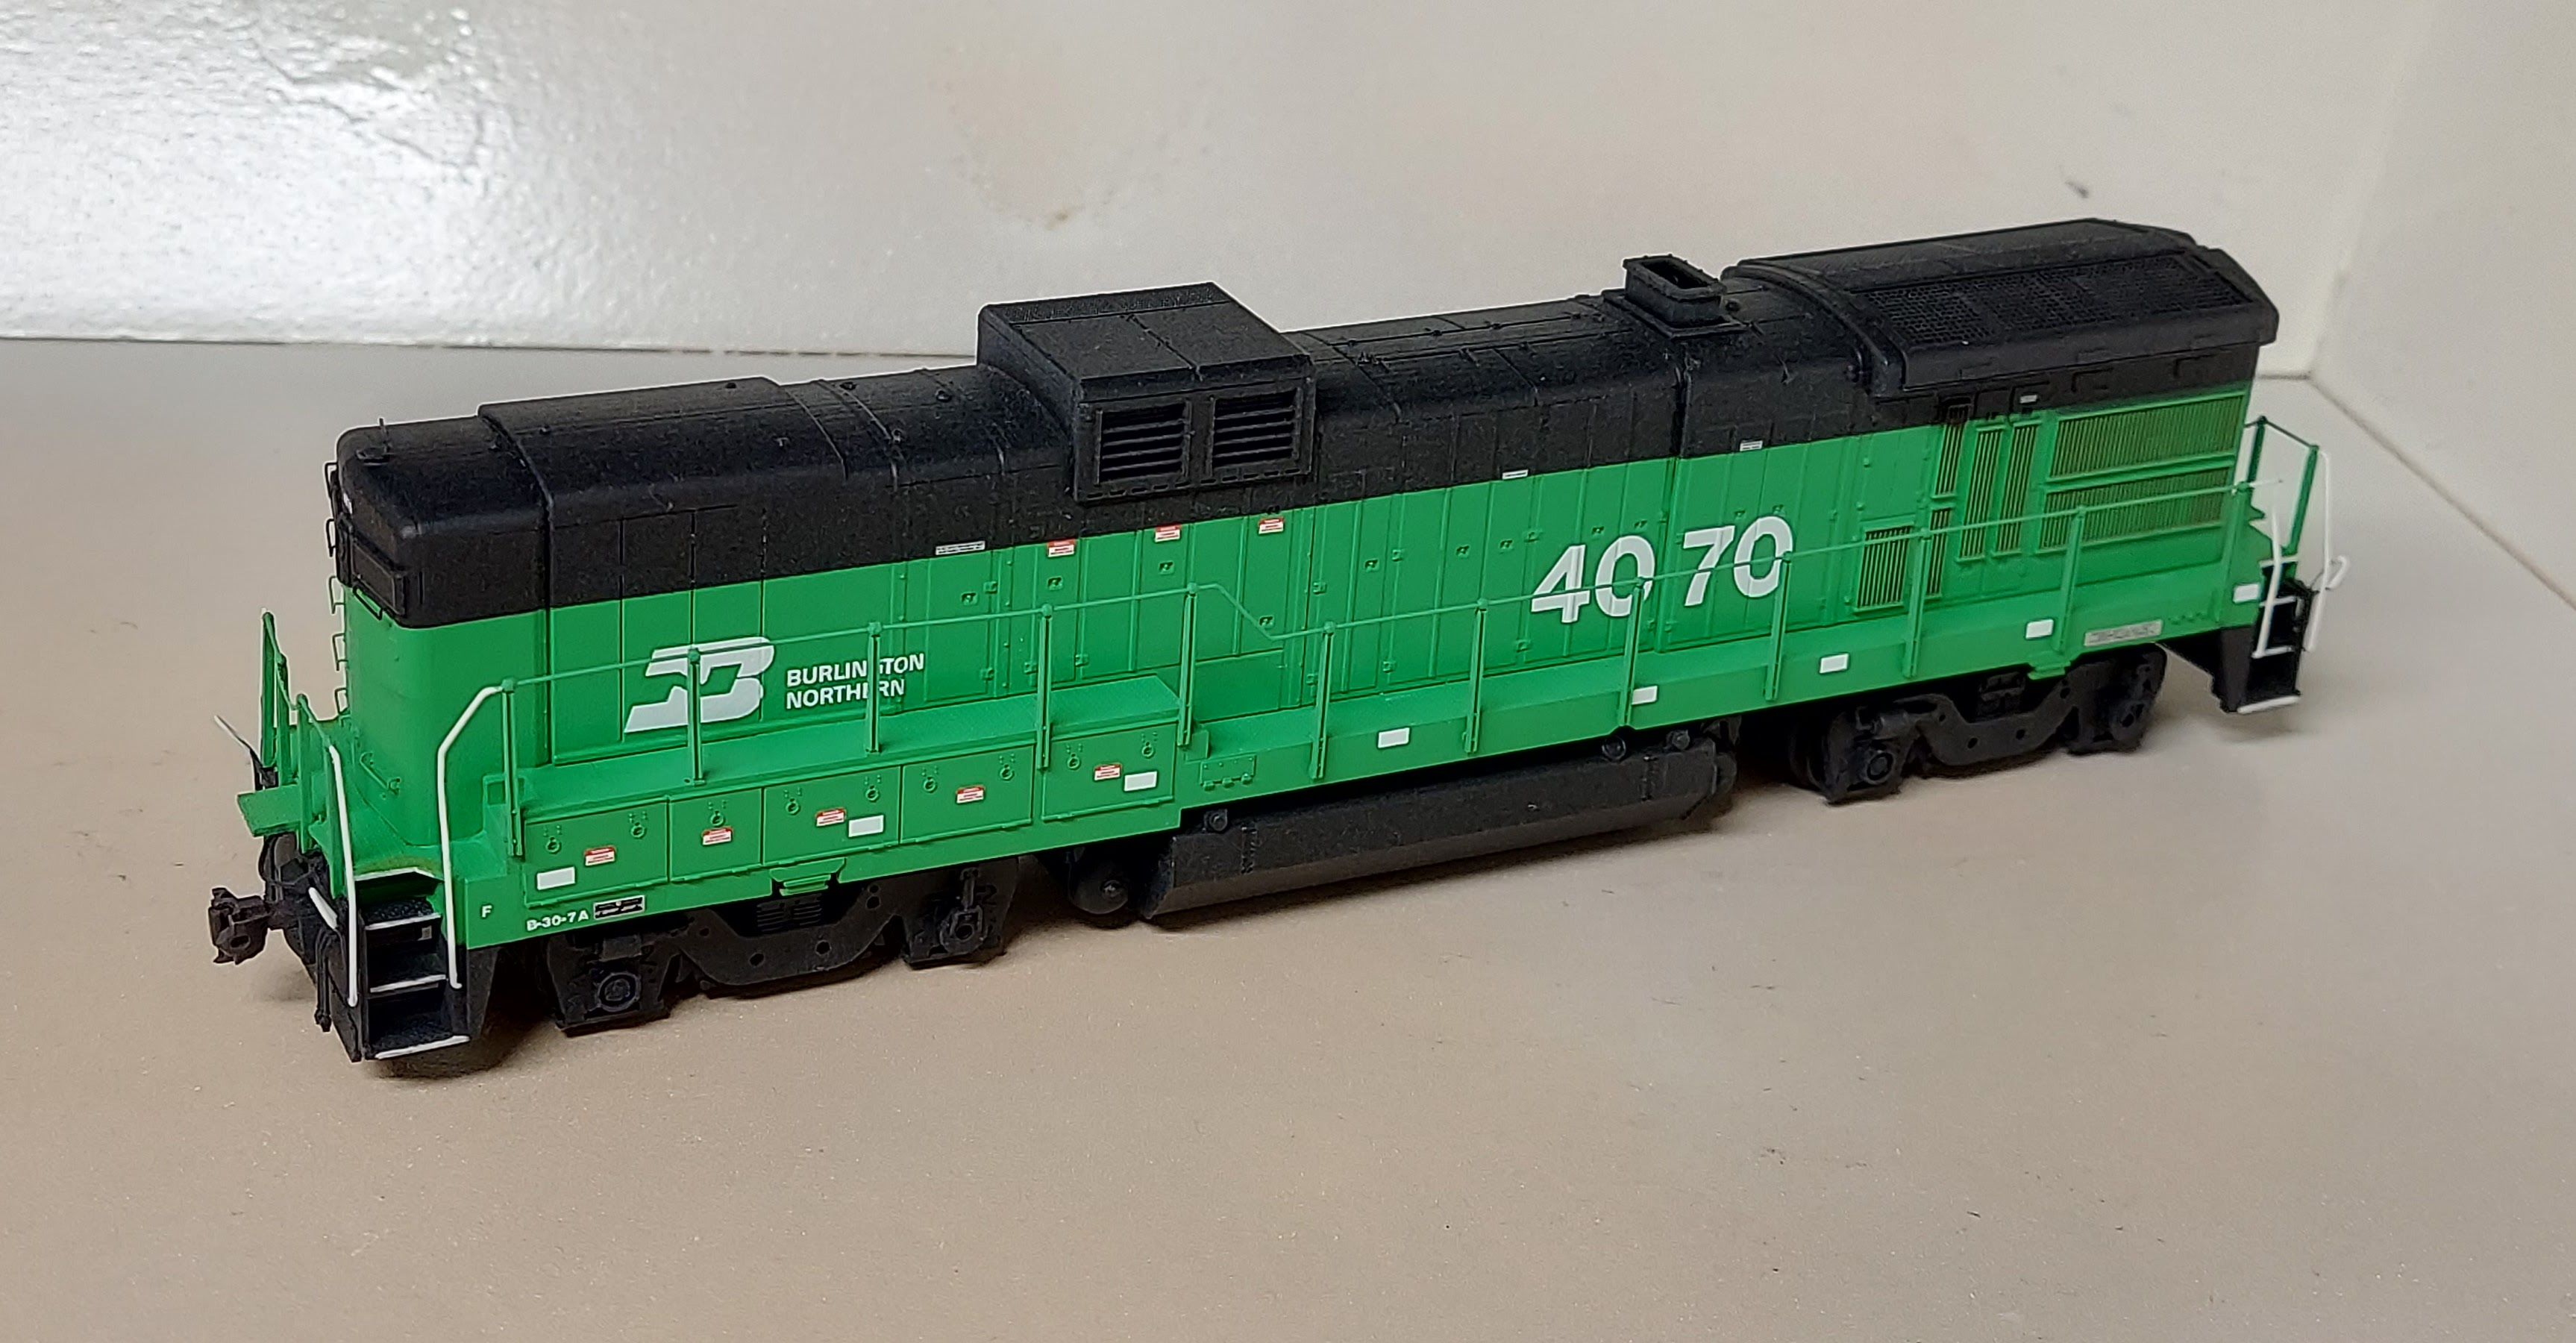
The Rapido models aren't cheap -- nothing in HO scale is at this point anymore -- so who's going to use them for kitbash fodder? Not me I can tell you that! But some folks might be motivated to tear off the shell of their model and replace it with something else to help them model a B30-7A or a late B23-7 or one of the B-unit versions Burlington Northern had. If I were a betting man I'd put money on Rapido offering these models on their B36-7 frame at some point in the future. In fact, when they were showing the test shots of the B36-7 they hinted at these future releases by showing fuel tank variations tooled for Missouri Pacific and Burlington Northern, neither of which had the B36-7.
So if not Rapido, what's the path to modeling a Phase 3 Bxx-7?
The Method
Long before I'd ever heard of the Rapido model I worked up some drawings of the various Phase 3 hoods. One thing led to another and I started drawing some Phase 1 and 2 hoods. And fuel tanks. And details. Anyway, Atlas got a few things right with their Phase 1 and 2 models, so I didn't see any reason to reinvent the wheel there (at first). In particular I liked the way the radiator was rendered with cores molded as part of the body and a photoetched metal screen insert with frame that snaps in place on the radiator. Now that KV Models offers an etched part for the Atlas U33C/C30-7 radiator, which is larger and better proportioned than the B23-7/B30-7 radiator, I've begun adapting this etched part to a revised 3D printed radiator section.
Atlas is to be commended for their B30-7 cab. I covered what makes it good and where it misses in a previous blog. They have also recently started delivering their U33B/U36B model with a revised cab that addresses these shortcomings. I couldn't wait for that so I designed a cab with better fidelity to the prototype some time ago. It comes with numerous options covering the Universal Series through the end of Dash 7 production. I started printing these cabs as flat kits through Shapeways but over the past year or so I've been printing one-piece resin versions.
Now as far as the rest of the Atlas model is concerned -- the hood contour, the heaviness of latches and other details, the fuel tank and reservoirs, the high short hood -- well, not so good. These things are passable in a factory painted model I suppose (nope, not that high short hood), but after kitbashing the Southern Pacific B36-7 above from an Atlas C30-7 body I figured I could do better. This has led to a lot of drawings of Bxx-7 hoods. A LOT of drawings.

GE B36-7 B-unit wreck rebuild, one of many drawings
The Atlas sills are also very nice and they are easy to shorten by cutting out six inch sections near the stepwells. The B36-7 kitbash makes a good case for using the Atlas sills in a Bxx-7 build. The Southern B30-7A1 is it's own thing worthy of its own blog, but was also able to make use of the Atlas sill by lengthening it just aft of the step down from the battery boxes. Phase 3 sills have a "long, short, long, long, long" pattern of access doors on the conductor's side under the cab, compared to the Phase 1 and 2 pattern of "panel, short, short, long, long, long" access doors. This is easy to model using a donor sill to harvest the long access doors. However, this process of cutting up spare sills gets a little old and mistakes can be made, so I've been drawing up variations on the sills to be able to print every version without cutting anything. Again with more and more drawings.
Atlas Phase 2 subbase modified to Phase 3 (moving the stepwells inboard remains to be done)
So if I'm keeping the Atlas sill and radiator part, what am I replacing? Everything else. Well, almost. I do like using the Atlas coupler boxes. But who knows? I might start printing those, too.
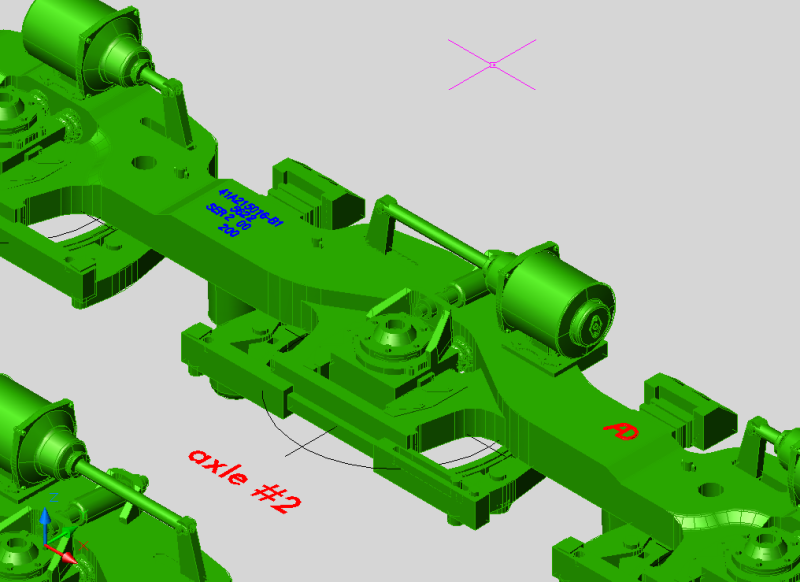
The Frame
This is the wildcard that prevents using an Atlas frame. The Phase 3 frame is not only shorter in length, but the truck centers are different from both Phase 1 and Phase 2. I've seen other people scratchbuild frames out of brass or cut up diecast frames and piece them back together with pins, screws or strong glue. I could probably muddle my way through one or more of those methods but I doubt I could make it repeatable. So instead I dealt with custom frames by drawing them in 3D and printing them in nylon through Shapeways. This allowed me to model the B39-8 demonstrator, B36-7 and create a dummy frame for a spare Atlas Phase 1 shell I had. This method also allows me to model any frame with any truck centers, which means models are on the table now that only existed as demonstrators or were built for only one railroad.
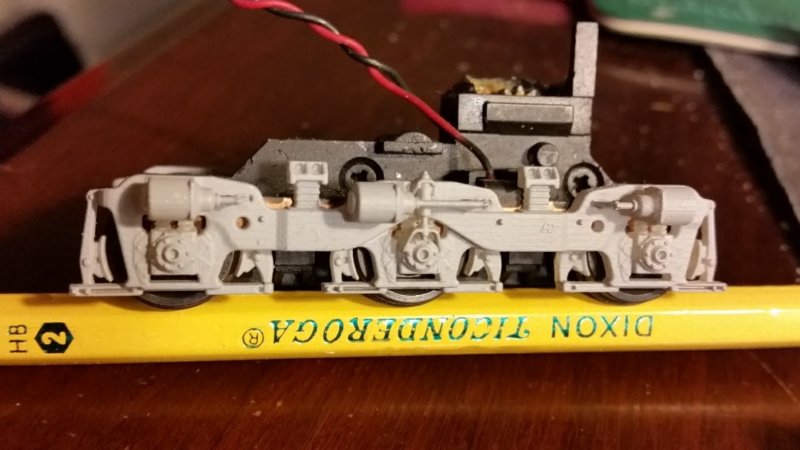
Shapeways' nylon is a rough material but it is strong. It also doesn't present an opportunity to show detail so the fuel tank and reservoirs are printed as separate parts to cover the frame much in the way a pretty or exotic veneer wood is used to cover a less expensive and less attractive substrate wood. The nylon material does not offer much weight though so it has to be added somewhere. My first attempts to fill the fuel tank area with weight resulted in the frame sagging, so it became clear the frame would either have to be reinforced or the weight would have to be located in the body shell. The thicker frame seemed to do the trick but it still couldn't support much more weight than the Kato HM-5 motor and drivetrain so I glued lead bird shot into the inside of the body shell.
First generation nylon frame with Life-Like P2K Athearn-clone AAR B trucks designed for Atlas B30-7 fuel tank
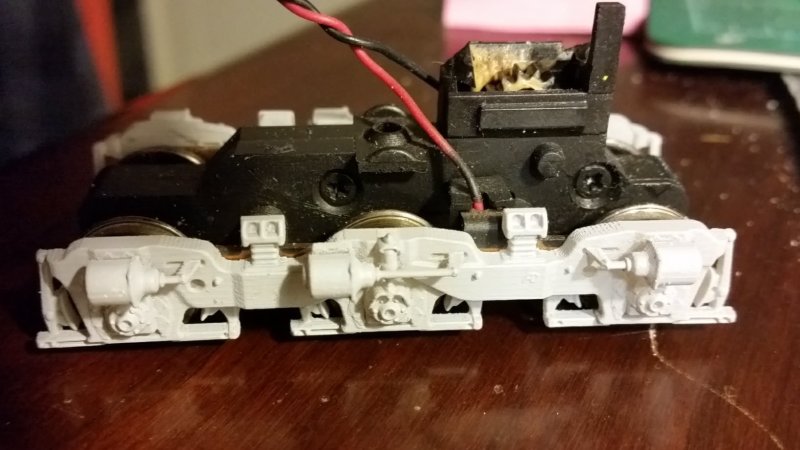
The first variation on the frame involved using the laser cutting vendor Send Cut Send. I was able to get thin sheets of stainless steel cut to my dimensions for a good price. I removed a corresponding amount of thickness from the nylon frame model and glued the frame to the steel part. The fit was excellent since both Shapeways and Send Cut Send do very precise work.
Laser cut stainless steel frames from Send Cut Send

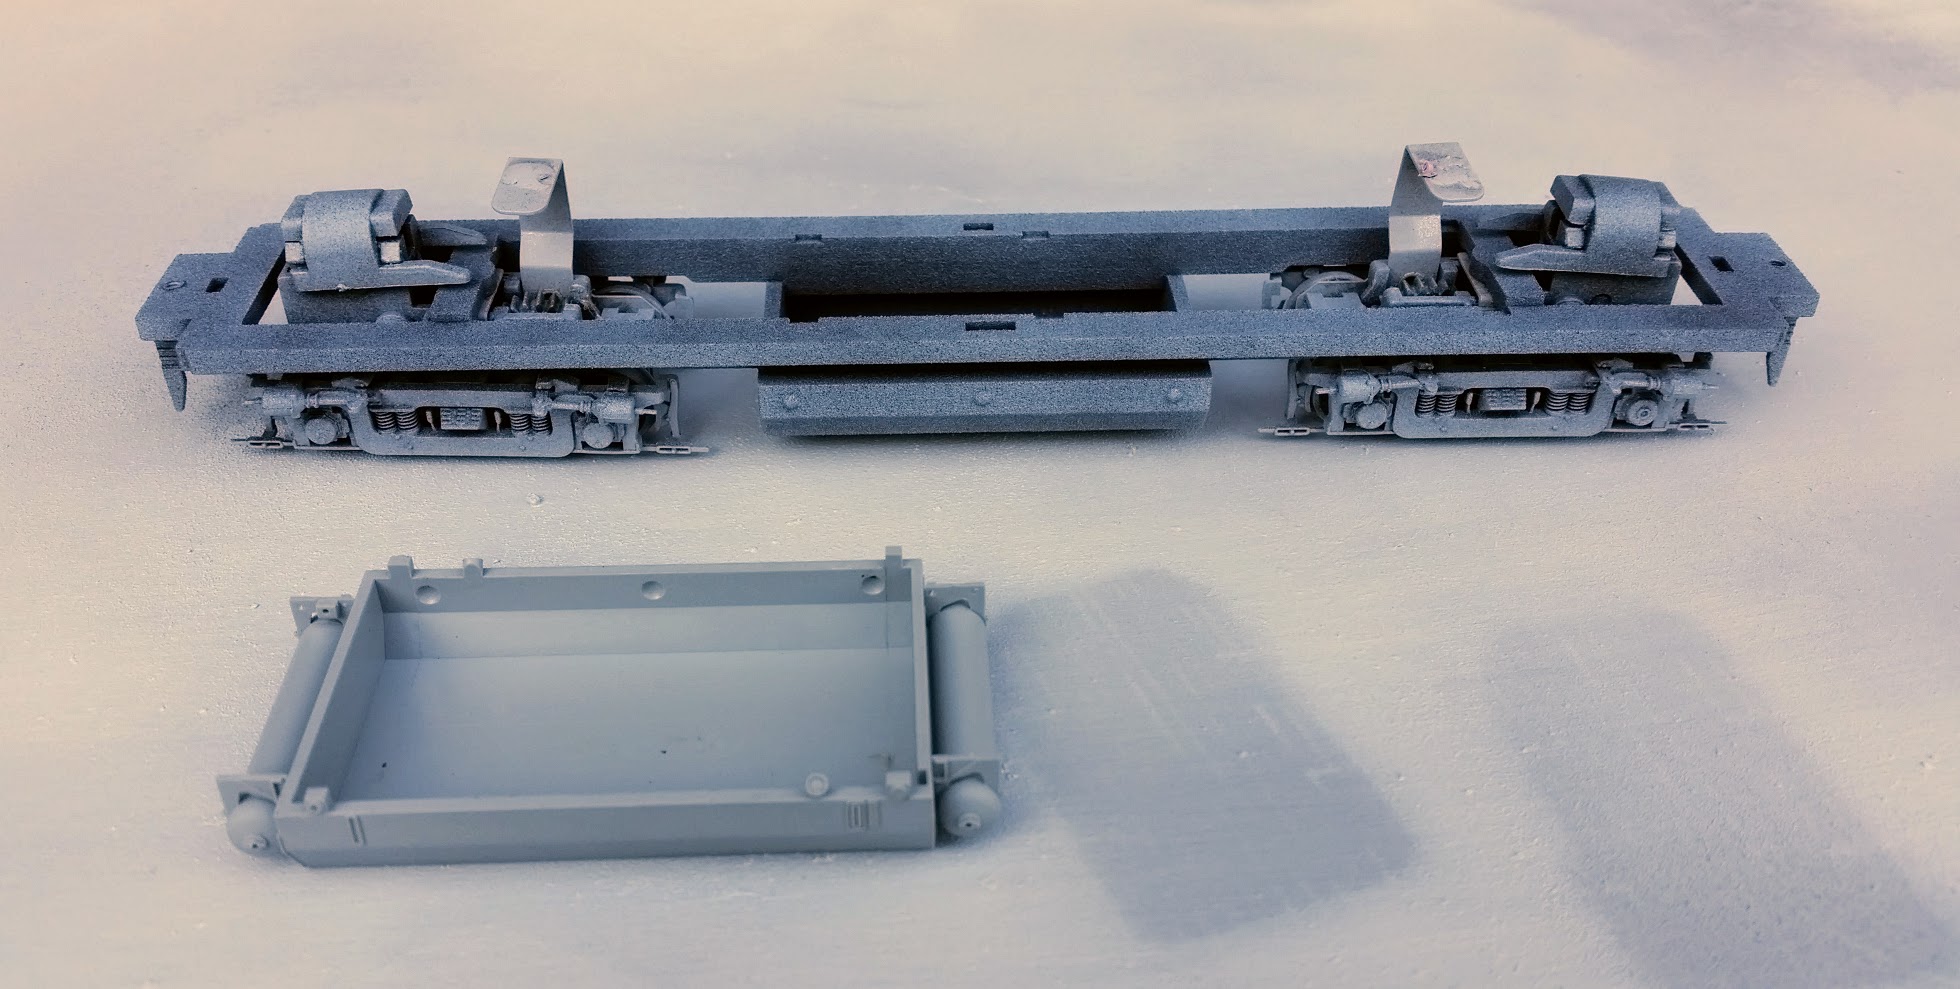
Hybrid nylon and stainless steel frame with Athearn trucks and 3D printed B30-7A1 fuel tank from Shapeways
Once I started using MP Scale Models as my printing vendor instead of Shapeways I was able to adapt the frame design to resin instead of nylon. This results in a much smoother appearance. The resin material is also easy to cut, sand, drill and tap. Like the nylon material these resin frames don't have much strength on their own but together with the laser cut steel frame they are quite strong.
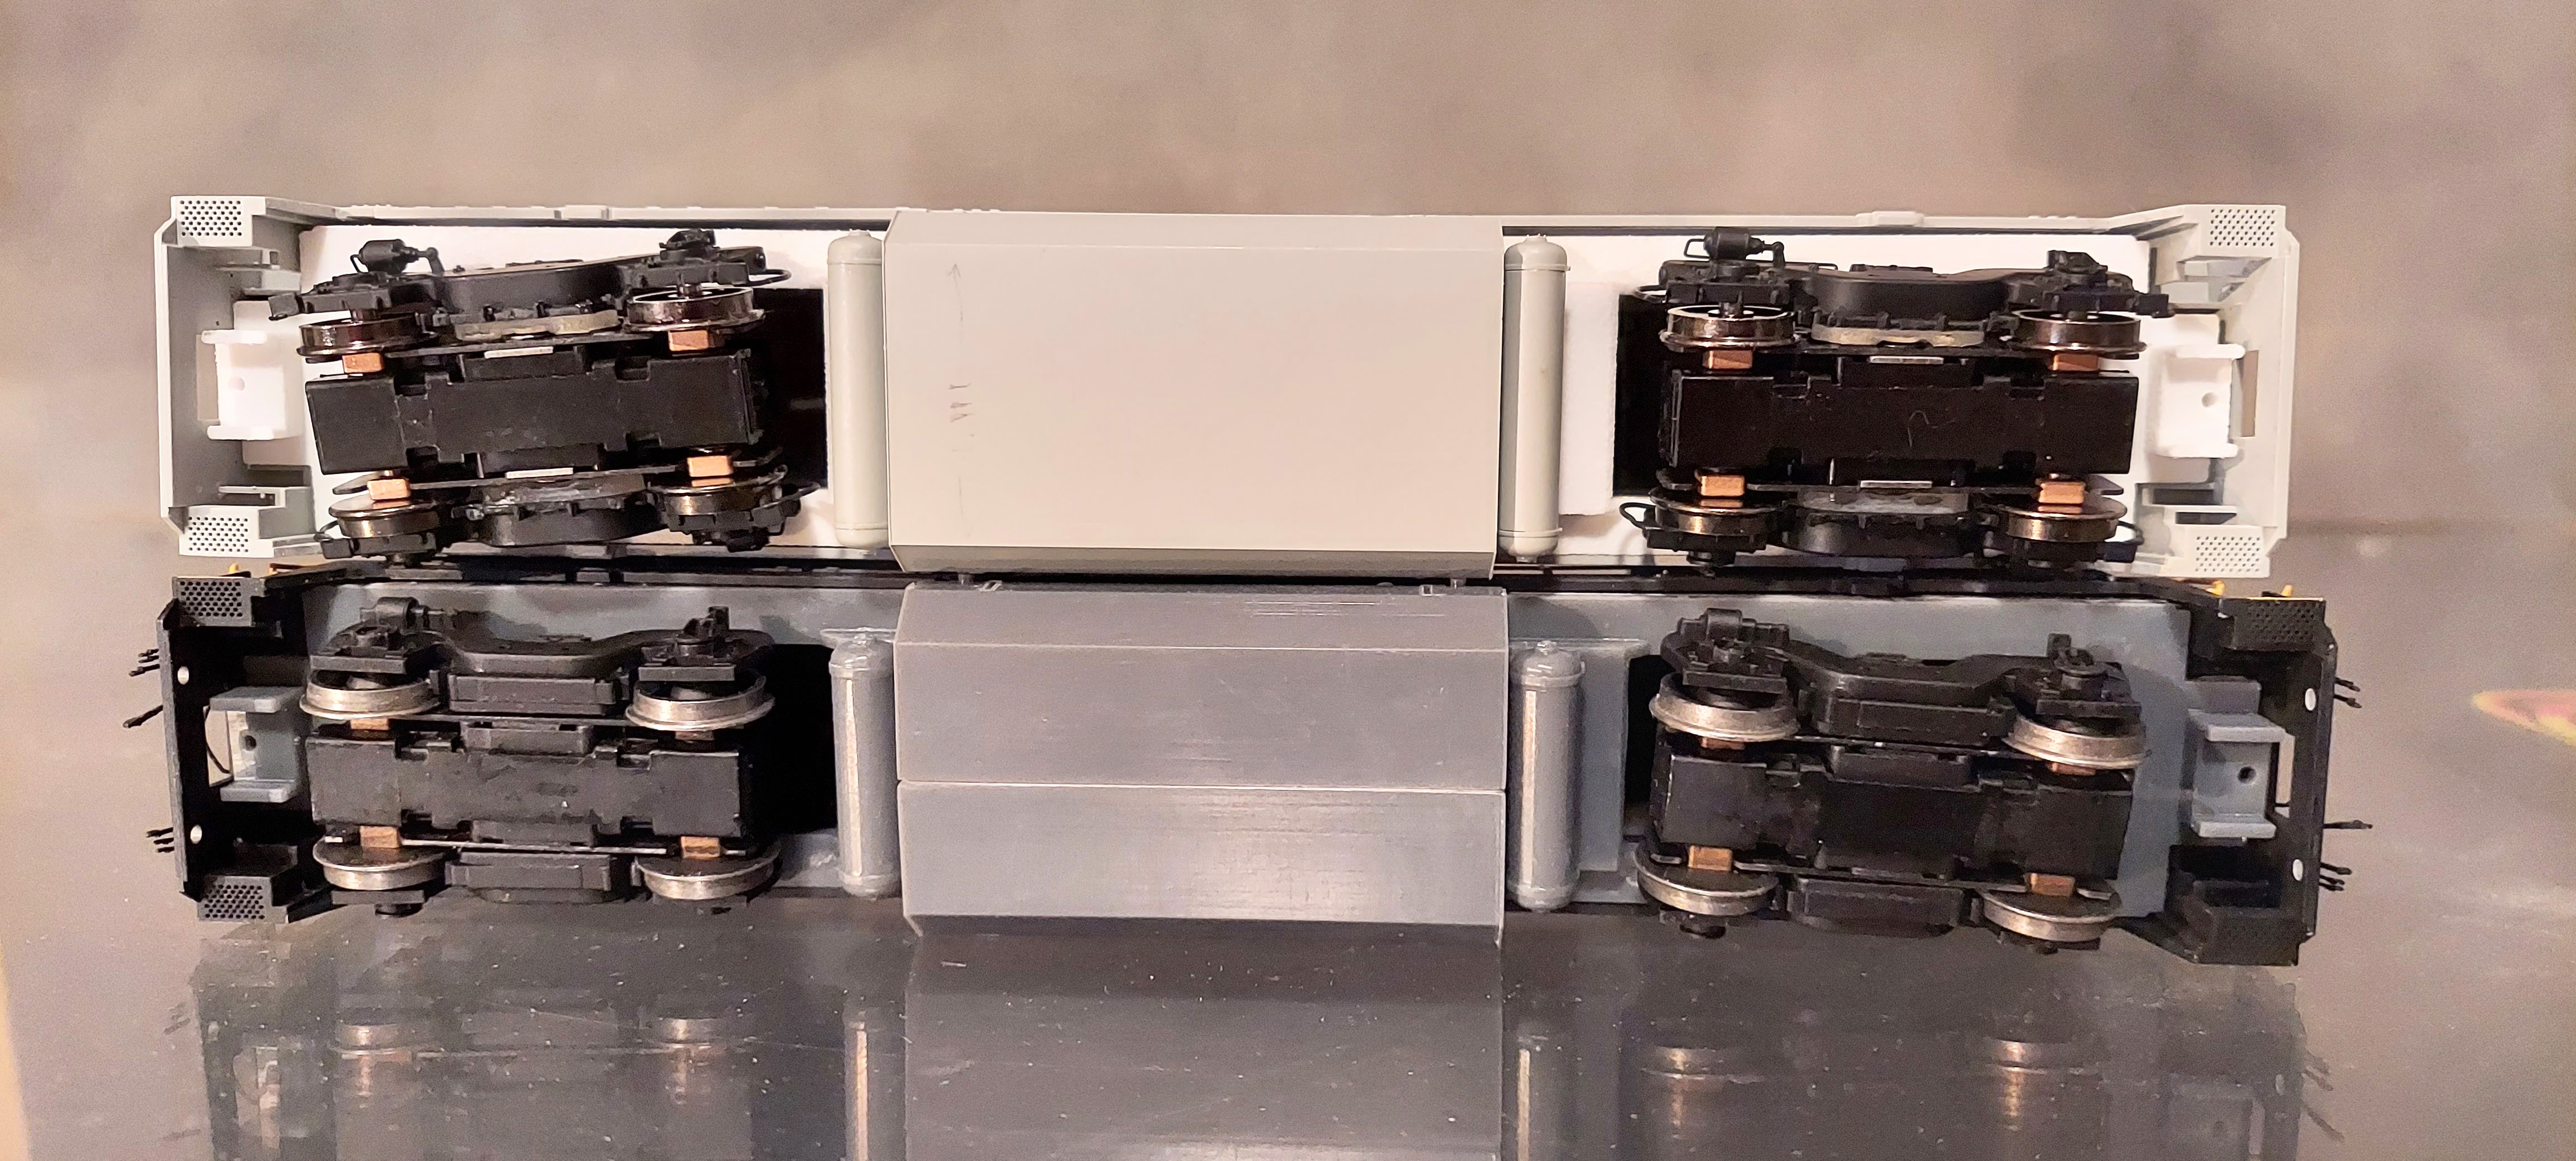
Hybrid nylon/stainless frame on top with dimensionally challenged Atlas fuel tank and skinny but too long reservoirs;
hybrid resin/stainless frame on bottom with resin fuel tank and reservoirs
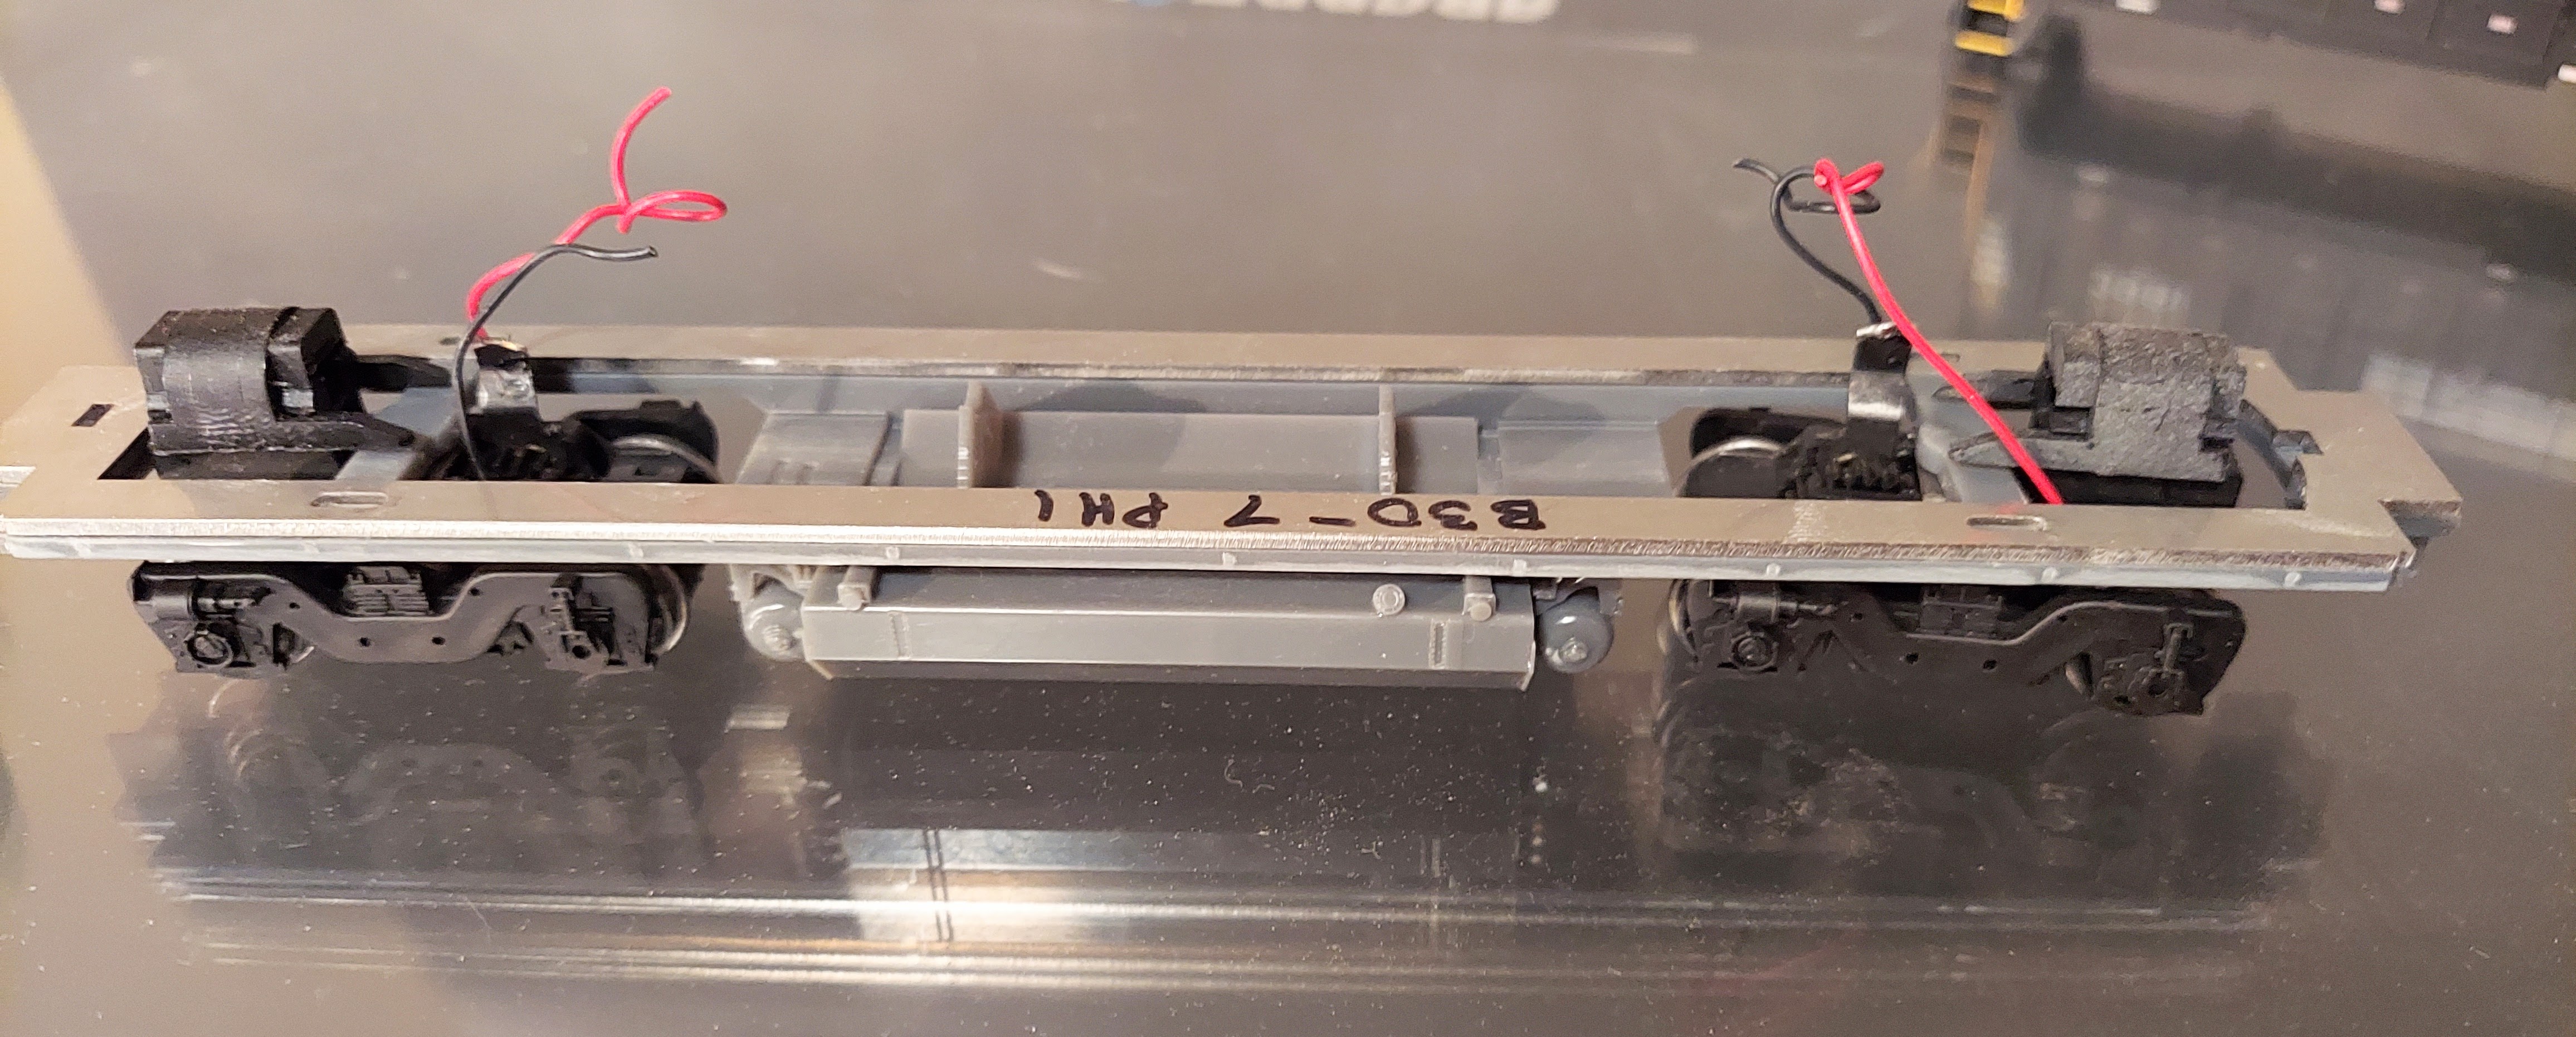
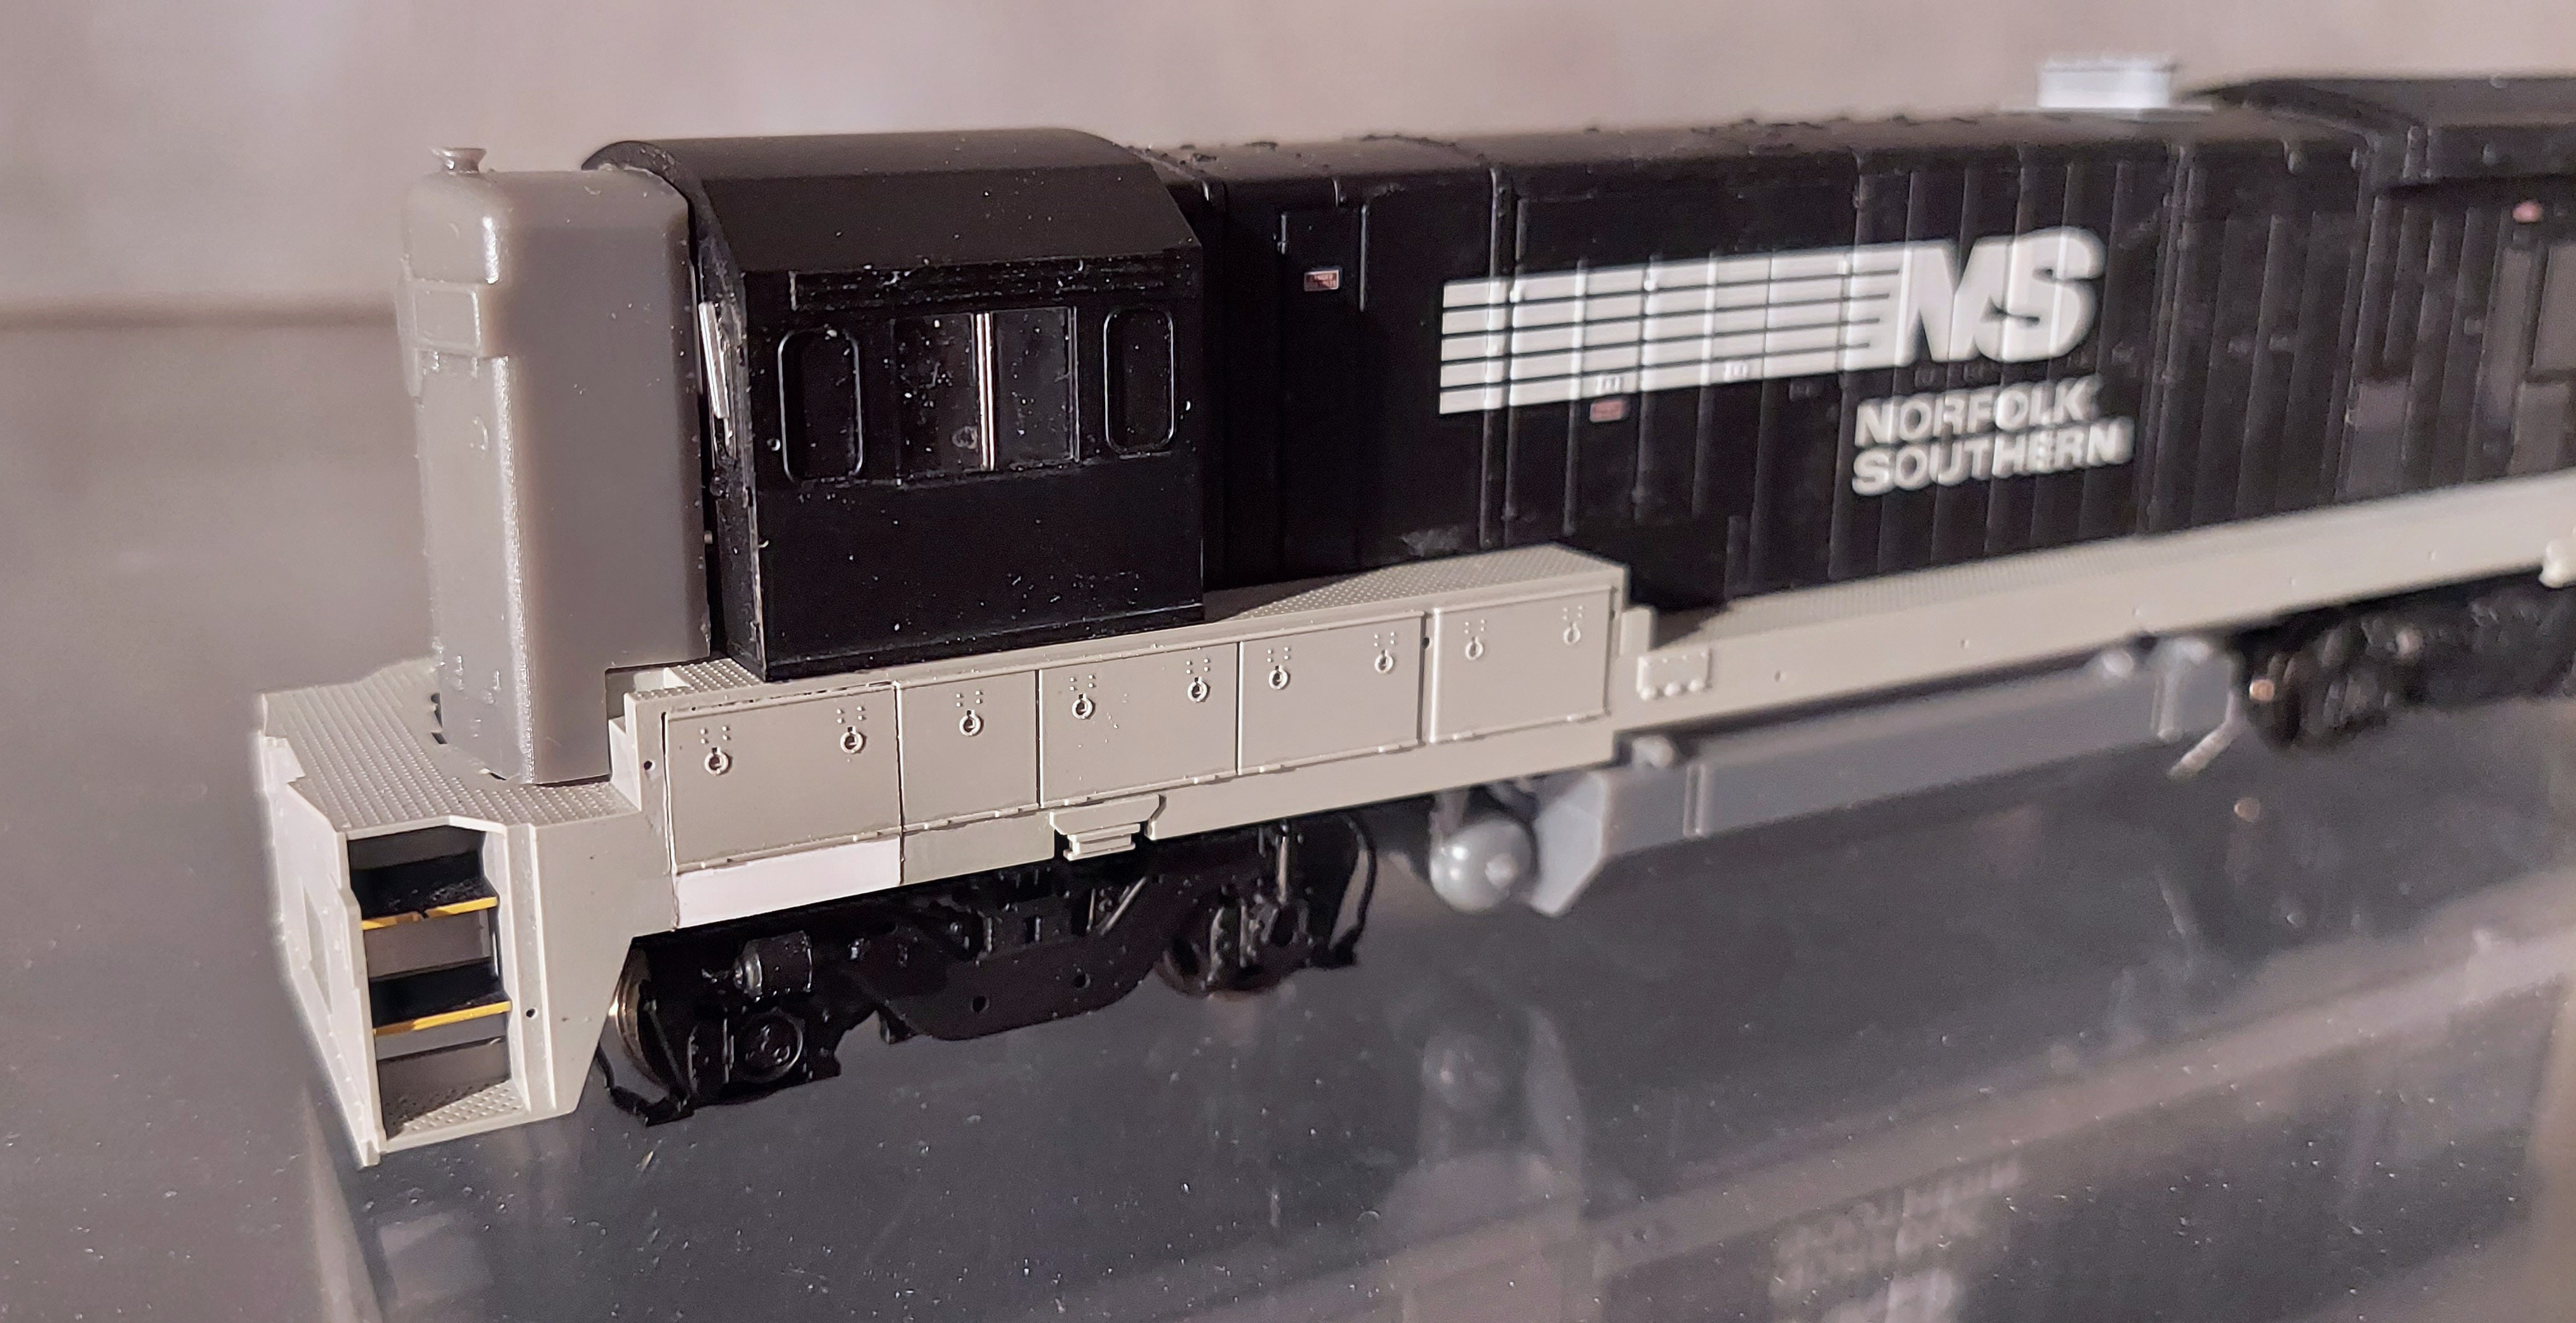
Hybrid resin/stainless frame with resin fuel tank and reservoirs and Athearn trucks with Atlas/Kato FB-2 sideframes
To date all these frame variations are designed to use a Kato HM-5 motor with flywheels, Athearn drive shafts and Athearn trucks. I am working on versions that will use Atlas and Atlas/Kato trucks (such as the AAR B and FB-2 found on the early C424 and U23B models) as well as Atlas and Athearn motor mounts. A-line makes a universal hex drive shaft kit so that is an option if the Athearn hex shafts in various lengths are unavailable.
Trucks
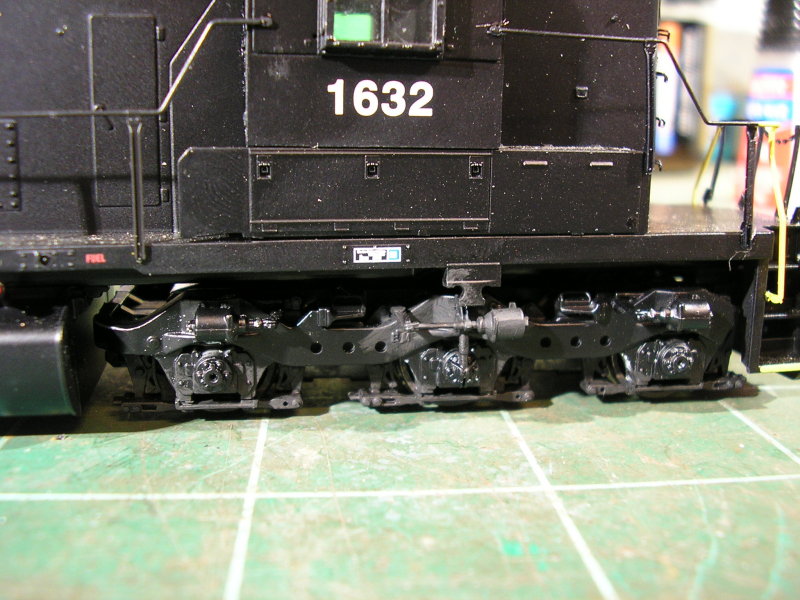
So far I've been working with Athearn and Athearn clone trucks on these kitbashes. They are widely available and the design hasn't changed over the years. Not only that but the Athearn Blomberg sideframes are legendary in their proportions and detail and unmatched by another manufacturer. For SCL/Family Lines/CSX modelers this is great. And for Conrail and Santa Fe modelers the former Life-Like Proto2000 AAR B trucks are a drop-in fit. I'm not certain but I believe Athearn has made their own AAR B truck for the former MDC RS-3, but I have not seen these. Both the P2K and MDC AAR B truck model the longer wheelbase of the prototype accurately whereas the AAR B trucks found on old Athearn U28B, U30B and U33B models are a shortened version of the sideframe adapted to the Blomberg truck.
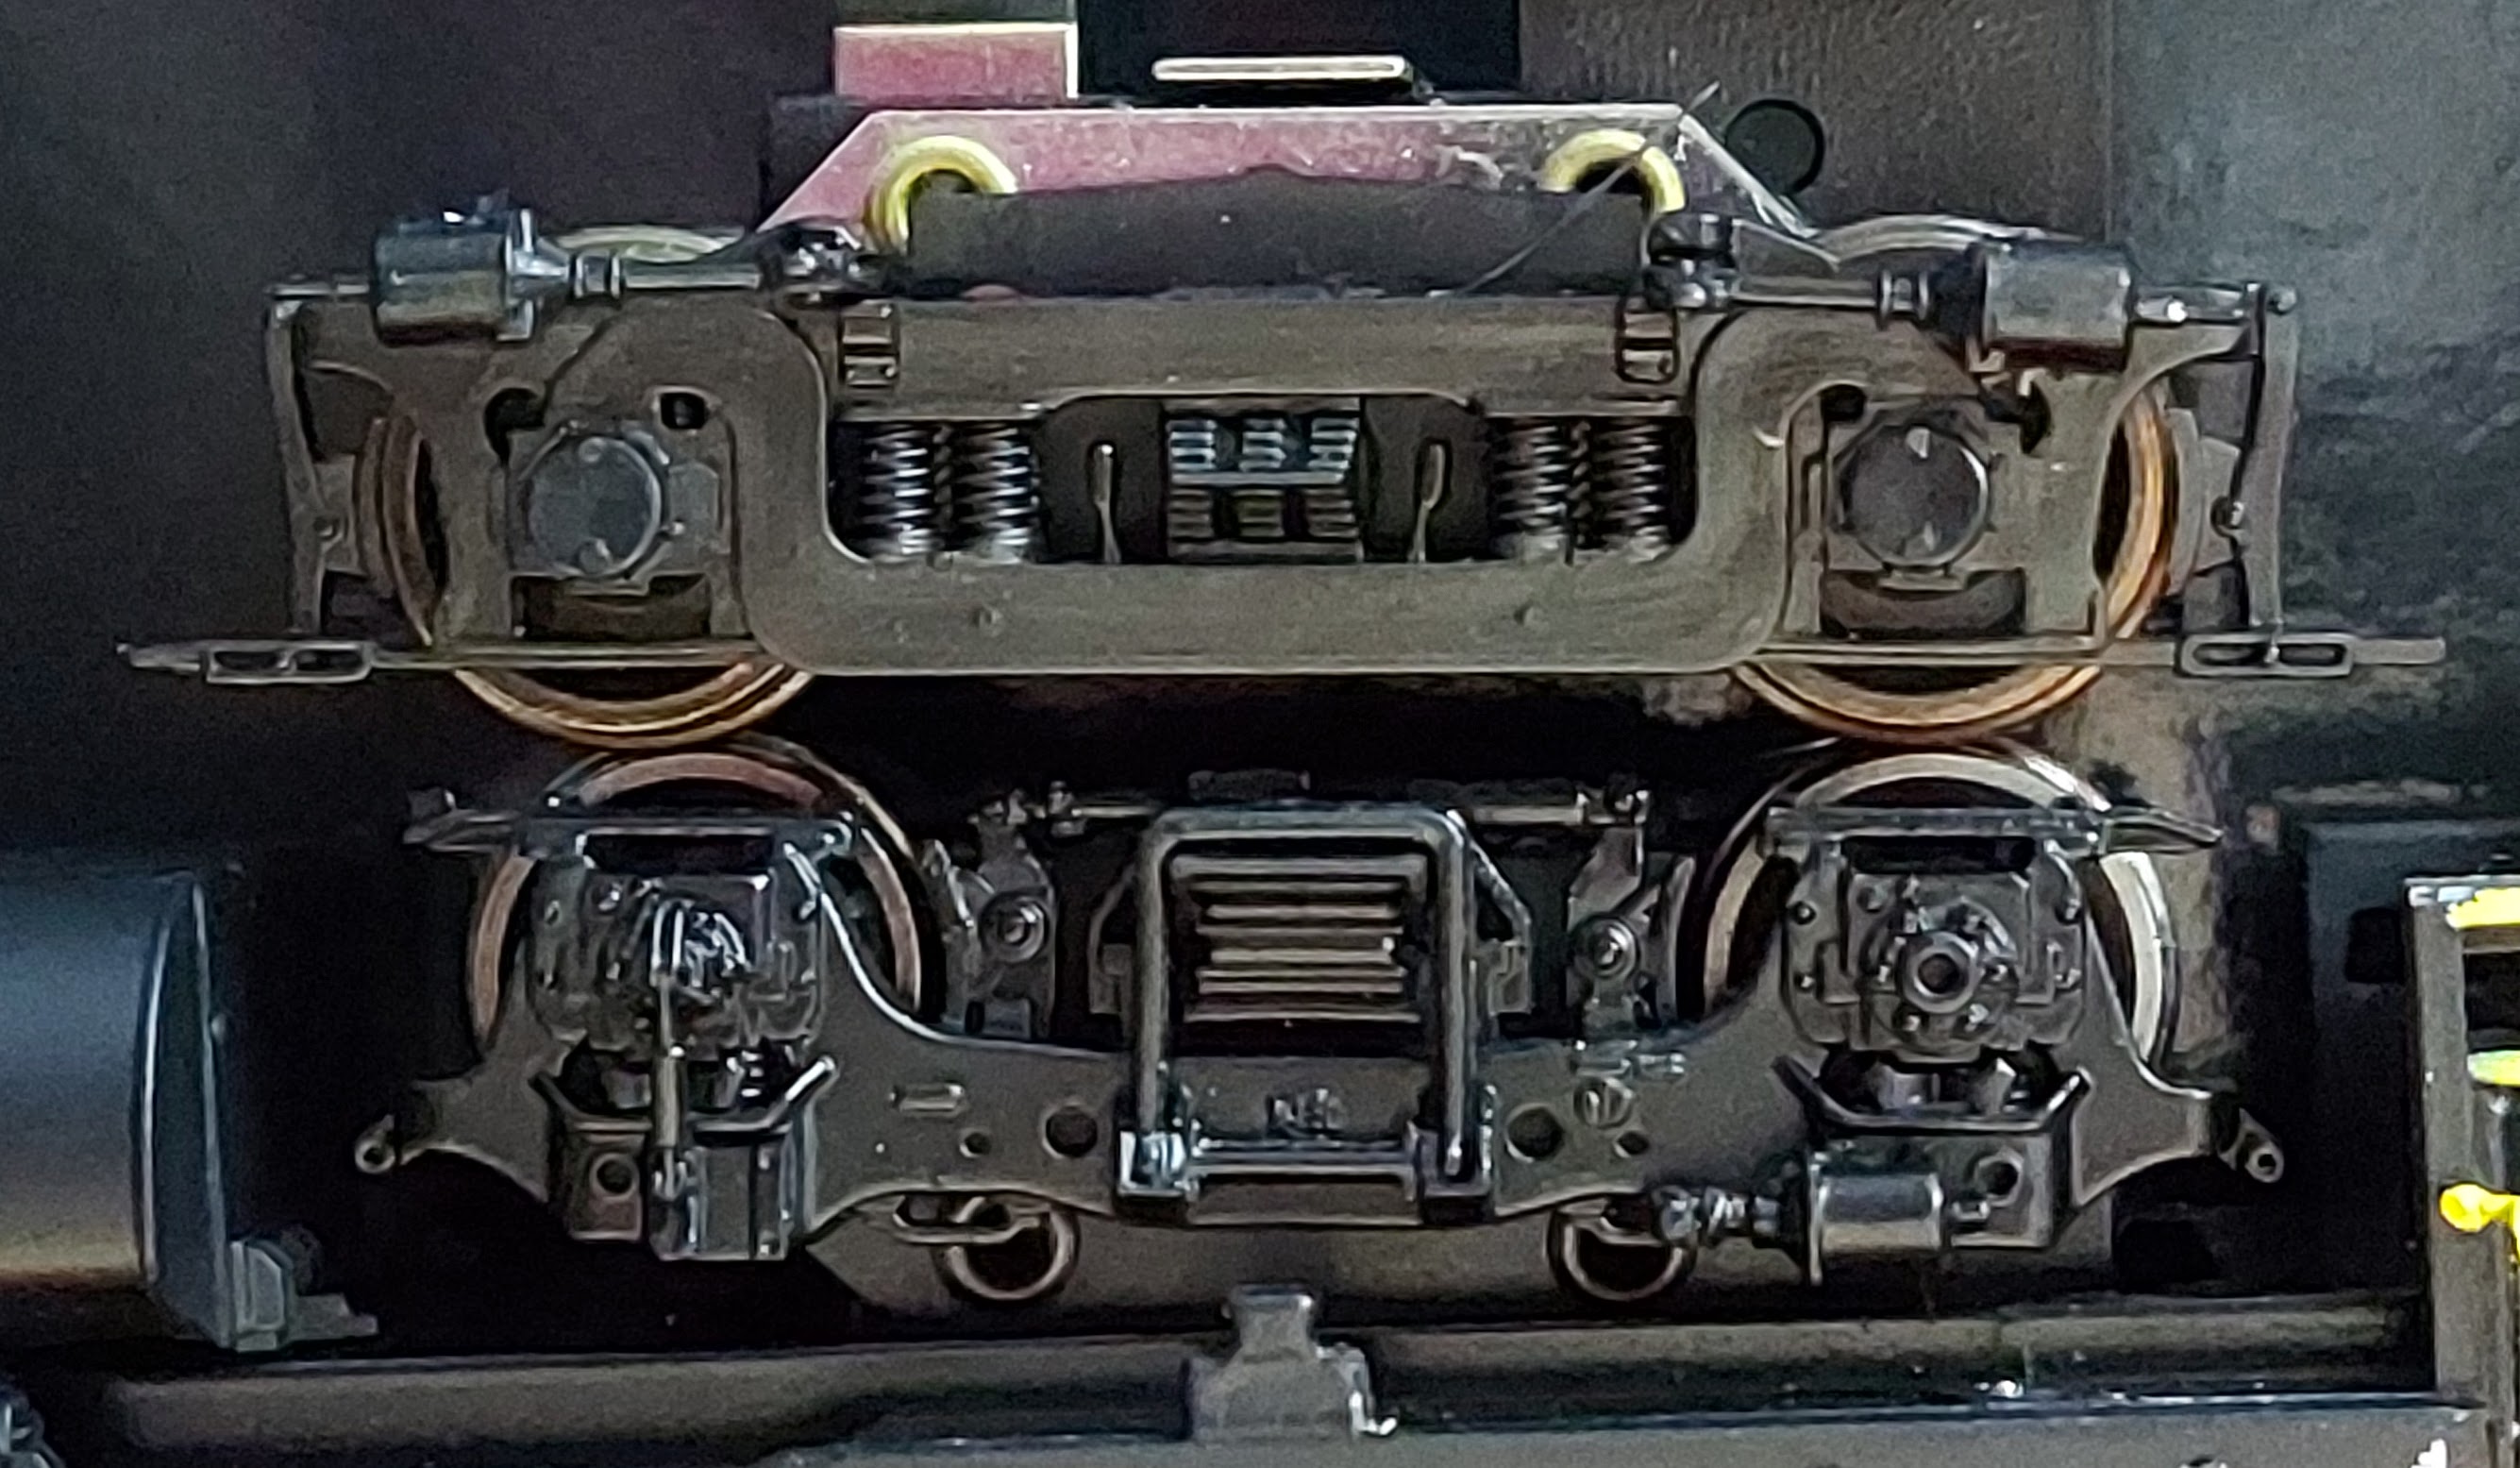
Blomberg trucks vs. AAR B trucks; Life-Like P2K on top, Athearn on bottom
The FB-2 trucks commonly found on most of the Bxx-7 prototypes have been made in HO scale by Atlas/Kato for the U23B, Atlas (China) for the B23-7/B30-7/B40-8 and now by Rapido for their B36-7. Smokey Valley made FB-2 sideframes designed to fit the Athearn Blomberg truck, but they aren't much to look at and they did not fit the truck very well. So I set about ways to correct this problem by adapting Atlas and Rapido sideframes to the Athearn truck. Atlas parts are generally available either from Atlas directly or other third party vendors but Rapido does not offer parts to my knowledge. However, Rapido made a mistake with their original B36-7 release and put the wrong sideframe variants on some of their models. To correct this they offered anyone who bought one of these models a full set of replacement sideframes. I was able to buy some of the "incorrect" sideframes from Rapido customers and adapt them to the Athearn truck. While these are good solutions to adapt existing parts the obvious solution is to draw the FB-2 truck and simply print new sideframes to fit the Athearn truck or the older Atlas/Kato truck.
The hideous crime against humanity that is the Smokey Valley FB-2 sideframe in the foreground, Atlas in background

3D printed adapters for mounting the Atlas/Kato FB-2 sideframe on Athearn trucks (these also work for Atlas China parts)
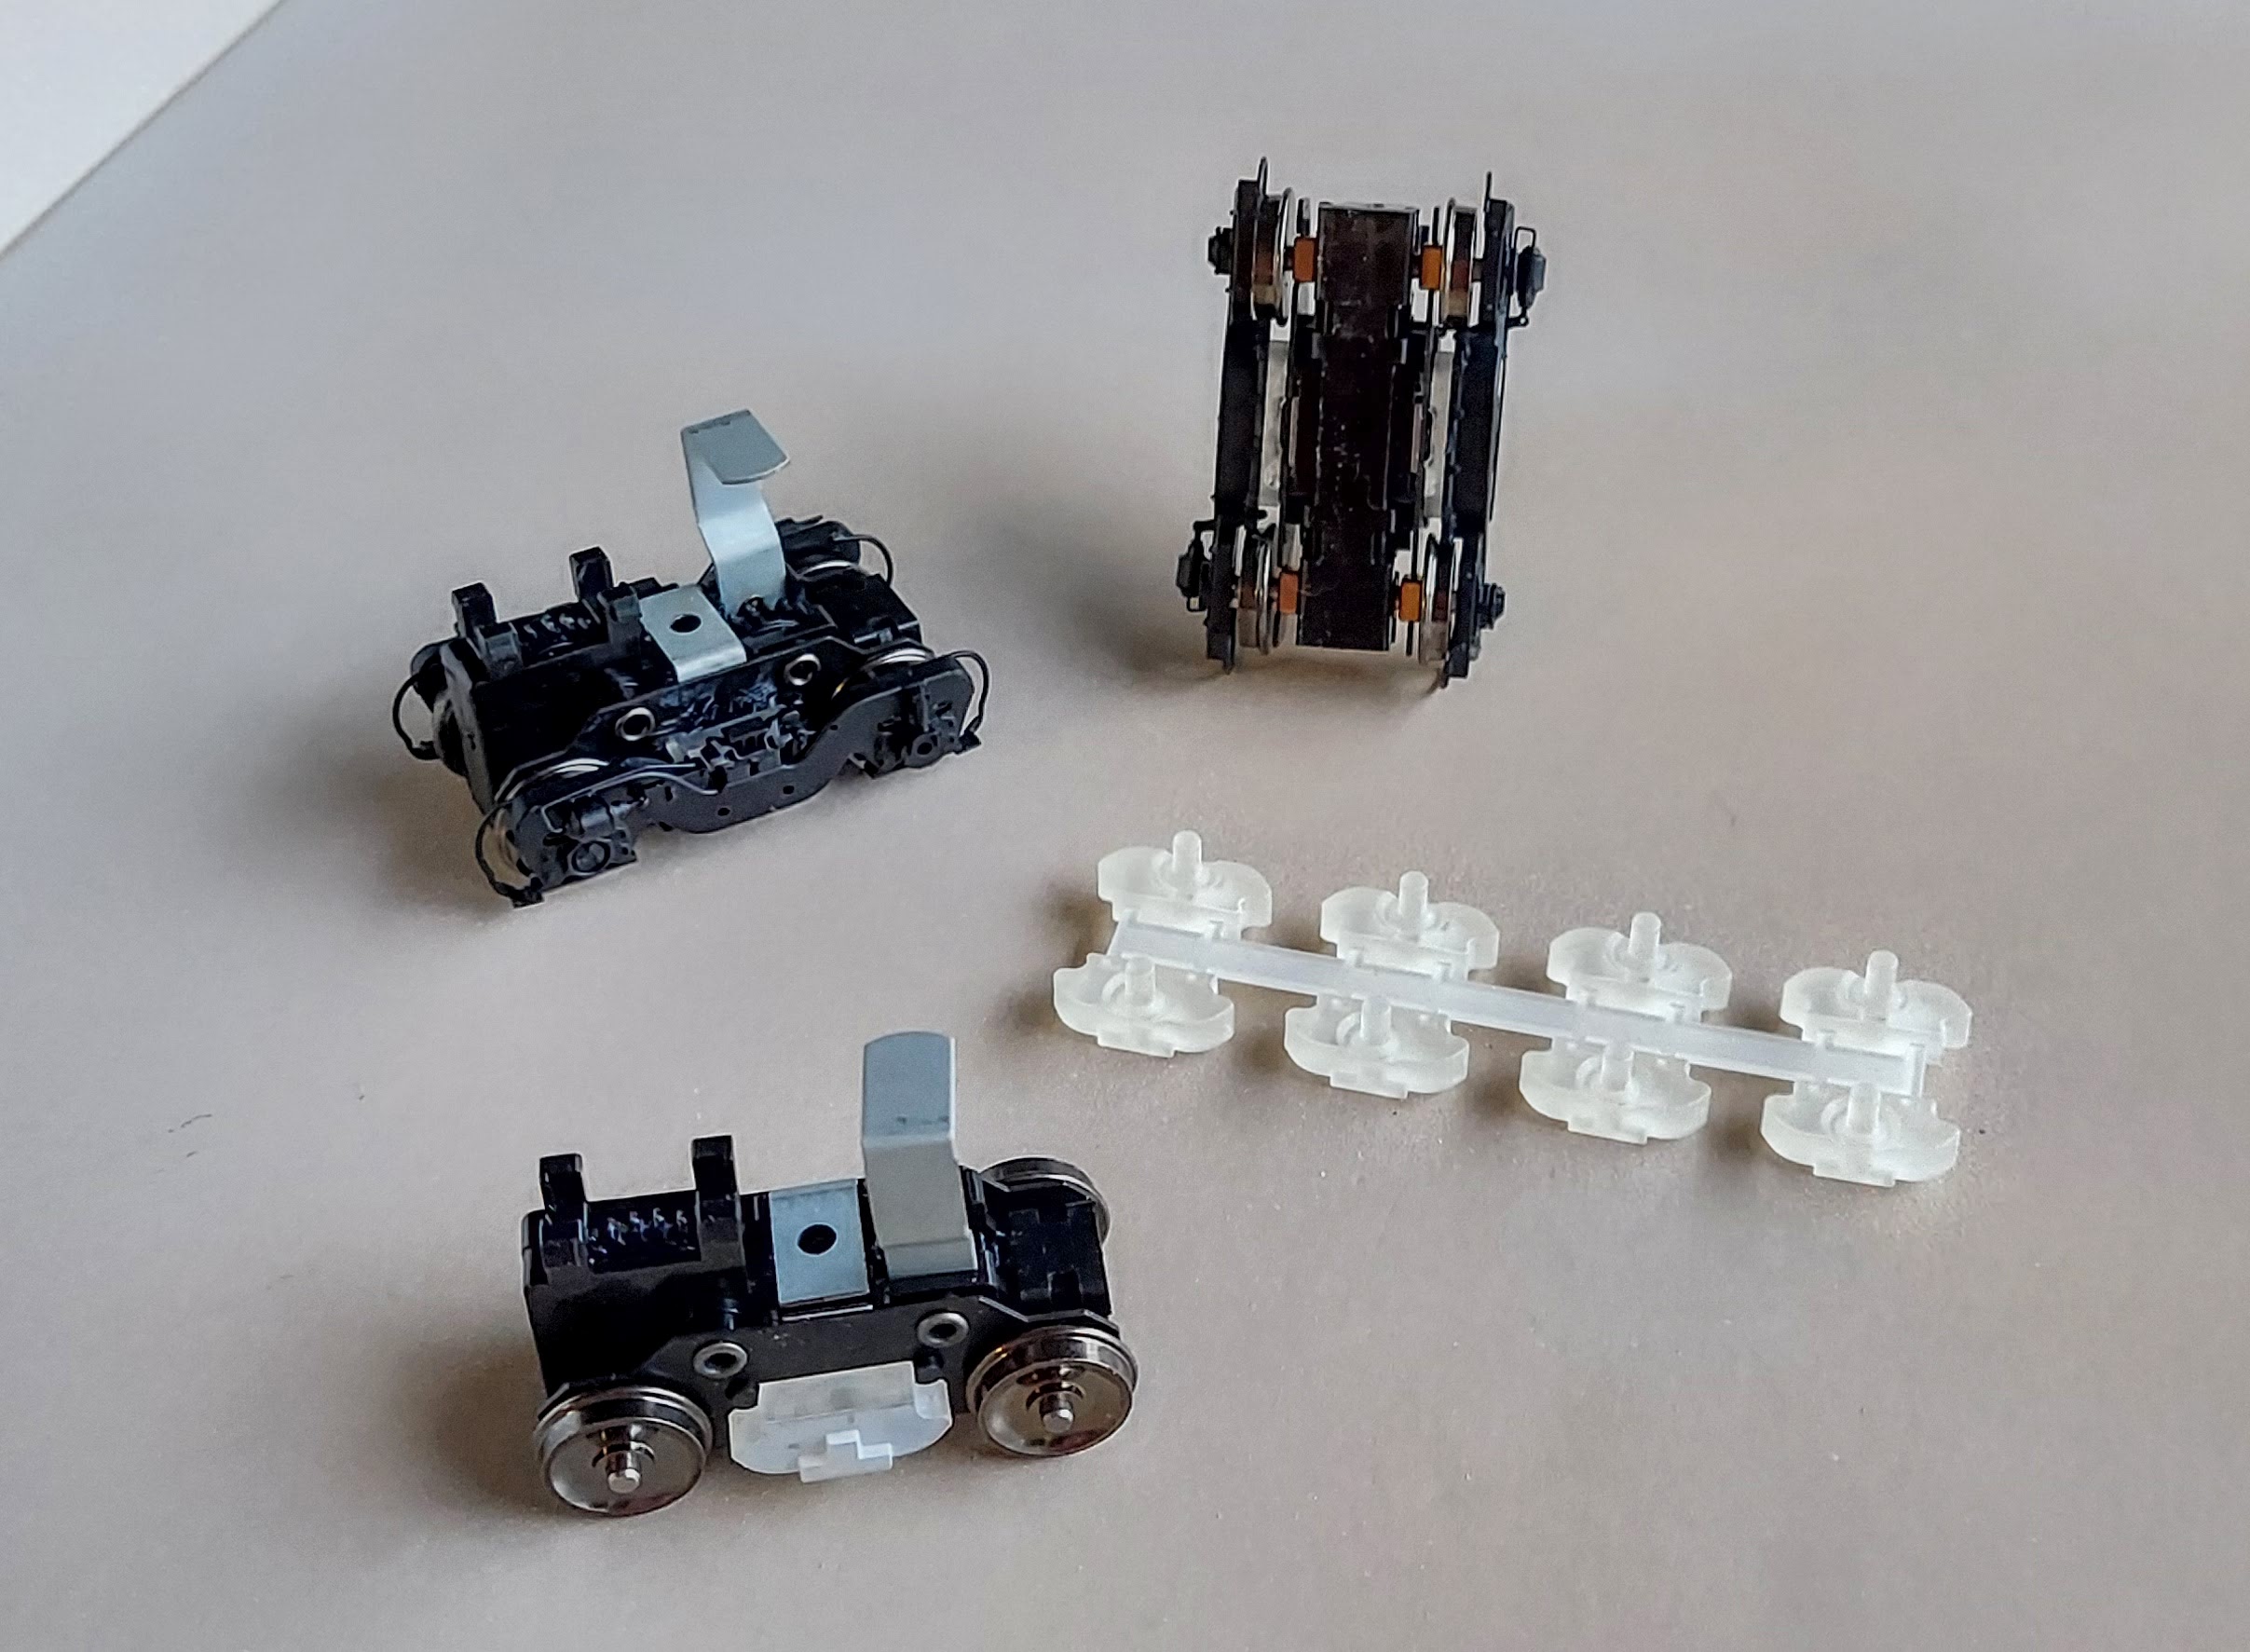
3D printed adapters for mounting the Rapido FB-2 sideframe on an Athearn truck
The Hood
The long hood and nose are the other parts I'm replacing. These are intended to fit the Atlas sill and (until recently) reuse the radiator parts. As I mentioned above an improved radiator part is now being tested to fit the KV Models etched grille.
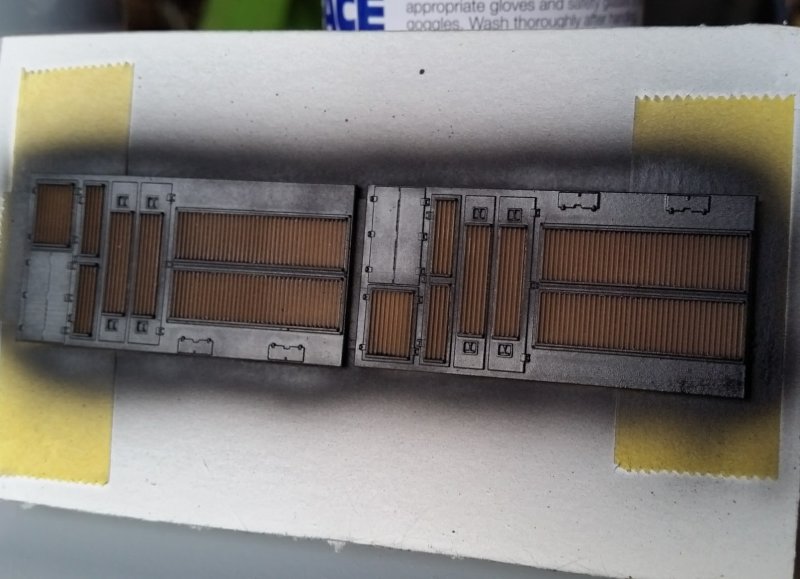
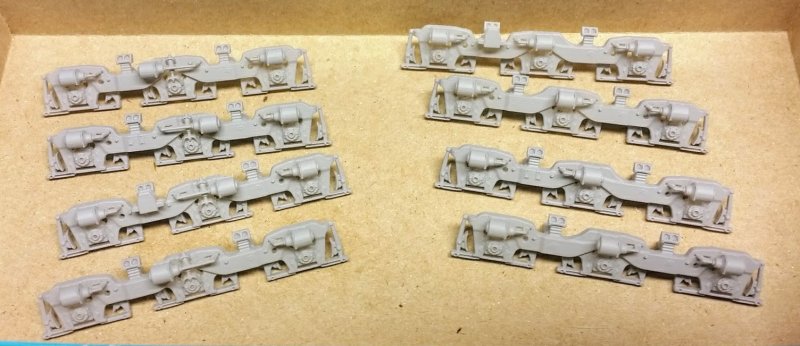
When I originally started printing through Shapeways I learned quickly the way to get the best results was to design everything as a flat kit. Flat kits were these awful flash-filled ill-fitting things from the 80s that required more work to get usable parts than it did to actually assemble the kit. But the flat kits I've designed and received from Shapeways are nothing like that. If I must heap praise on Shapeways it's for their ability to deliver parts printed exactly the size and shape designed. When I've found a part that didn't fit as intended it turned out I made a mistake in the design. The flat kits I've printed at Shapeways go together exactly as designed and the parts fit quite well whether it's a caboose body or a B30-7AB shell.
Where I've had a bit of trouble with Shapeways is printing large flat parts. There is a tendency for larger parts to warp so I found that breaking flat kits down to smaller interlocking segments helped keep things square as the kits were assembled.
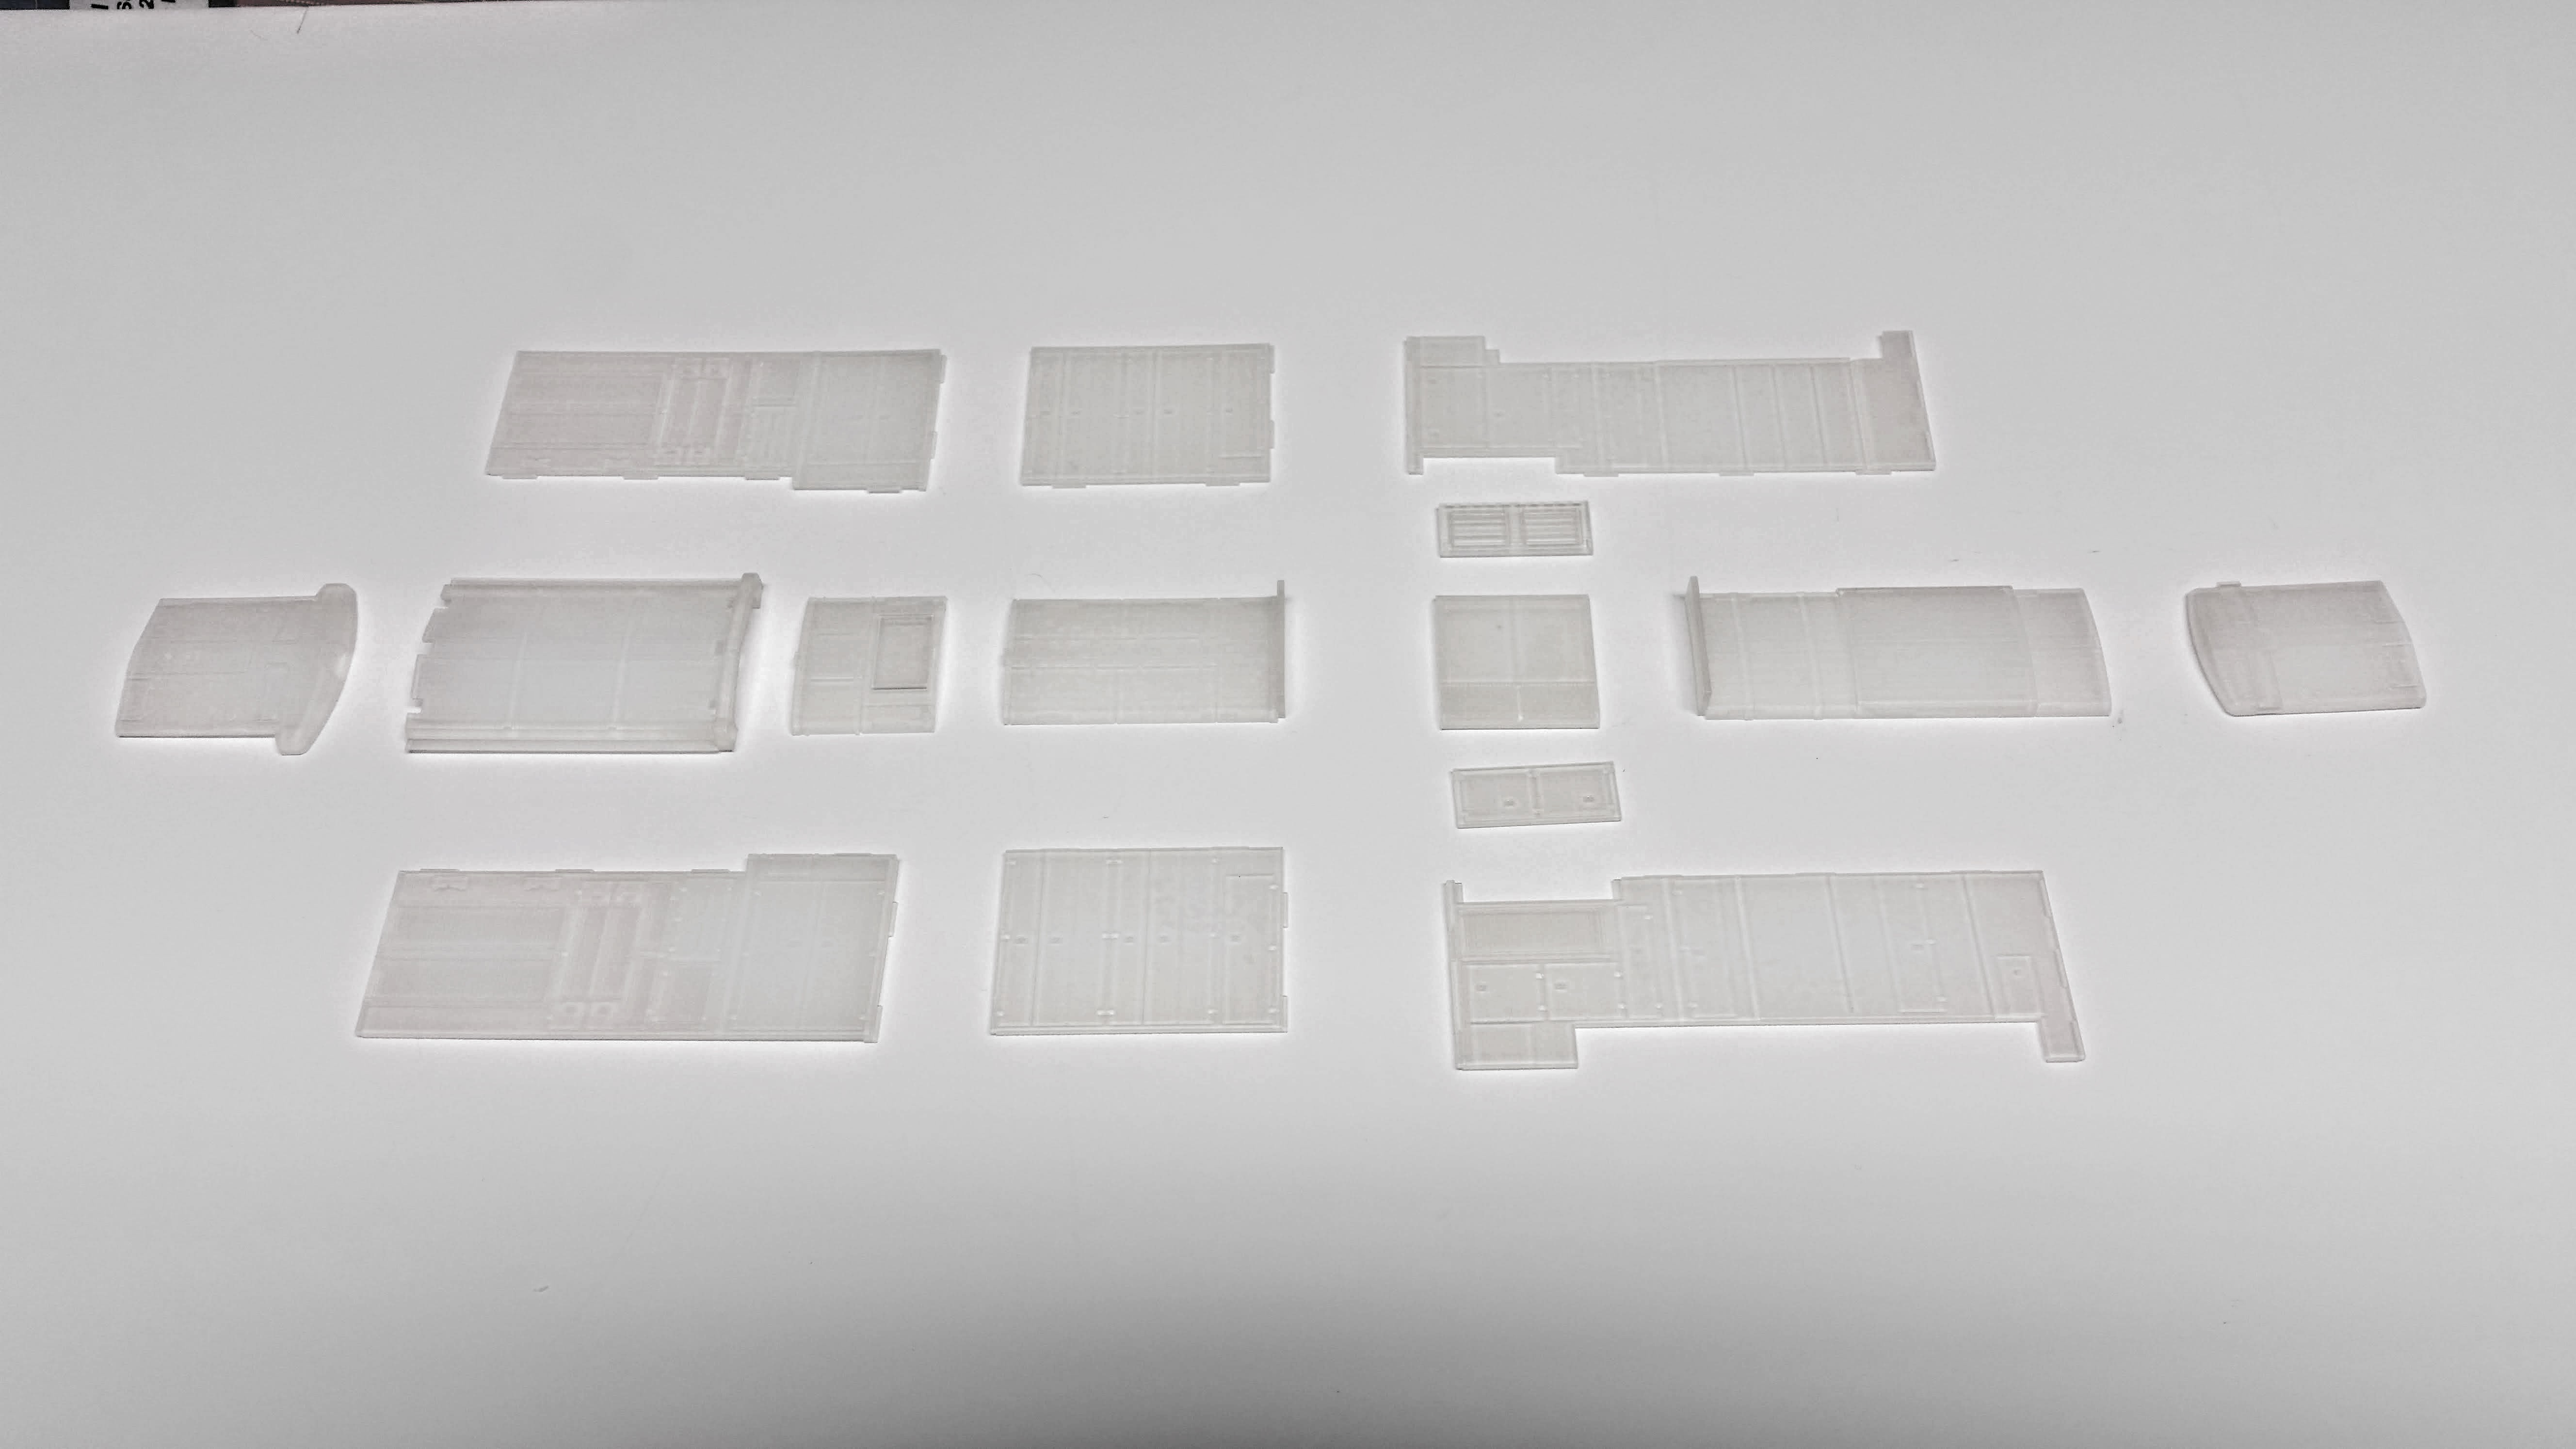
B30-7A1B body kit printed by Shapeways
B30-7A1B body kit printed by Shapeways assembled on modified Atlas sill and custom frame
The other problem has always been the price. These kits are not cheap. And after printing in resin the Shapeways acrylic material leaves a lot to be desired in terms of the finish. So the natural progression of the flat body kit is the one-piece resin printed body shell.
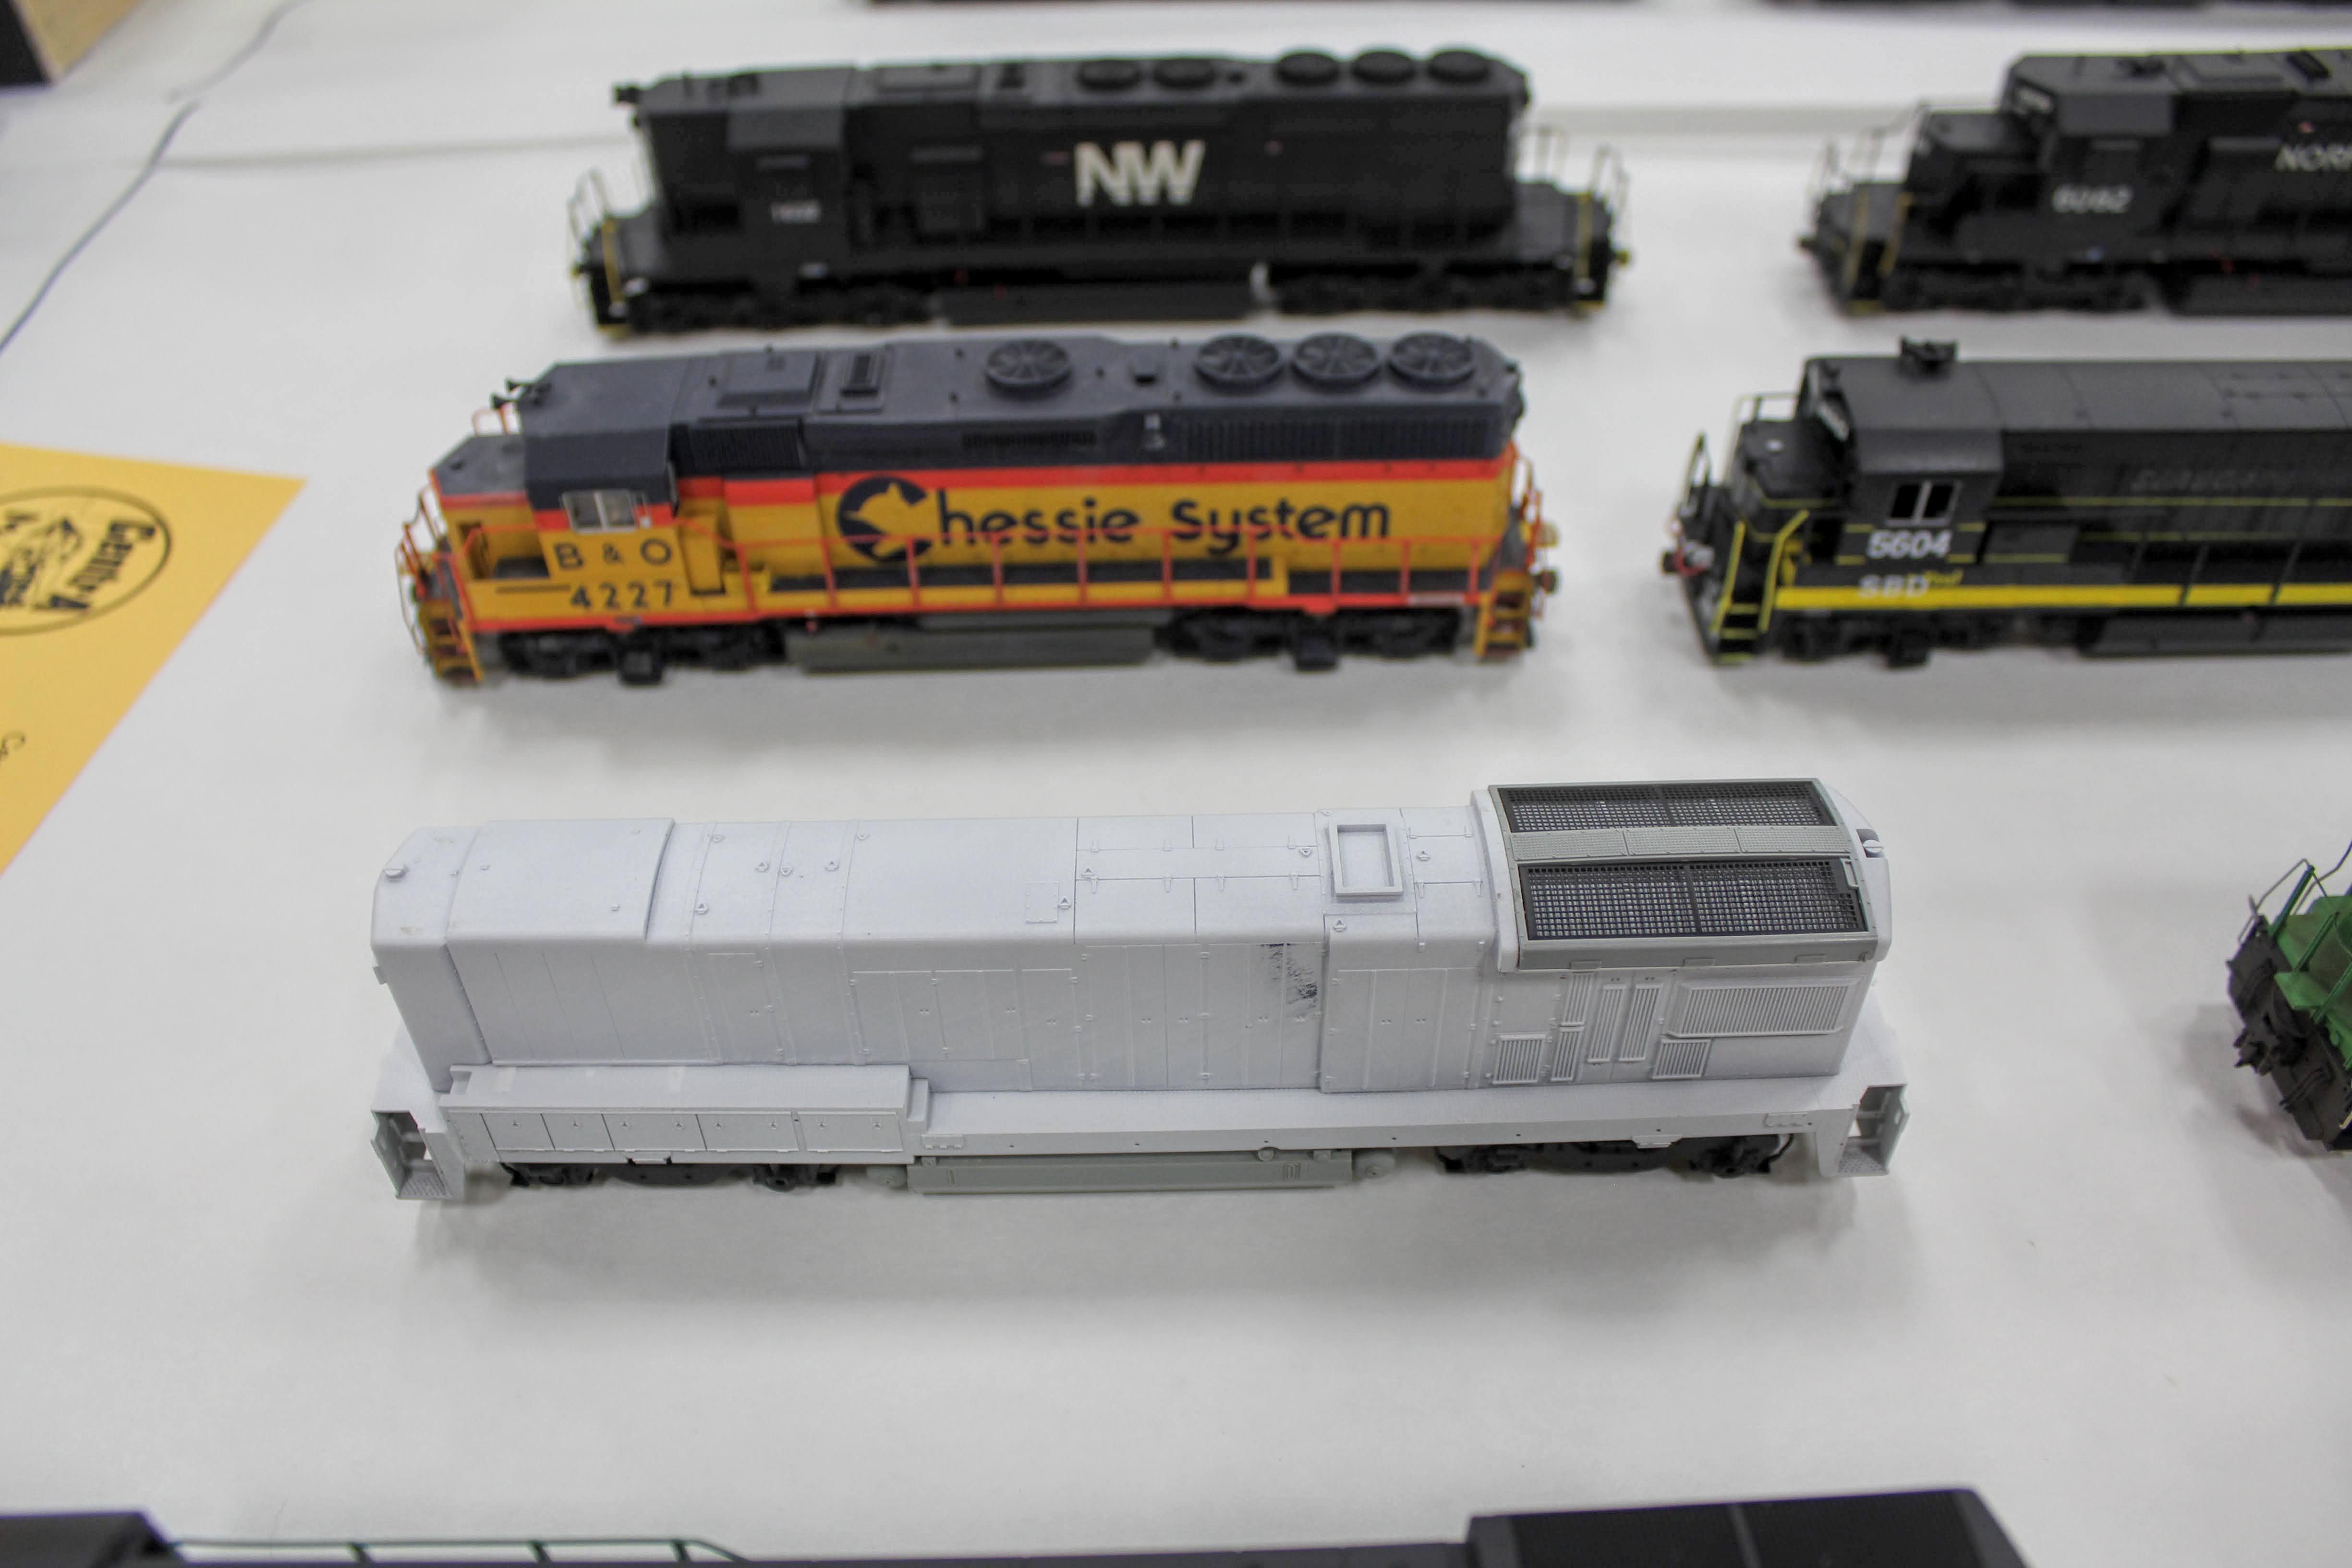
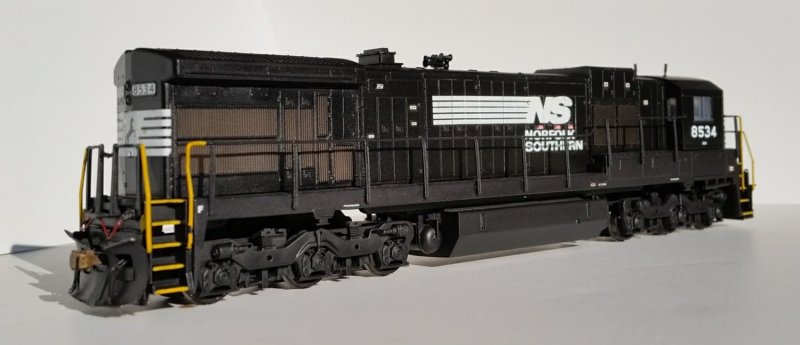
B30-7AB body shell printed by MP Scale Models on modified Atlas sill and custom frame
Like the Shapeways kits some effort must be made to avoid warping but the ease of construction and quality of the finish makes that trouble worth the effort.
With GE models in particular there are so many detail variations within the different phases that it's cost-prohibitive to make every detail for every prototype. Rapido found themselves embroiled in a controversy over a stepwell variation specific to Seaboard when they promised accurate B36-7 models but ignored that variation because tooling up a separate sill part was too expensive. This doesn't have to be a concern with 3D printed parts. In fact, ifwhen there's an error or mistake made in the model it doesn't have to be forever. It can be easily corrected and new parts printed. No expensive tooling must be thrown out and replaced at a great cost. I have made my own share of mistakes (and then some!) but when I catch them I fix them.
This B30-7A1 nose looks great against the cab, but it's too short and forces the cab too far forward. No sunk tooling costs to absorb and no errors to live with. The CAD file has been revised and a replacement is headed for the printer.

B30-7A1 cab and nose printed by MP Scale Models on modified Atlas sill
...but why male models?

You serious? I just told you that a moment ago.
For somebody who's not reinventing the wheel, it sure seems like there's a lot of reinventing going on. There may be something to that. The fact is, the more I looked at the Atlas Bxx-7 model the more I found to improve. There's no need to address the drive or the trucks, the cab is pretty good and the sill, steps and handrails are just fine. And the Rapido model, while it's an improvement in many ways over the Atlas model, it's expensive and doesn't give many options for modeling other Dash 7 variants (yet).
But probably the biggest motivator is the cost. If I want to build any of these models I have to start with a powered Rapido model plus a pile of 3D printed parts or I can start with a pile of Atlas parts and a pile of 3D printed parts plus a motor and some trucks. Atlas parts are still cheap but the cost of the 3D printed parts is coming down while the quality keeps coming up. There's not much I can do about the cost of motors and trucks, but it's easy to find good deals on used models on ebay, train shows, swap meets, Facebook and so on. There's no reason why the guts of those used models can't be adapted to a new model.
So that's the future for now: keep on making drawings, making better parts, adapting the 3D printed parts to the good stuff that's out there already. I don't see myself making ready-to-run models out of this adventure. I may not even be able to offer complete kits. But the concepts behind this mess of cut up models and printed parts are viable, repeatable and scalable so that anyone with the right tools could do it.