Showing posts with label vehicle. Show all posts

Saturday, January 7, 2023

Dumps, Pups, Flat-decks, Ragtops, Gensets, Chassis and Cans

Ah, vehicle models! The unsung heroes of the model railroad landscape. The supporting cast backing the stars of the show. As scenery or even loads these models seem to get far less attention. Let's face it: most modelers are willing to let anachronisms, detail inaccuracies, and even a lack of detail go just to have a reasonably close version of a particular vehicle model.

There are some who look at the vehicle models as the real stars and the trains are just the backdrop to the action on the highway. In other scales these modelers tend to be separate from the railroad modelers; only in HO scale would these folks be considered a subset of the larger model railroad hobby. But there are many who push the limits and take HO scale vehicle modeling to the forefront.

For me the Athearn Freightliner cabover kit was a great introduction to HO scale vehicle modeling. It was very cheap compared to the giant 1/25 scale models and though it was a simple model it was proportioned beautifully. I remember clearly the first time I saw Leonard Frere's models in the HO Model Railroading Handbook:


The heritage of that daycab Freightliner straight truck and trailer was obvious: Athearn's tractor and Fruehauf reefer van models. The creativity behind this kitbash started me off on a path of bashing my own models as a teenager. To this day it almost depends on which way the wind blows whether I'd consider myself a railroad modeler first and a vehicle modeler second or vice versa. For the past few months it's been decidedly skewed toward vehicle models.

Dumps

At the inaugural Texas Railway Modeling & Historical Society prototype modeler's meet in June 2021 I got to meet a bunch of local model railroaders of the same stripe as me: guys who not only count rivets but measure them, people who are experts in their field of interest, folks who design and build and paint and print their creations. 

I met Marshall of MP Scale Models who had several N scale models displayed that he 3D printed. These were resin prints that were so much smoother and more finely detailed than the acrylic prints I'd been getting from Shapeways. It turns out he lives close by and we have some common interests in prototypes that bridged the divide in scale. Soon the conversation turned to printing my designs and he felt confident he could print the trailers I asked about. A few weeks later he handed me this:

1979 Fruehauf 32' Dump Trailer kit fresh off the printer


I took this photo as soon as Marshall put it in my hands. I could already tell the material was so much smoother than what I could get from Shapeways. The extended hydraulic ram was straight and the wheels looked amazing.

It didn't take long before I had the parts primed and assembled. Here it is in the raised position then with the hydraulic rams swapped out in the highway position.


A similar truck and dump trailer at Flynn Yard in Oklahoma City


Although these aren't cheap to print, Marshall was able to give me a much better price than I could from Shapeways. And the quality difference is just ridiculous, truly on another level. These prints are gorgeous! 

Shortly after I printed these first samples I found the elusive 39' version of this dump trailer for sale on an auction site. The photos weren't great but they were good enough for me to count the ribs and confirm that lengthening the trailer would be a simple slice and dice. In no time I modified the CAD file to model the longer version of this kit. 

When I wrote the instructions for the dump trailer kit it occurred to me many modelers will want to assemble the model with the bed lowered in the highway position and won't want to go to the trouble to make the model positionable with interchangeable hydraulic rams (sorry, I can't get those to operate!). So, to speed up the assembly of trailers that will only ever be in the highway position I came up with a variant that is printed in six parts: four tire/wheel parts, one spring suspension part and one "everything else" body part:

The "one-piece" 39' trailer model with unpainted tires

Pups


After this success I had to try a few other ideas out, and none was more exciting to me than the bullnose pup trailer. When I first drew these and uploaded them to Shapeways I was so excited. But then I saw the price. Outrageously expensive! Unfortunately it was to the point where I could maybe have one or two, but a warehouse dock full of them? No way. 

The worst part was I'd made a few mistakes in that first draft and the model needed to be repaired manually. I fixed the wheel wells and the position of the rear axle but I couldn't do much for the fact that it's a scale foot too short. Ouch. Here's the first Shapeways print with my custom decals printed by FedEx Office 😮😁 and the revised version printed by Marshall below:

3D printed flat kit from Shapeways, warts and all


First print from MP Scale Models


The basic bullnose trailer drawing was based on a wedge pup built by Trailmobile, but with a few minor changes it could fit in with prototypes built by Road Systems, Strick and Evans Monon among others. Motor carriers who operated these bullnose trailers include: Transcon, Pacific-Intermountain-Express (and successors Ryder/P-I-E and P-I-E Nationwide), ANR through Garrett Freightlines and Graves Truck Lines, Brown Transport, Consolidated Freightways, Roadway Express and Santa Fe's SFTT. 

Naturally there were differences between the versions each of these carriers had and for those with larger fleets there were even differences within the fleet. So it wasn't long before I found myself cataloging these options of noses, sides, wheel well cutouts, doors, pintle hooks, taillights, suspension and landing gear. I figured the easiest way to break these variations down was to print the doors and floors separate from the body, that way those parts could be combined with each other to form unique models.

The basic kit


Here are some examples of variations on the printed models:


I was talking with my friend Bob of Masterbilt Models about the possibilities with these variations, how it reminded me of when I'd take the girls to the mall and they'd come home with a stuffed animal they chose and helped make. A modeler could select a door, a floor, the body and the type of wheels for a trailer they wanted to model. The idea for Build-A-Pup was born.

This same idea can be extrapolated to other trailer designs and I've got a few in the works. Fruehauf trailers have always been fascinating to me since I was a kid building 1/25 scale models. Those AMT kits seemed to have every variation Fruehauf made covered in model form back in the 70s and 80s, so it didn't take long to become familiar with those details that made a Fruehauf trailer stand out. After drawing up so many bullnose pups I moved on to drawing Fruehauf wedge and straight-floor pups. I've only just printed out two examples, but like the Trailmobile pups the possibilities are practically endless.


All done except for the wheels


The Roadway trailer is 102" wide and it's the first one of the wedge trailers I've widened from the 96" wide CAD file. After applying the Microscale decals and seeing the columns of rivets relative to the lettering the mistakes I made cutting and splicing the CAD file are obvious. That's always how it goes!

The Central trailer represents a prototype cut down from a 40' x 96" Z-van trailer for P&D service. Bob had the Central decals made and they look fantastic.

Flat-decks and Ragtops


This brings me to flat deck trailers. Thinking back to those AMT kits there were some really cool flats including one that telescoped into a long version for oversize loads. While searching for photos of those online I stumbled across some more straightforward Fruehauf designs. The basic trailer is the same but the suspension setup can be changed from a fixed spread to a sliding tandem. Fruehauf used modular suspension components to build up both their fixed spread and sliding tandems so once I had the components drawn I started "assembling" them. The shape of the components changed over time from an early triangular shape to the later spade shape. 

Late sliding suspension 

Early fixed spread suspension 


Another project I just had to take on was a staple in the TOFC fleets of old: the ragtop van. Again, the Fruehauf version was a no-brainer for me since I'd drawn the body elements for the Fruehauf pups and the frame and suspension parts for the flats. This one is crying out for Santa Fe or Rock Island decals:


Gensets, Chassis and Cans


Speaking of decals (and realistically this deserves its own post so I'll work on that), I was all set to order some decals for these trailers and some other vehicle details last year. I had begun putting together a package illustrating the details I wanted captured in the artwork and some examples of the fonts and things that would be needed to complete the artwork. While describing this project to Marshall he suggested I try to create the artwork myself in Inkscape, a free vector software, that way I could get the details I wanted without having to iterate the design with a third party (in other words, save some dough!). 

So I downloaded Inkscape and started watching some tutorials. In no time at all I had some finished artwork and began working with Bill at PDC to print the decals. So what you see above on the bullnose trailers is the result of that process. I not only was able to create the artwork for the models on my terms and to my specifications, but I also found that I really love drawing decal artwork and creating fonts. Who knew?

Learning how to make decals has opened up some projects I've wanted to do for ages. Honestly, now I have more things on my plate than I ever expected. But that's a good thing. First of all, reefer containers and more importantly, reefer containers filled with tropical fruit. Those little clip-on gensets keep the reefer units powered to keep the containers cool in transit:


These little guys had been on my list for a long time. After finding some repair manuals with isometric drawings I was able to create a CAD file. Decals soon followed.


You can get Con-Cor and Walthers reefer containers lettered for Dole and if you're lucky you can find the Microscale Dole container decal set. Likewise, if you look you can find the Con-Cor container lettered for Chiquita but they are not easy to find. So I decided to correct that problem and make my own Chiquita container decals. 


A few months later and I had created artwork for Dole containers. 


3D printed gensets and some Chiquita containers with custom decals


But that wasn't enough, because Dole containers typically move on Dole's own Fruehauf chassis with gensets mounted below deck, so of course I had to draw the gensets...


...then the Fruehauf chassis...


...and finally a Fruehauf standard height reefer container:


This one will be much closer to the real thing than my stand-in made from an American Limited chassis with printed genset and fuel tank and a Walthers hi-cube reefer container:


Going back in time a little bit, around the time I printed the Fruehauf dump trailer, I had also printed this Gindy container chassis, based on photos posted by Ed Sutorik. This chassis helps add a little variety to the fleet with something that's appropriate for the 70s through the 80s. It doesn't hurt that they're fairly inexpensive to print, too.


3D printed Gindy chassis in foreground, American Limited chassis in background


Gindy chassis, Walthers container and ThermoKing clip-on genset


The Gindy chassis and the Fruehauf chassis share some of the same bones, but there are some real differences throughout. It's the same with the bullnose trailers and the other pup trailers. Those little differences really make the difference. The takeaway is that I can dial in any variation I want to draw and I can print it. 

Any variation? Why not? 

Well, it's actually kind of the opposite problem manufacturers have when they cut tooling. They are trying to find the most common variants to model so that the tooling can be used across a variety of paint schemes. Many times little compromises have to be made, such as the double row of rivets on this prototype can't be modeled or the different step wells on that model can't be done. 

With manufacturing on demand that's not a problem. But where it starts to get out of hand is having dozens and dozens of variations. Chasing down every esoteric detail, defining them and describing them on a model-by-model basis might be asking a bit much. In the case of these containers, chassis and trailers, some things just have to be let go or the project will never end. It truly can spiral out of control.

I can't help but feel optimistic about this endeavor. It's easy to say the possibilities are endless with 3D printing, but... And there's always a "...but" in these discussions. But for an aspiring cottage industry manufacturer -- today's equivalent of yesterday's one-man resin casting shop -- the technology is finally good enough. Even inexpensive hobby printers can achieve a resolution fine enough to satisfy the most discerning modelers. In not much more time 3D printers will achieve the same or better resolution than expensive injection-molded plastic. 

Another great aspect to manufacturing on demand is the democratizing effect it has. Twenty years ago an aspiring designer had to apprentice as a toolmaker and either be well off himself or be backed by some deep pockets. That's not true anymore. It's possible to design sophisticated models using free software or even old software (ahem, looking at you AutoCAD) on mediocre computers. You don't even have to own a printer -- I'm living proof of that -- but besides those entrepreneurs doing contract printing many libraries have printers available to the public. You don't need an engineering or design background to design 3D models, either. Anyone motivated enough with some basic resources can do it. Like Chef Gusteau says, "anyone can cook!" 

Monday, April 9, 2018

Innovative Intermodal Service

The 1980s saw lots of change on the railroad. The Staggers Act deregulated railroads to a large extent and allowed them to compete with long-haul trucking companies. The Surface Transportation Assistance Act of 1982 allowed trucking companies to run longer tractor-trailer rigs on interstate highways. New crew consist agreements eliminated the brakeman from road trains and a Presidential Emergency Board decision recommended railroads eliminate cabooses. Economic pressures, including high unemployment, stagflation and high fuel costs, forced railroads and carbuilders to get creative in an effort to curb costs.

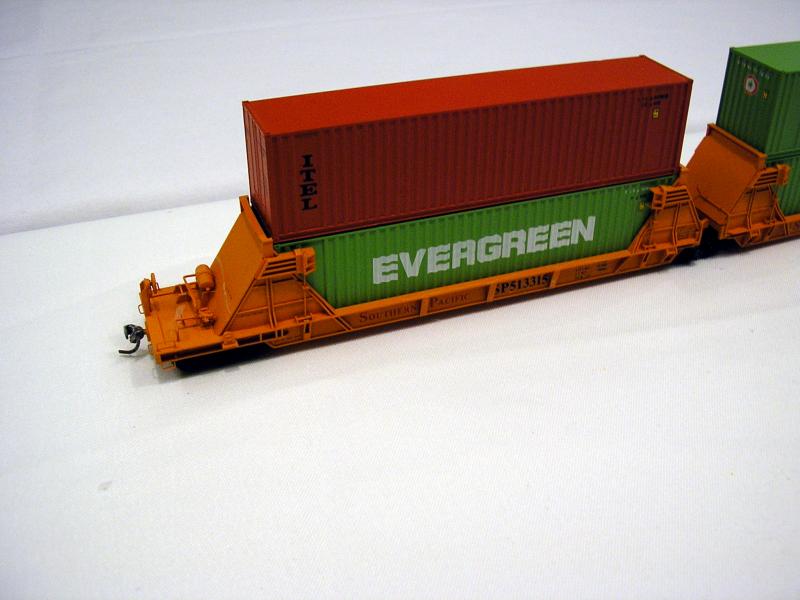
Keith Hapes' beautiful scratchbuilt Southern Pacific ACF five-unit stack car

Some of the greatest opportunities for innovation were in the rapidly growing trailer-on-flatcar and container-on-flatcar services. Longer trailers allowed nationwide meant many existing railcars weren't capable of handling more than one trailer without modification. In the late 1970s, Southern Pacific and American Car & Foundry developed the first car designed to carry two stacked containers loaded in individual wells less that two feet off the top of rail. This development ushered in an entirely new kind of car that has been built by nearly every builder since.

Santa Fe Fuel Foiler from Athearn Impack kits with Trainworx and Athearn trailers

Around the same time, Santa Fe developed the six and later ten-unit articulated "Fuel Foiler" flatcars for carrying trailers. These cars were not like traditional flatcars with a deck running the full length of the car. Instead, several reinforced central spines with a hitch at one end and wheel decks for the trailer tires at the other end were connected with articulation joints over single trucks. The weight savings -- not to mention the fuel savings -- was significant. Santa Fe licensed its design to Itel, who developed it further as the Impack car. Other builders were quick to offer their version of the articulated spine car. Southern Pacific and Cotton Belt were notable users of both four and eight unit versions of the Impack car.

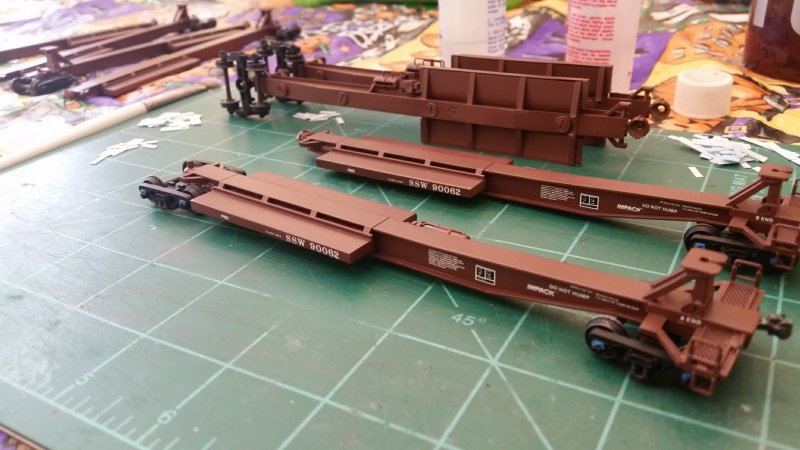
Cotton Belt Impack cars under construction. From Athearn's Impack spine car kit with 3D printed hitches

Trailer Train began a massive program to convert its fleet of 89'-4" flatcars to carry a pair of 45' trailers, with the resulting flatcars known as Twin45s. 45' trailers were being added to the nation's highway carriers faster than these flatcars could be converted, which caused the railroads to seek out their own solutions. At the same time, the decrease of boxcar traffic led to a surplus of boxcars. Southern and Chicago & Northwestern were among the railroads that established programs to convert boxcars to flatcars equipped to carry a single trailer. In addition to boxcar conversions, some of Santa Fe's bulkhead flatcar fleet was modified for TOFC service and some for COFC service.

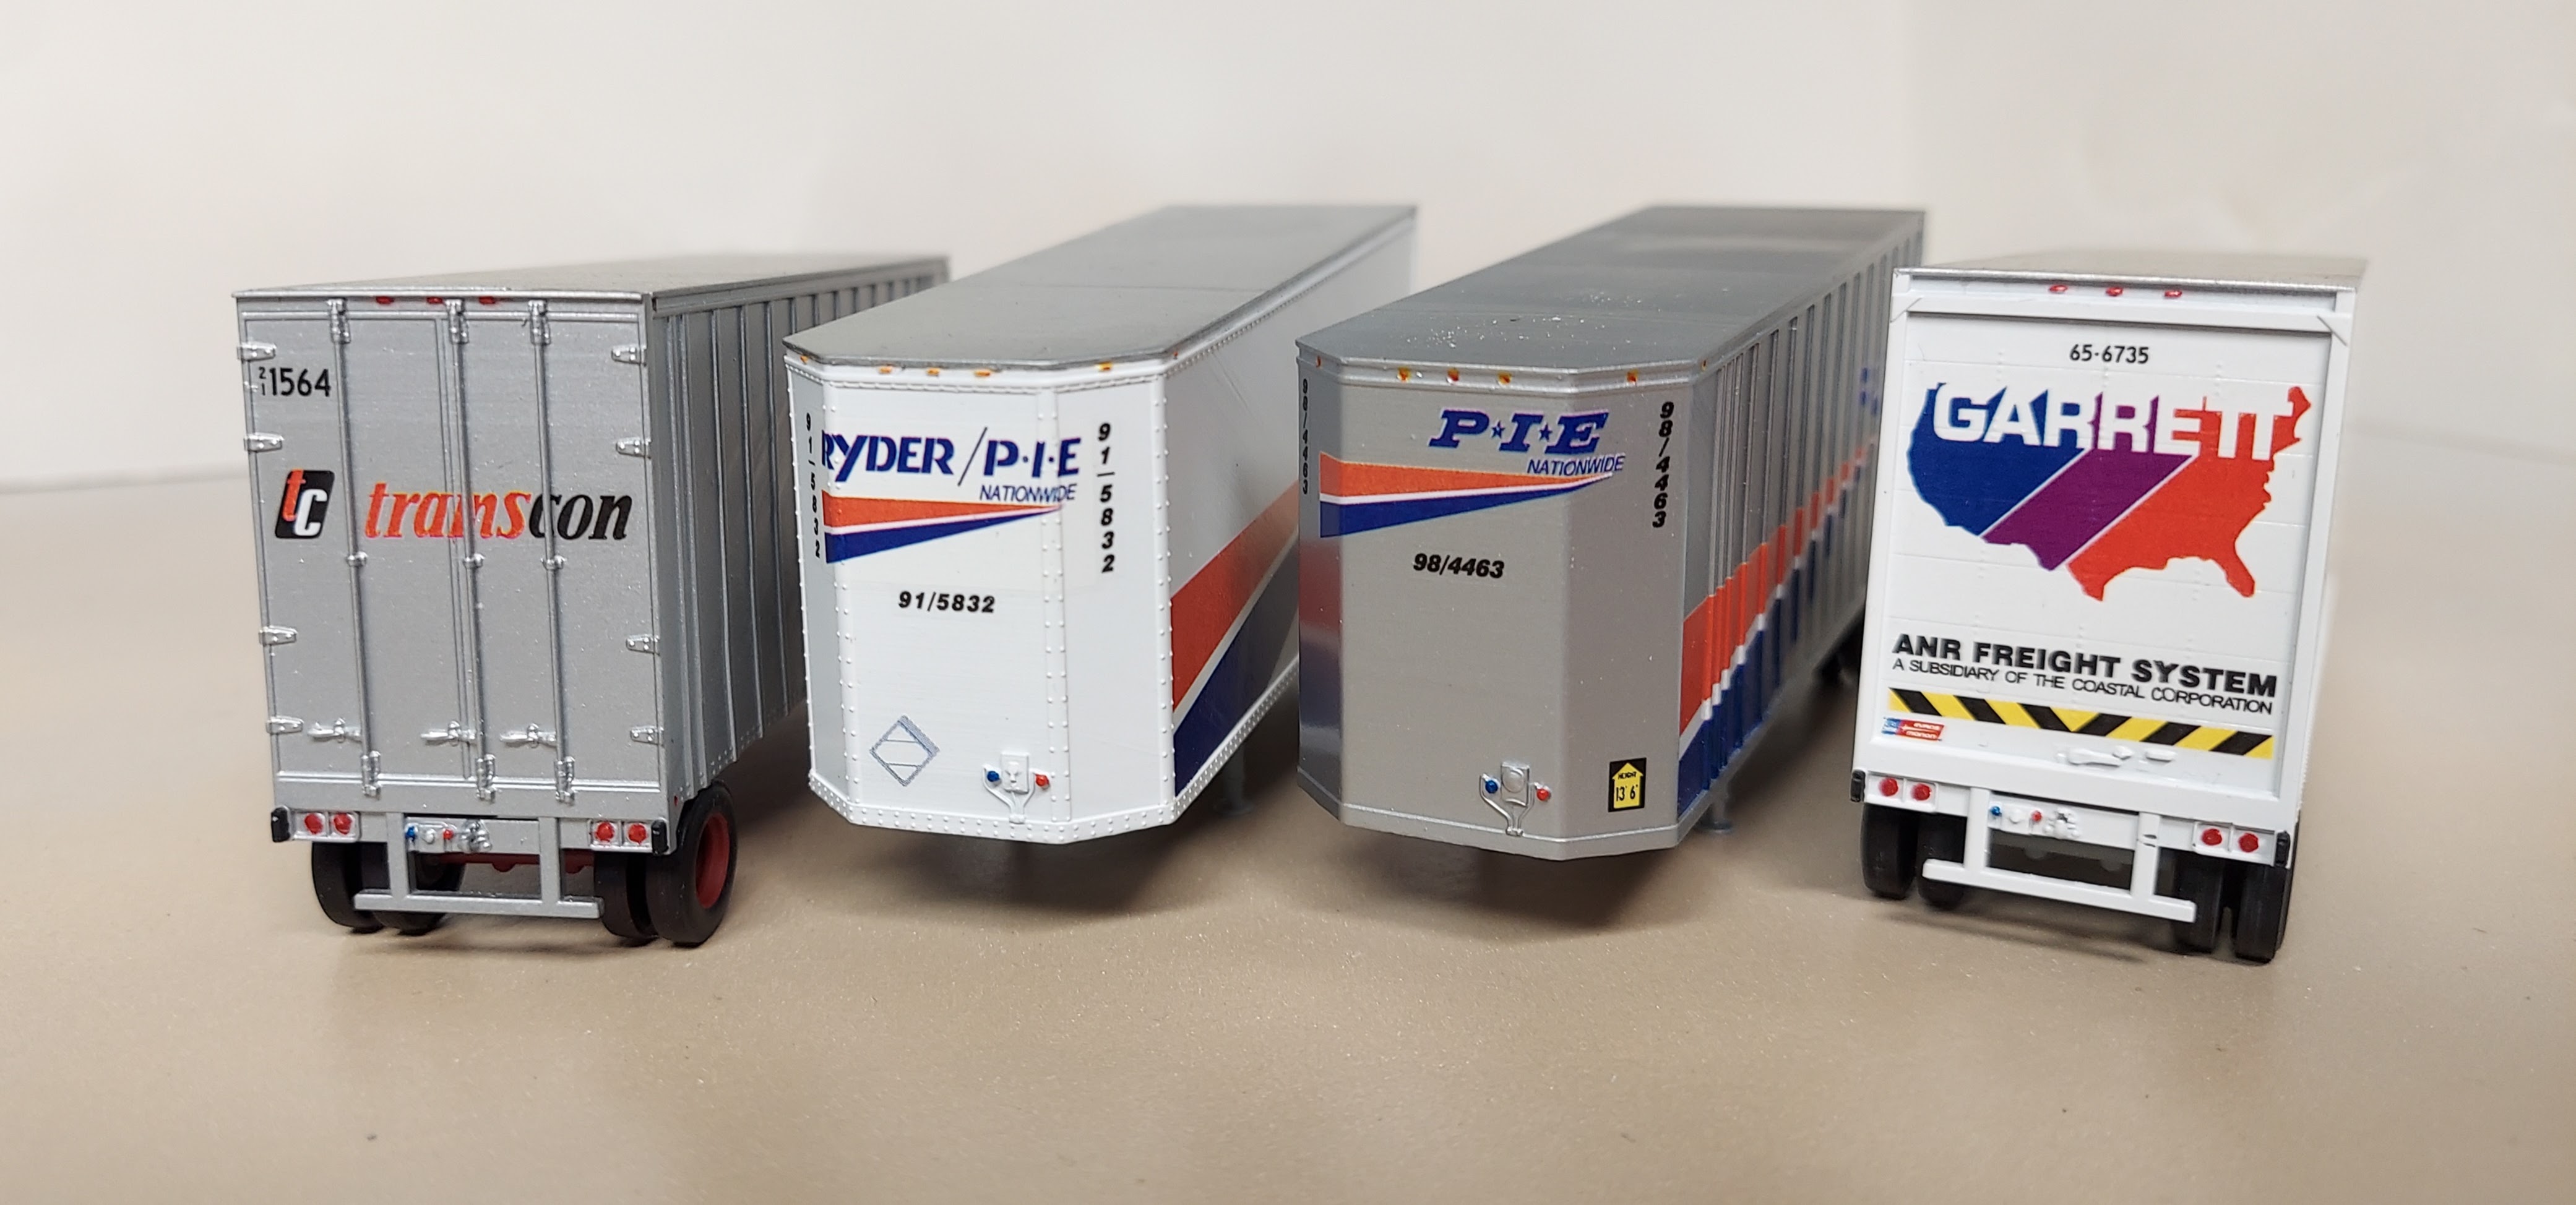
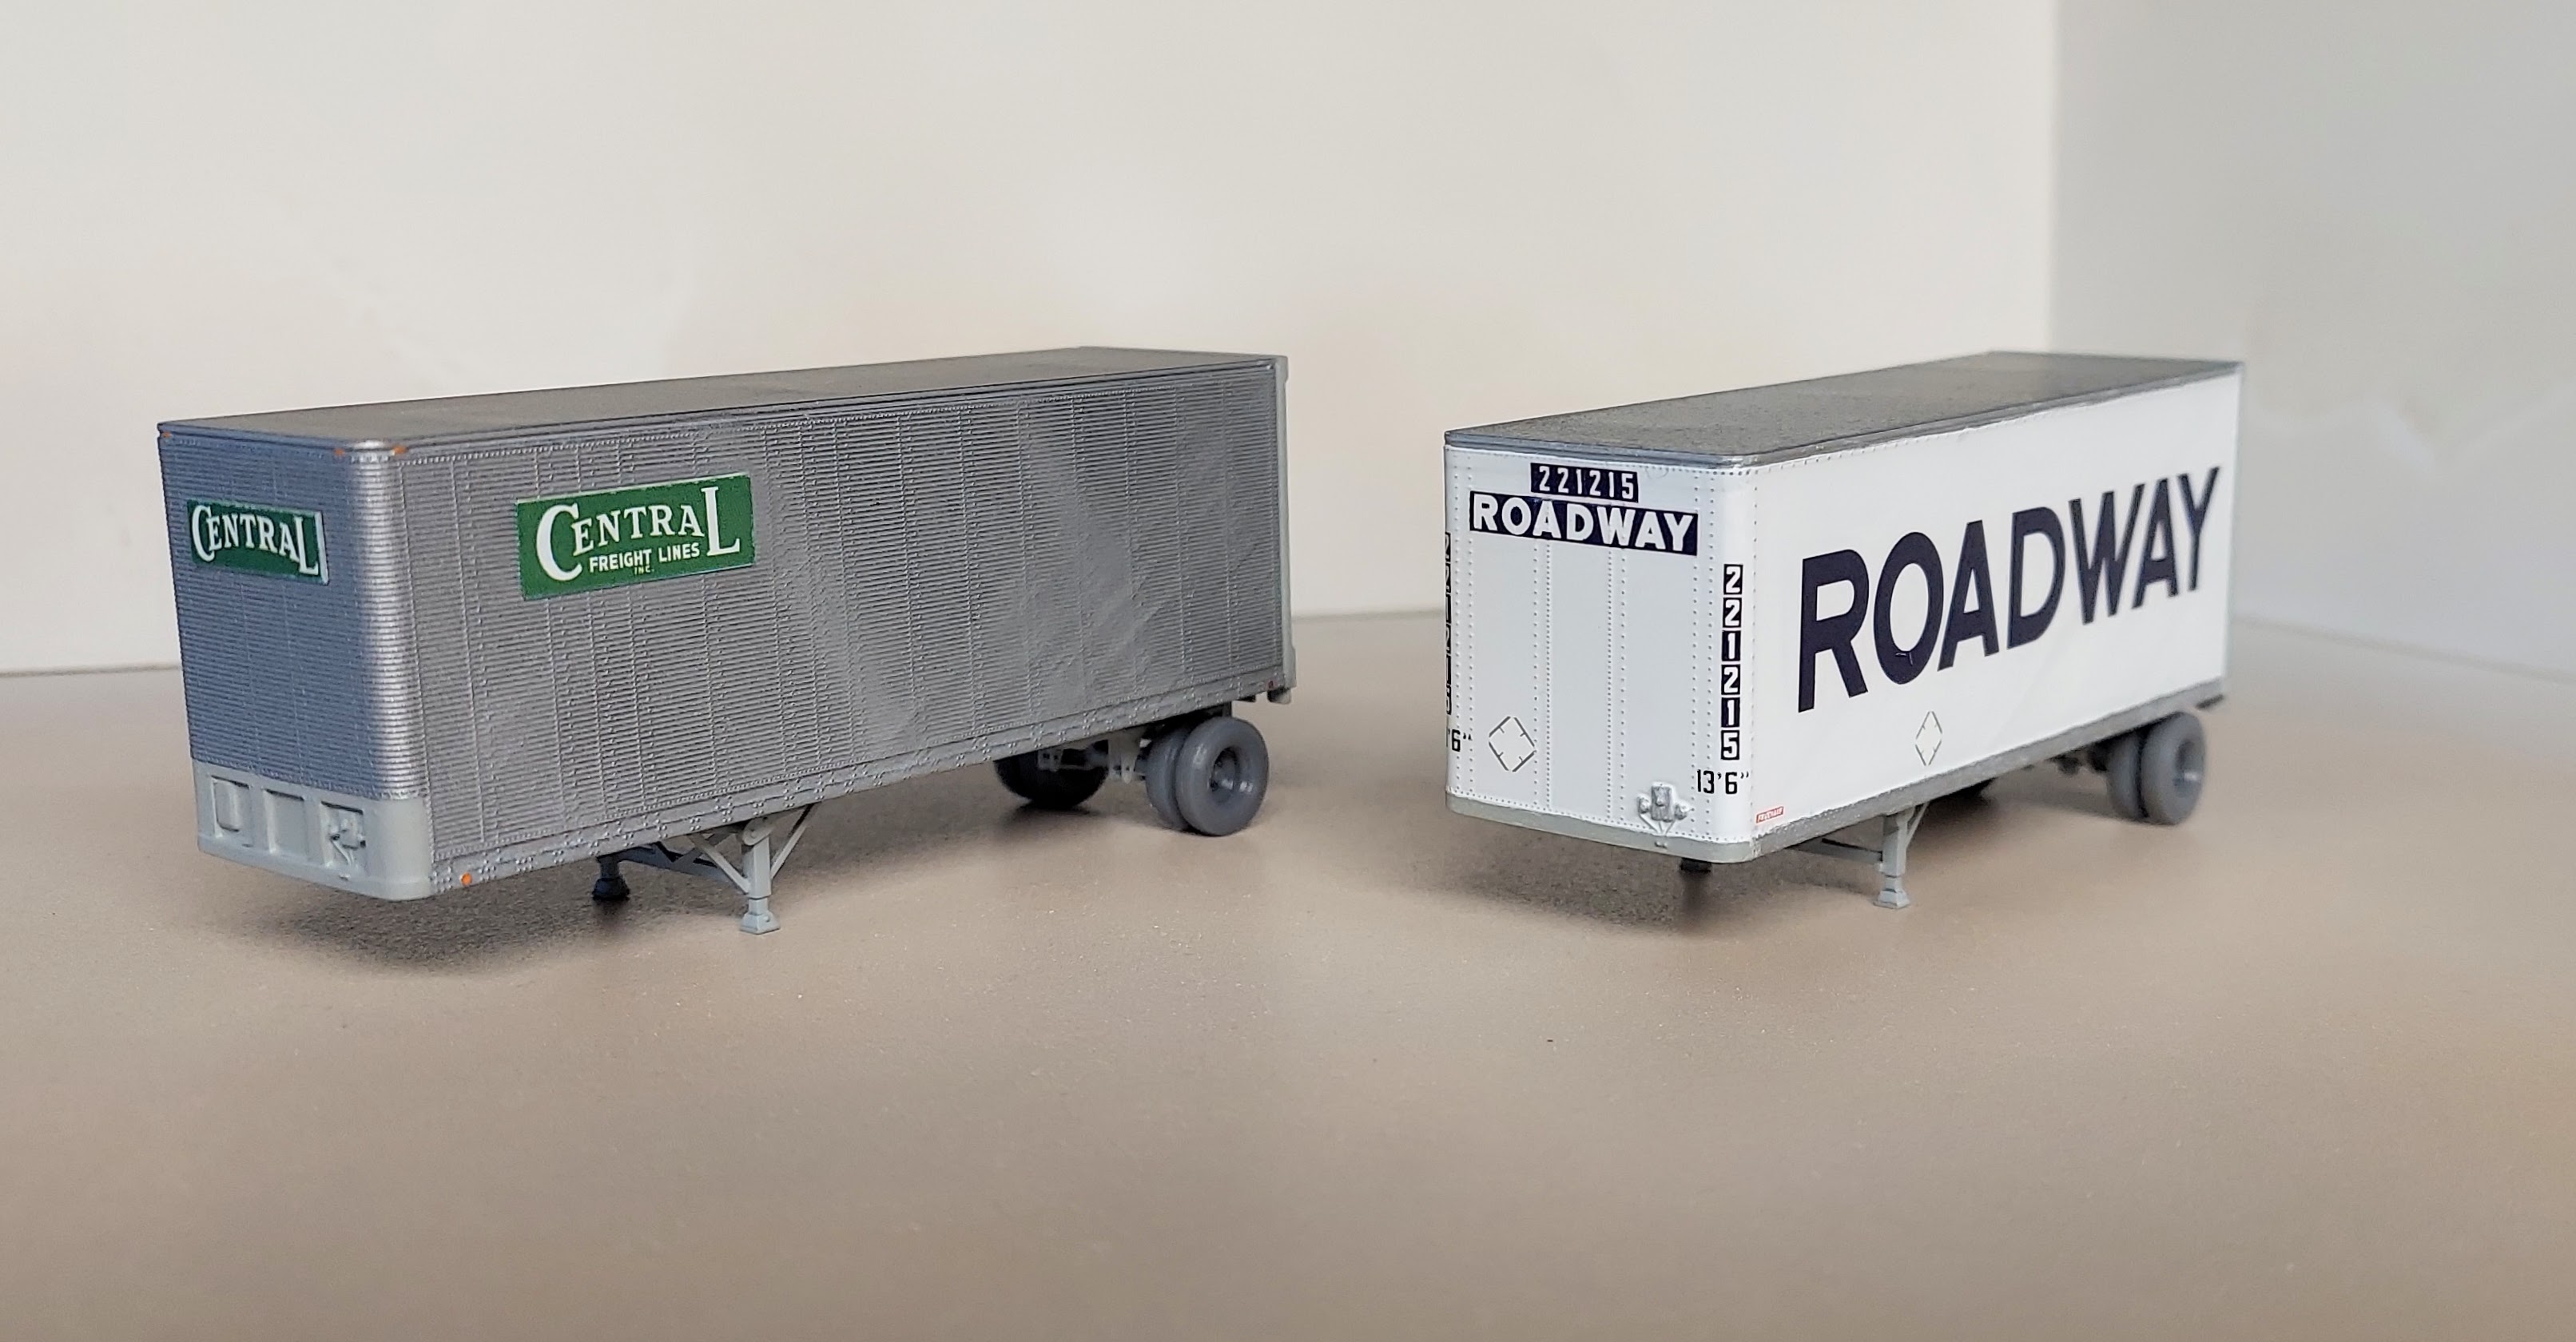
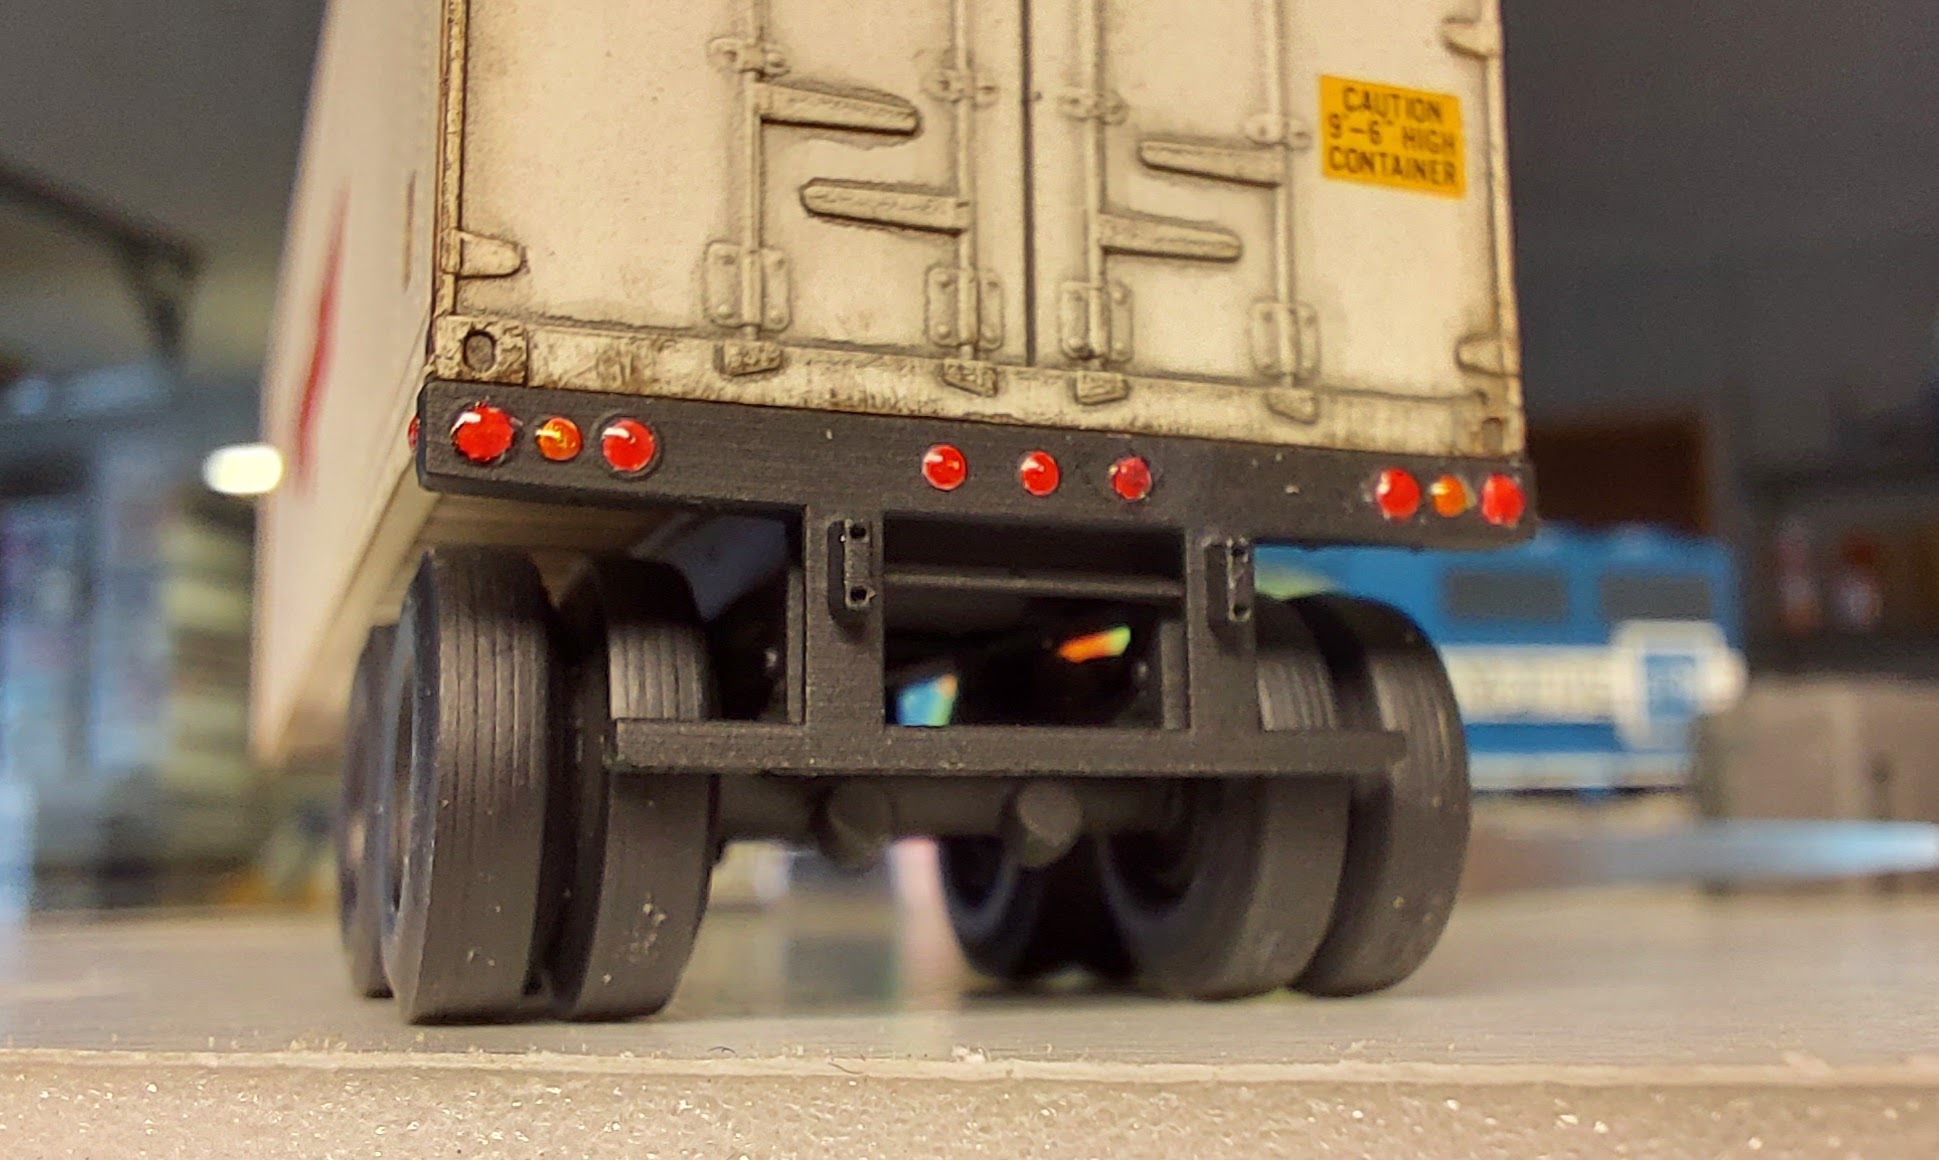
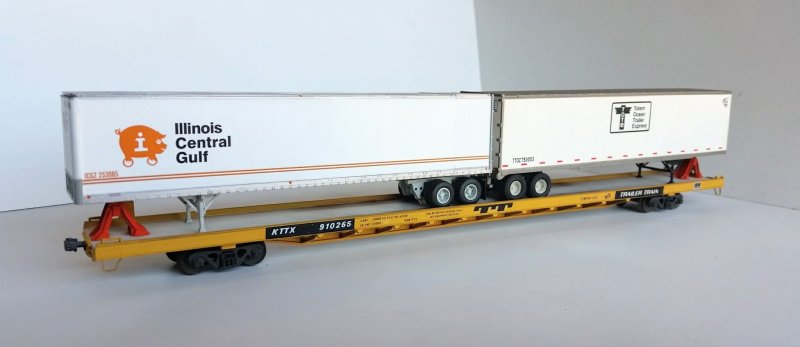
Upgraded Walthers F89F flatcar as KTTX 910265 with trailers from Athearn and Walthers

Southern 151048 and 151268 from modified Front Range kits with Hubert Mask decals

Aside from the Twin45 program, Trailer Train developed the Four Runner, a four unit drawbarred car consisting of two-axle spine cars. These were later developed as the Front Runner, single two-axle spine cars capable of carrying a single trailer. Trailer Train also began to build its own articulated spine car fleet.

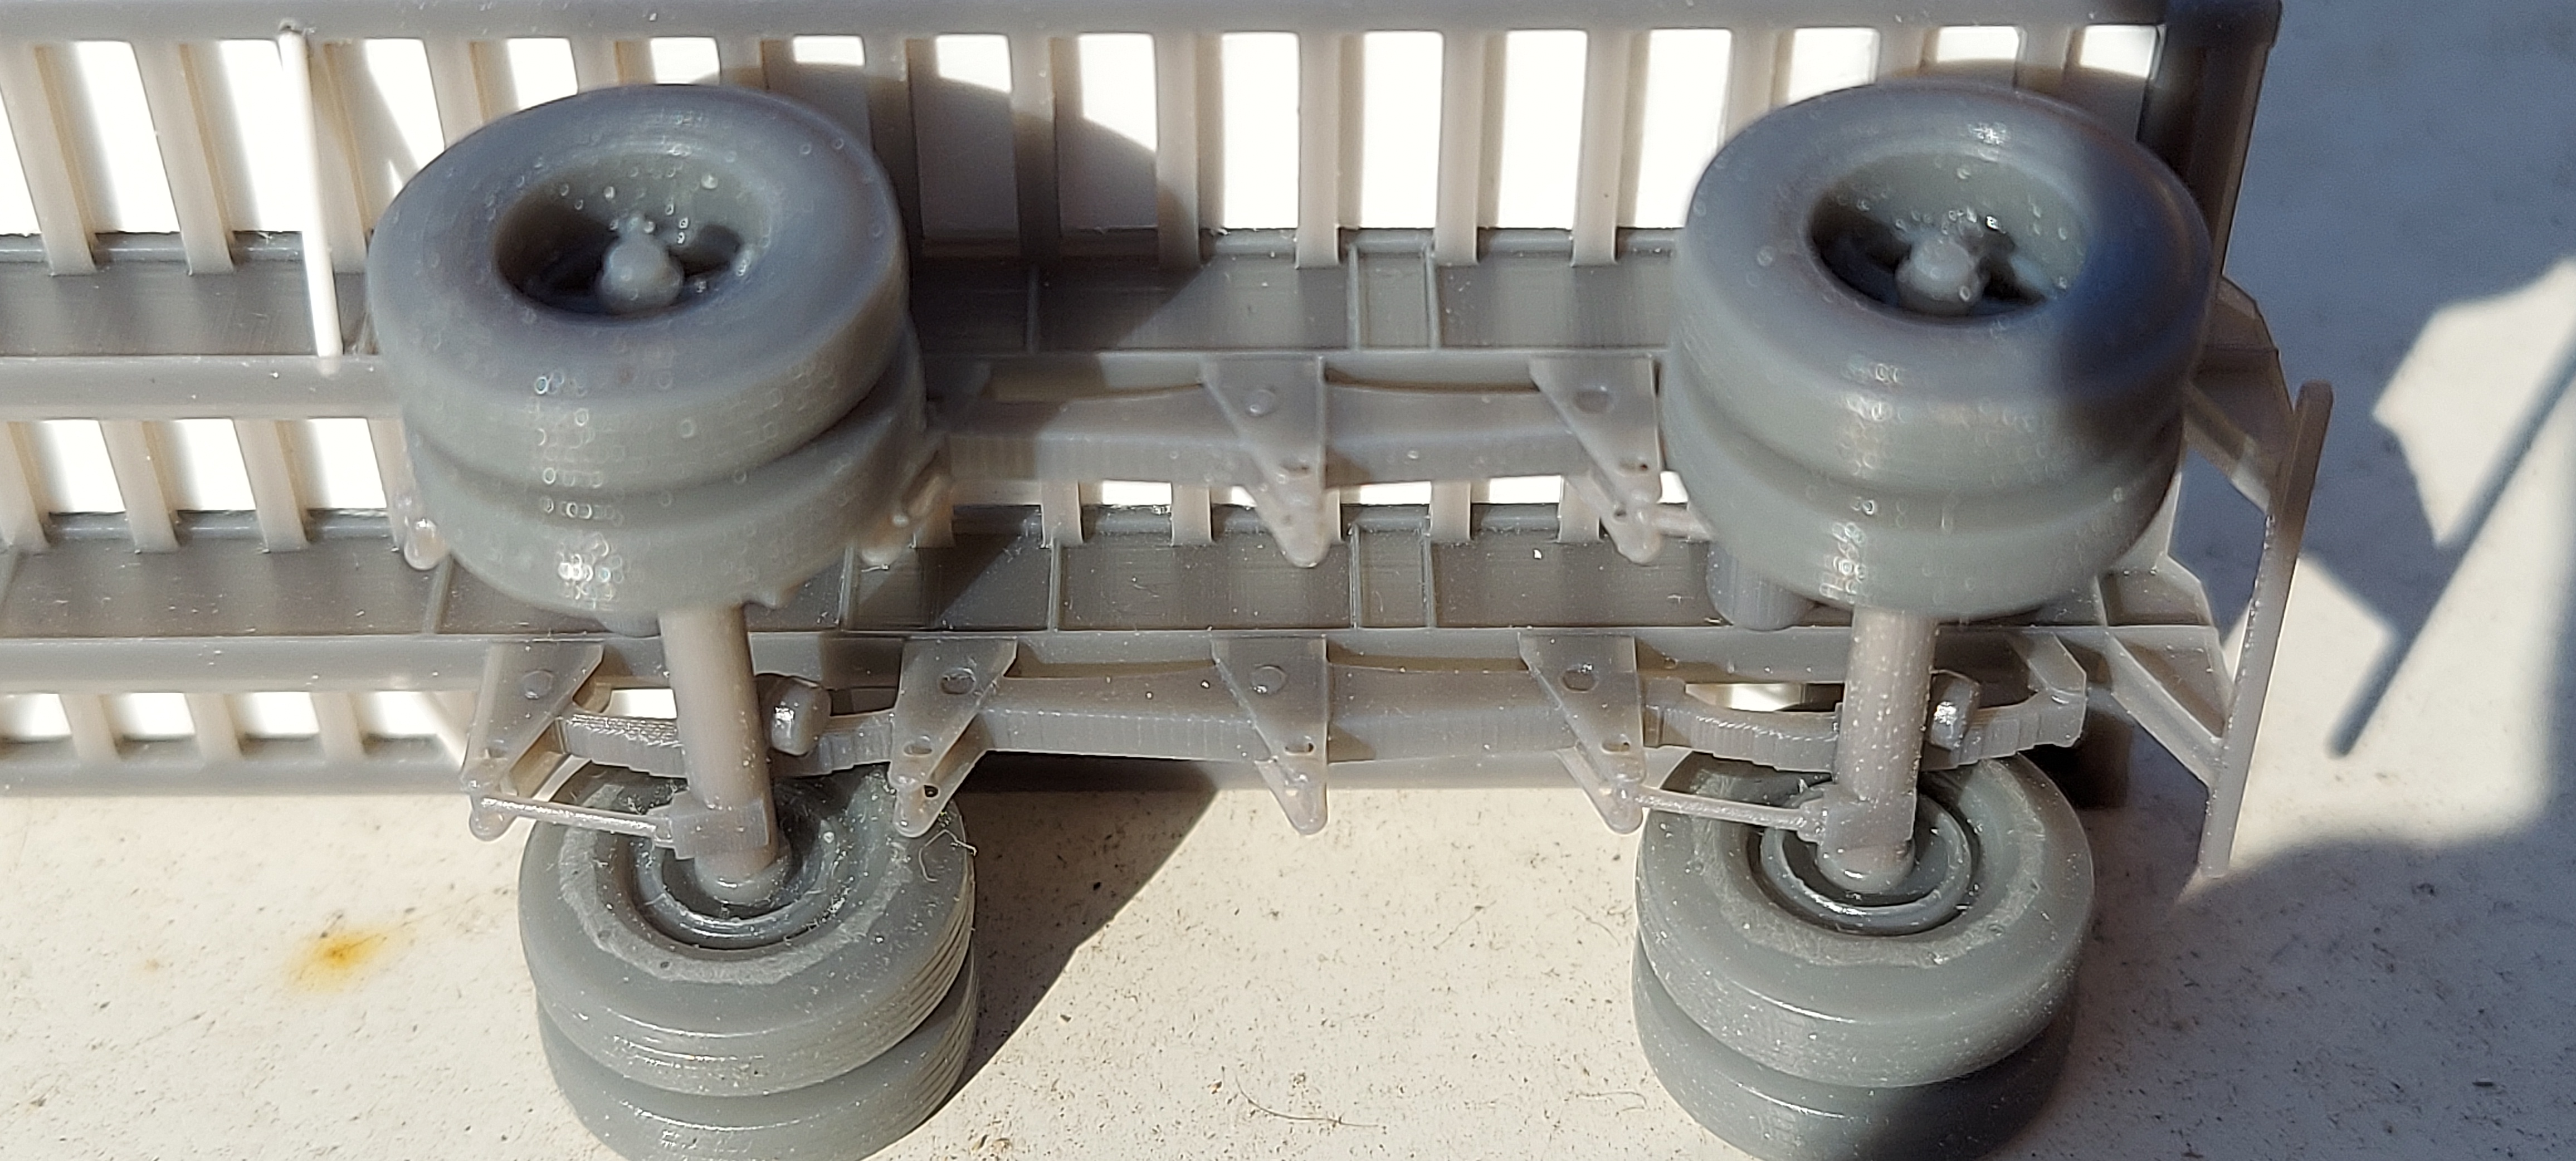
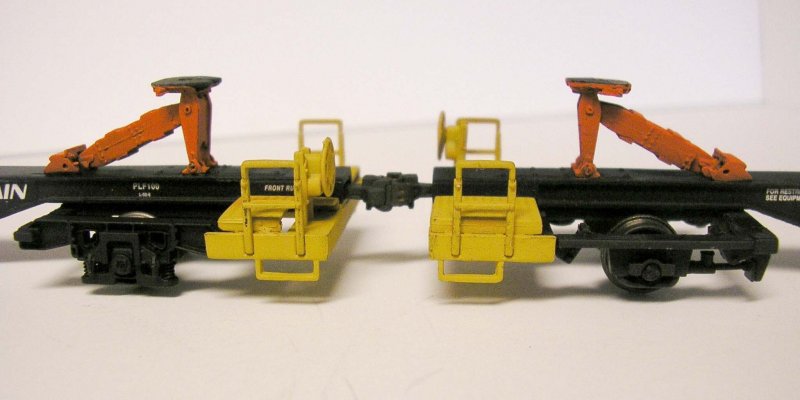
Walthers Front Runner spine cars as modified with Details West hitches and 3D printed National Uni-Truck II trucks (on left)

Just as the real railroads were gearing up for intermodal service, some of the model manufacturers joined in. One of the more ambitious manufacturers to take on modern freight cars of the 80s (not just intermodal) was Front Range. Unfortunately many of their kits had serious design issues making them unpopular with modelers who didn't have the skills to correct the problems. Since their competition was comprised mainly of simple and reliably easy to assemble "shake the box" kits from Athearn and Model Die Casting they didn't last long. I don't know the whole story, but apparently Front Range became McKean Models at some point and some of the kits lived on while other new kits were introduced. Between Front Range and McKean two different styles of boxcar to flatcar conversions were offered, as well as models of the Four Runner/Front Runner and the Pacific Car & Foundry articulated spine car.

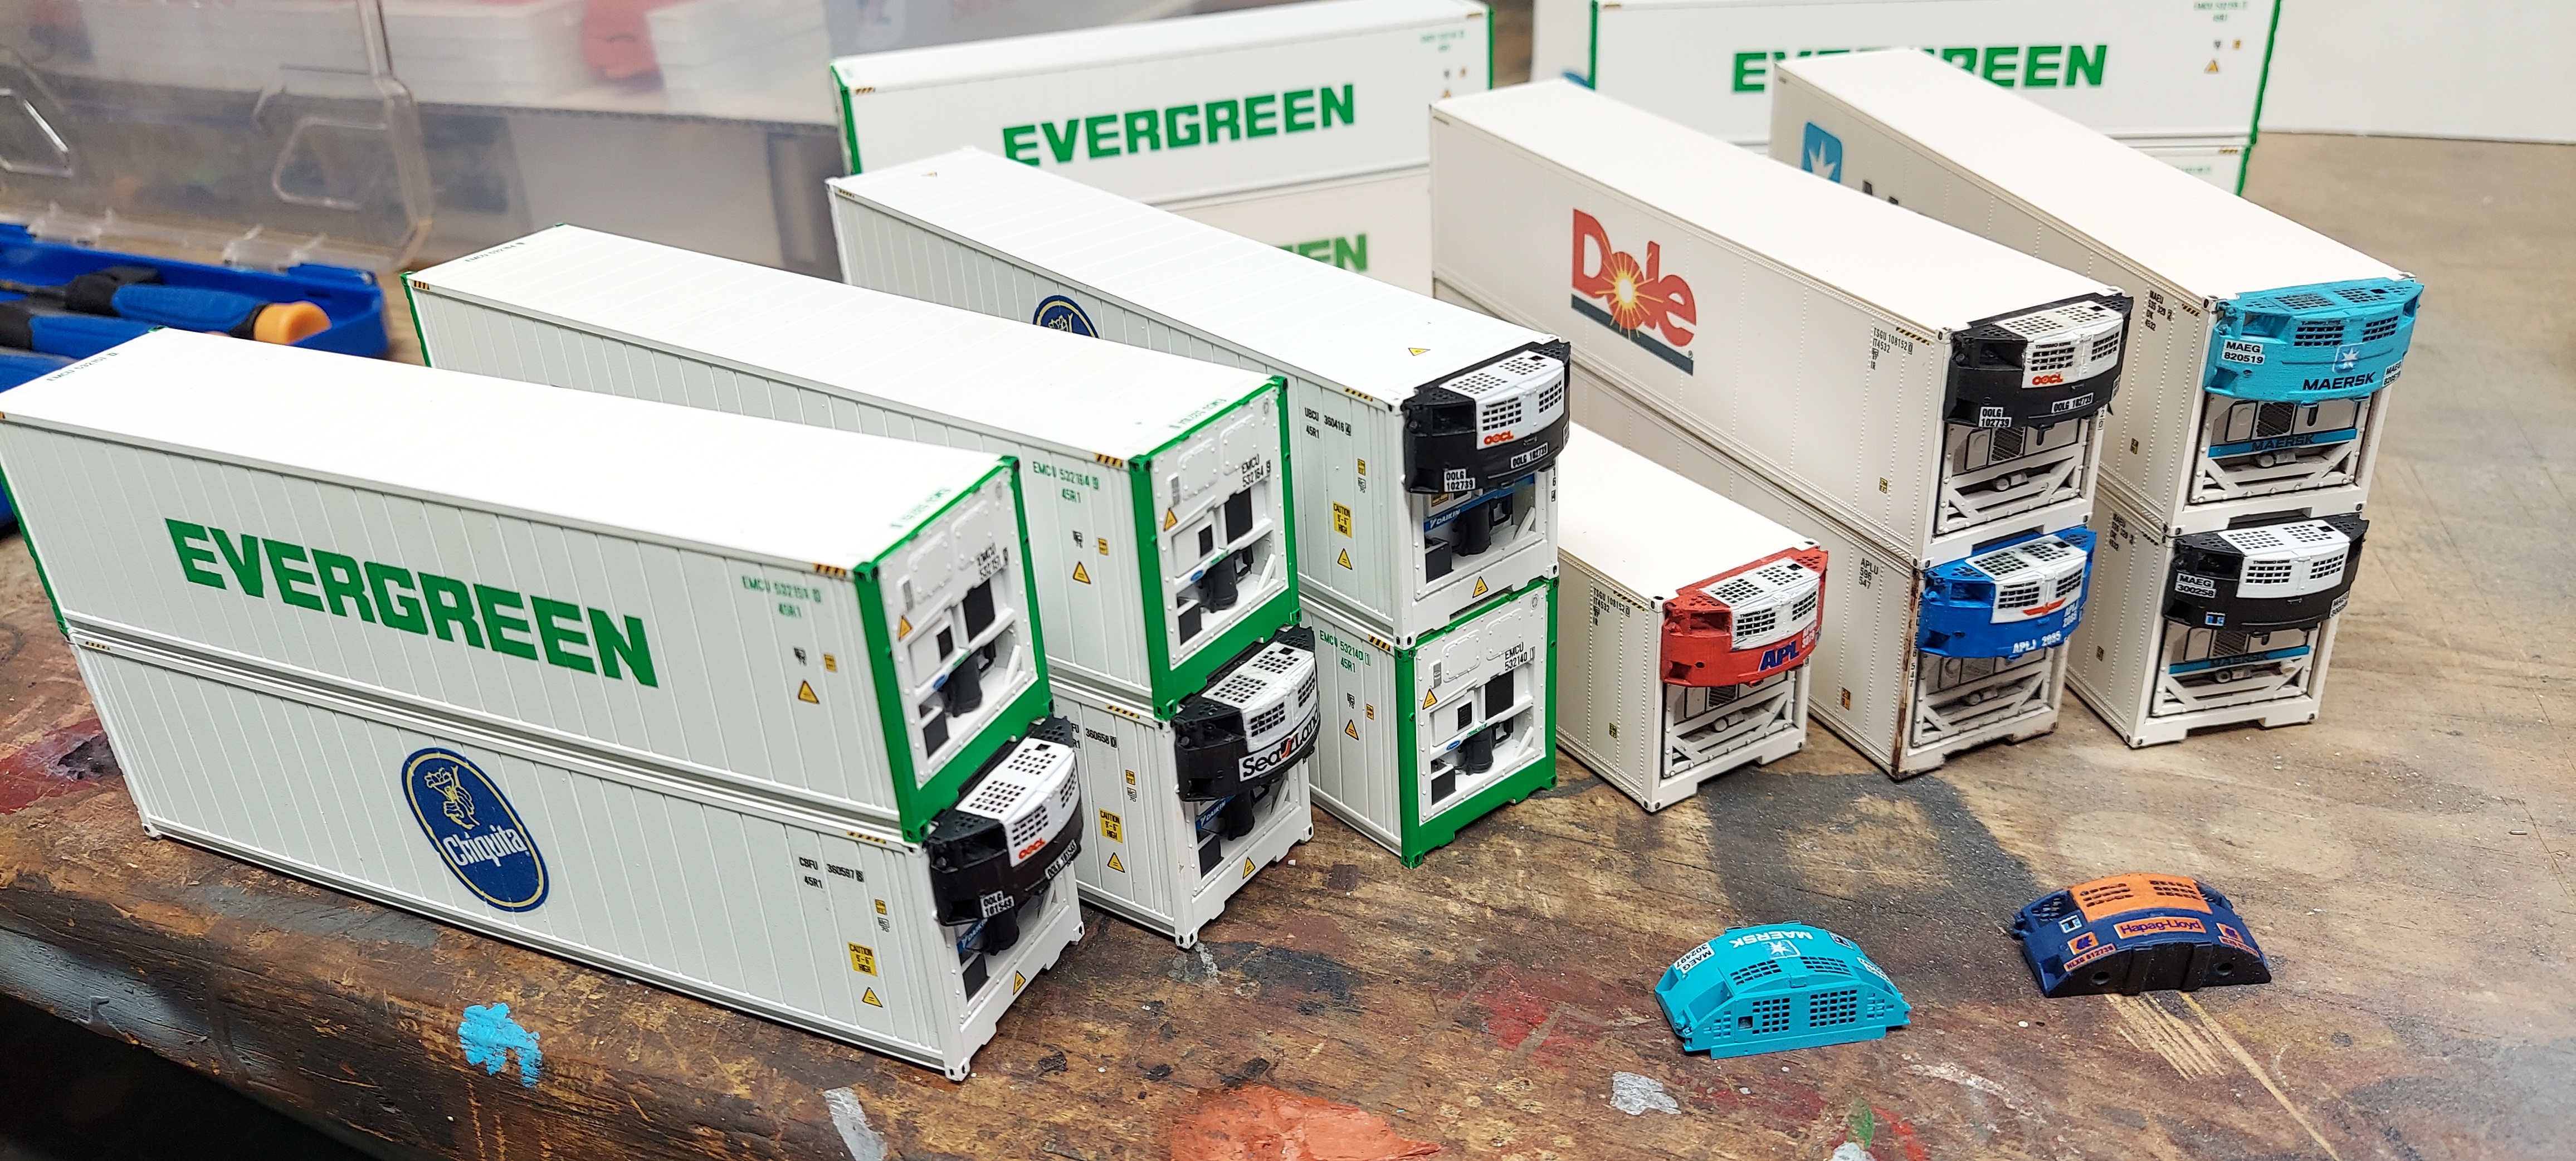
A-line was another manufacturer to get involved in intermodal models early on. A-line produces a line of trailers, containers and well car kits along with a line of decals. The container and well car kits were later offered assembled and decorated by Intermountain. The trailer kits are now offered assembled by Athearn.

During the late 80s innovation in intermodal equipment design continued. The focus shifted from the new concepts of the late 70s and early 80s to building efficiency and dialing in designs that had been proven in practice. Subtle changes were made to the increasingly common articulated spine and well cars, from accommodations for containers on spine cars to wells that could carry a pair of 48' containers. If a pair of 45' trailers on an 89'-4" flatcar was a stretch, a pair of 48' trailers on the same car was impossible. However, three trailers could fit on a pair of permanently connected flatcars, and so Trailer Train's Long Runner was born.

Custom painted Athearn Gunderson Maxi-III articulated well car as BN 64138

Walthers and Athearn both introduced a line of intermodal models in the 90s that corresponded with the explosive growth of container traffic. Walthers produced F89F flatcars, Thrall 48' well cars, a Front Runner (a much improved take on the model compared to the poor Front Range model) and a five-unit spine car. Athearn released the Impack spine car in end and intermediate kits, enabling the modeler to build any of the four, five, eight or ten unit prototype cars. Athearn also released the Gunderson Maxi-III articulated well car as well as the single unit version, the Husky Stack. Athearn had previously released a model of an All-Purpose flatcar, but it was shortened to fit the existing frame of their 85' piggyback car. A modeler could sacrifice one of the All-Purpose flatcars to cut into sections to splice into another flatcar to achieve the correct 89'-4" length (I did a few of these myself).

In the 2000s Atlas, Walthers and Athearn Genesis introduced another round of intermodal equipment, this time much improved in detail from the models of the 80s and 90s. For those desiring models of the various 89'-4" flatcars of Trailer Train, finally some nice models were available.

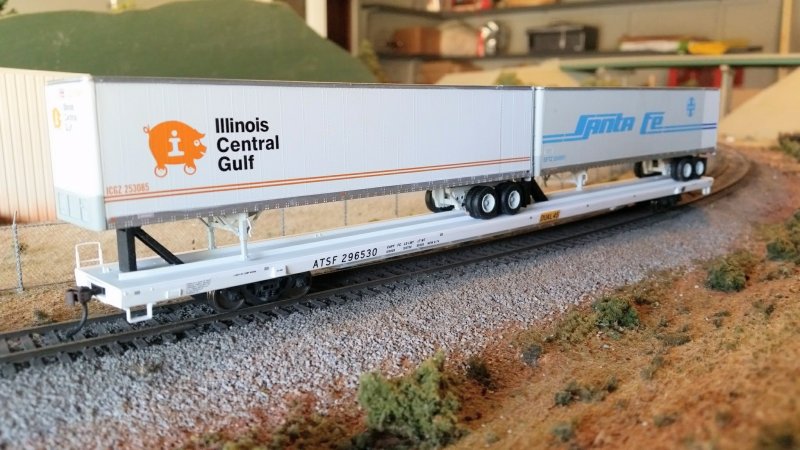
Walthers Bethlehem 89'-4" TOFC flatcar as ATSF 296530

Atlas ACF 89'-4" flatcar as SFLC 901323 (ex-Texas Mexican)

With all these models available, it's possible to build pretty accurate replicas of those innovative designs of the 80s without much effort. Just buy the models and plop 'em down on the layout. It wasn't always that easy, but for the skilled and motivated modeler, there was a source of drawings, photos and how-to articles readily available from several sources. With some basic tools and supplies, you could build some pretty impressive models just by following the directions. Having seen some of these models up close and personal -- Keith Hapes' Southern Pacific articulated stack car up above is a prime example -- they hold up, even today.

In the early 80s Model Railroader, Railroad Model Craftsman and other magazines ran several articles with prototype drawings of intermodal equipment, including Southern Pacific's first well cars, Santa Fe's Fuel Foilers and wallboard to TOFC conversions as well as supporting equipment like piggyback loaders and container chassis. These articles were an excellent resource for modeling some of the railcars, trailers and containers of the time.

In those days even mainstream magazines like Model Railroader considered scratchbuilding part of the hobby. I don't want to get on a high horse and lament that nobody scratchbuilds anything anymore, that we're just a bunch of collectors, how it was better in my day, blah blah blah. That's ridiculous and far from the truth.

I will allow that the greater variety has made it a lot easier to leave those skills behind for those who want to focus on other things, like building a layout perhaps or operating a layout more realistically. It's a double-edged sword, obviously. Let those skills dull long enough and they may vanish forever. If you're always trying to build specific models from scratch you won't have time for much else.

A few years ago I transitioned from scratchbuilding things the old-fashioned way to a new and improved way, well, to my way of thinking anyway. It started with a Missouri Pacific caboose. Several years ago I bought a resin model of a Mopac SL-1 slug hood from Sam Lloyd. Sam and I talked back and forth and he shared with me some other projects he was working on, including a Mopac extended vision caboose. Mop's version of the extended vision caboose had the cupola offset way toward one end, like an old wooden caboose. Sam came up with the elegant solution of cutting an Atlas caboose in a couple places then rotating the cut out section and reassembling the shell to get an offset cupola. He also drew up plans for the double-hung conductor's window in the rebuilt caboose side.

I built one of these following Sam's methods as close as I could. And I couldn't be happier with the results. But without modifying the cupola windows you really could only do the as-built version. And on top of that, you could only do the earlier cabooses, not the later ones with X-panel roofs. So, figuring I might want to have one of the later cabooses with the sharp-corner cupola windows, I made drawings of the Atlas caboose body modified to match the four versions Mopac had: early as-built, early rebuilt, late as-built, and late rebuilt. Faced with the prospect of scratchbuilding one X-panel roof, I decided to explore 3D printing. If I can do a Mopac caboose, why not a Cotton Belt caboose, or a Frisco caboose and so on. As they say, the rest is history.

So now we've come to an interesting question: is modeling in a virtual environment, i.e. on a computer, actually scratchbuilding? Like building a physical model, I start with simple shapes - in this case outlines of parts with depth and width - then I add the third dimension of height to them. This is similar to using thin layers of styrene to build up a block. One key difference is that I can make the process of giving height to the outline - that is, the act of extruding the shape - a straight or curved or complex shaped path to follow. I can create some interesting shapes this way. I can also take two overlapping objects and fuse them together into one new object without having to carve and cut and fit the parts together. So there are certainly some serious shortcuts to virtual modeling compared to physical modeling. But the process of working out how primitive shapes and objects will go together is the same.

So is it scratchbuilding? I don't know. It feels very similar to me. I experience the same emotions as I work my way through the problem of building the model whether it's a physical model or a virtual model. I get the same satisfaction out of building a model from styrene as from polylines.

Now here's the game changer: with 3D printing I only have to scratchbuild a model once to have multiple copies of it. Just like the X-panel roof or the National Uni-Truck II, it's cool to build one of these things, but to really get anywhere you need to build more than one.

Besides going through my own personal list of things I want to build and doing the research and making the 2D drawings and then the 3D drawings, I have decided to go back to those articles and take another look at scratchbuilding them virtually.

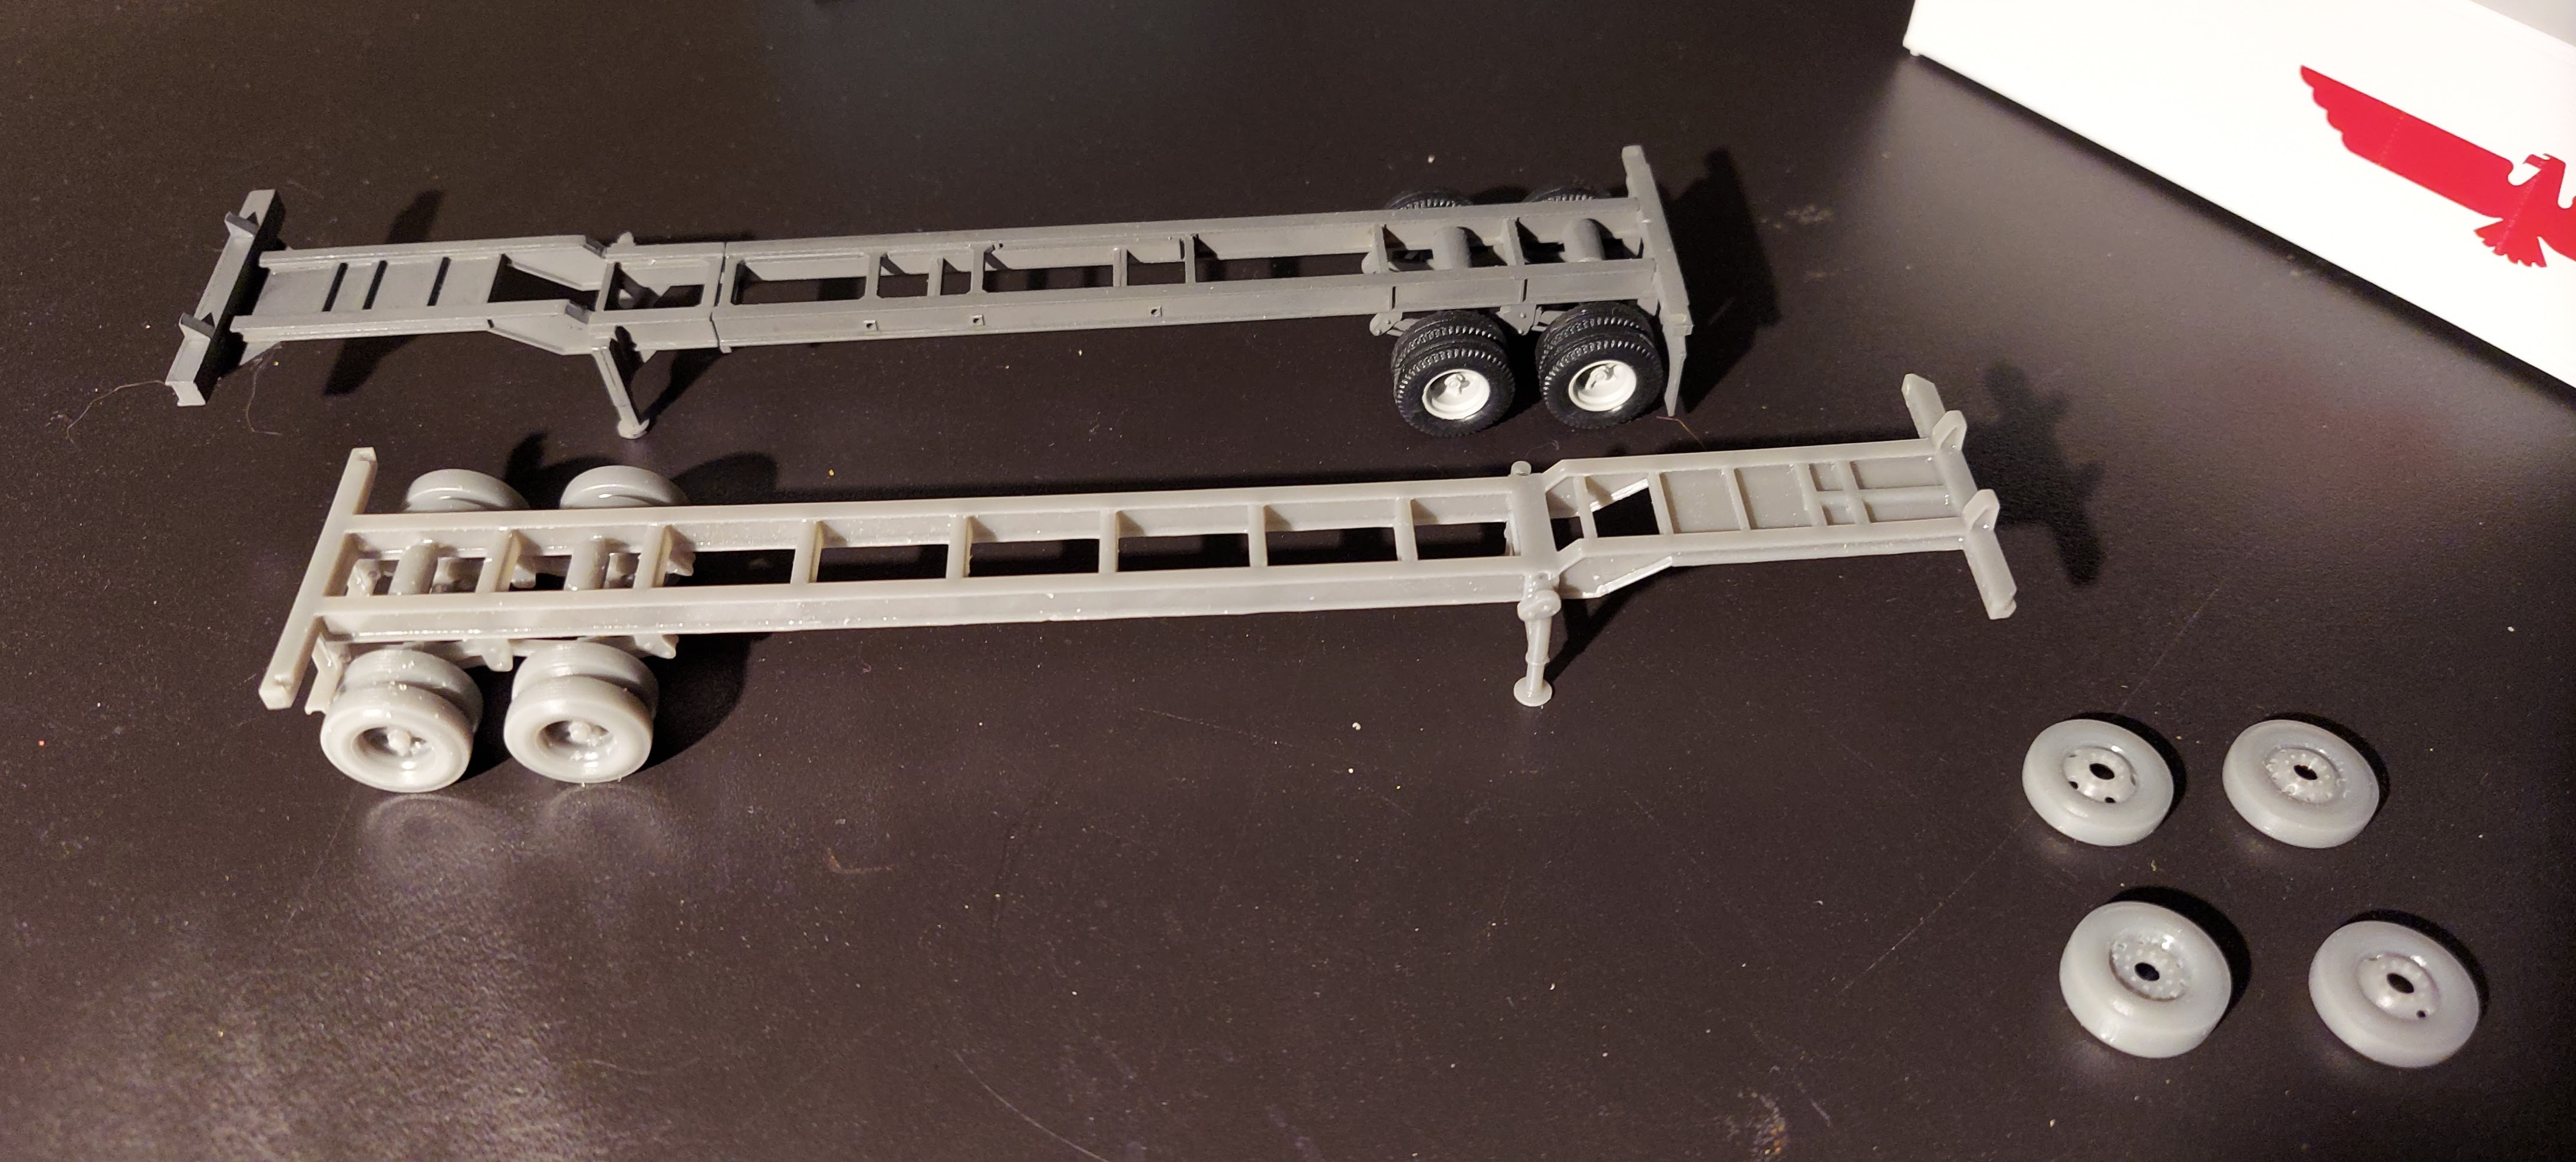
One area I found lacking in models is appropriate hitches for certain car types. Details West makes some excellent pewter hitches but not every variation of the prototypes are covered. Those old articles really broke down the details like hitches into simple parts you could make using only styrene strip and wire. Using the drawings from Model Railroader's Fuel Foiler article, I've created replacement hitches for Athearn's Impack car to match the Santa Fe prototype. Emboldened by success and ease of this simple solution, I worked up my own drawings of fixed hitches for Santa Fe's Dual 45 flatcars and Southern Pacific/Cotton Belt Impack spine cars, then 3D printed those as well.

3D printed intermediate hitch for Athearn Impack spine car as Santa Fe Fuel Foiler

3D printed hitch set for Cotton Belt Impack spine car

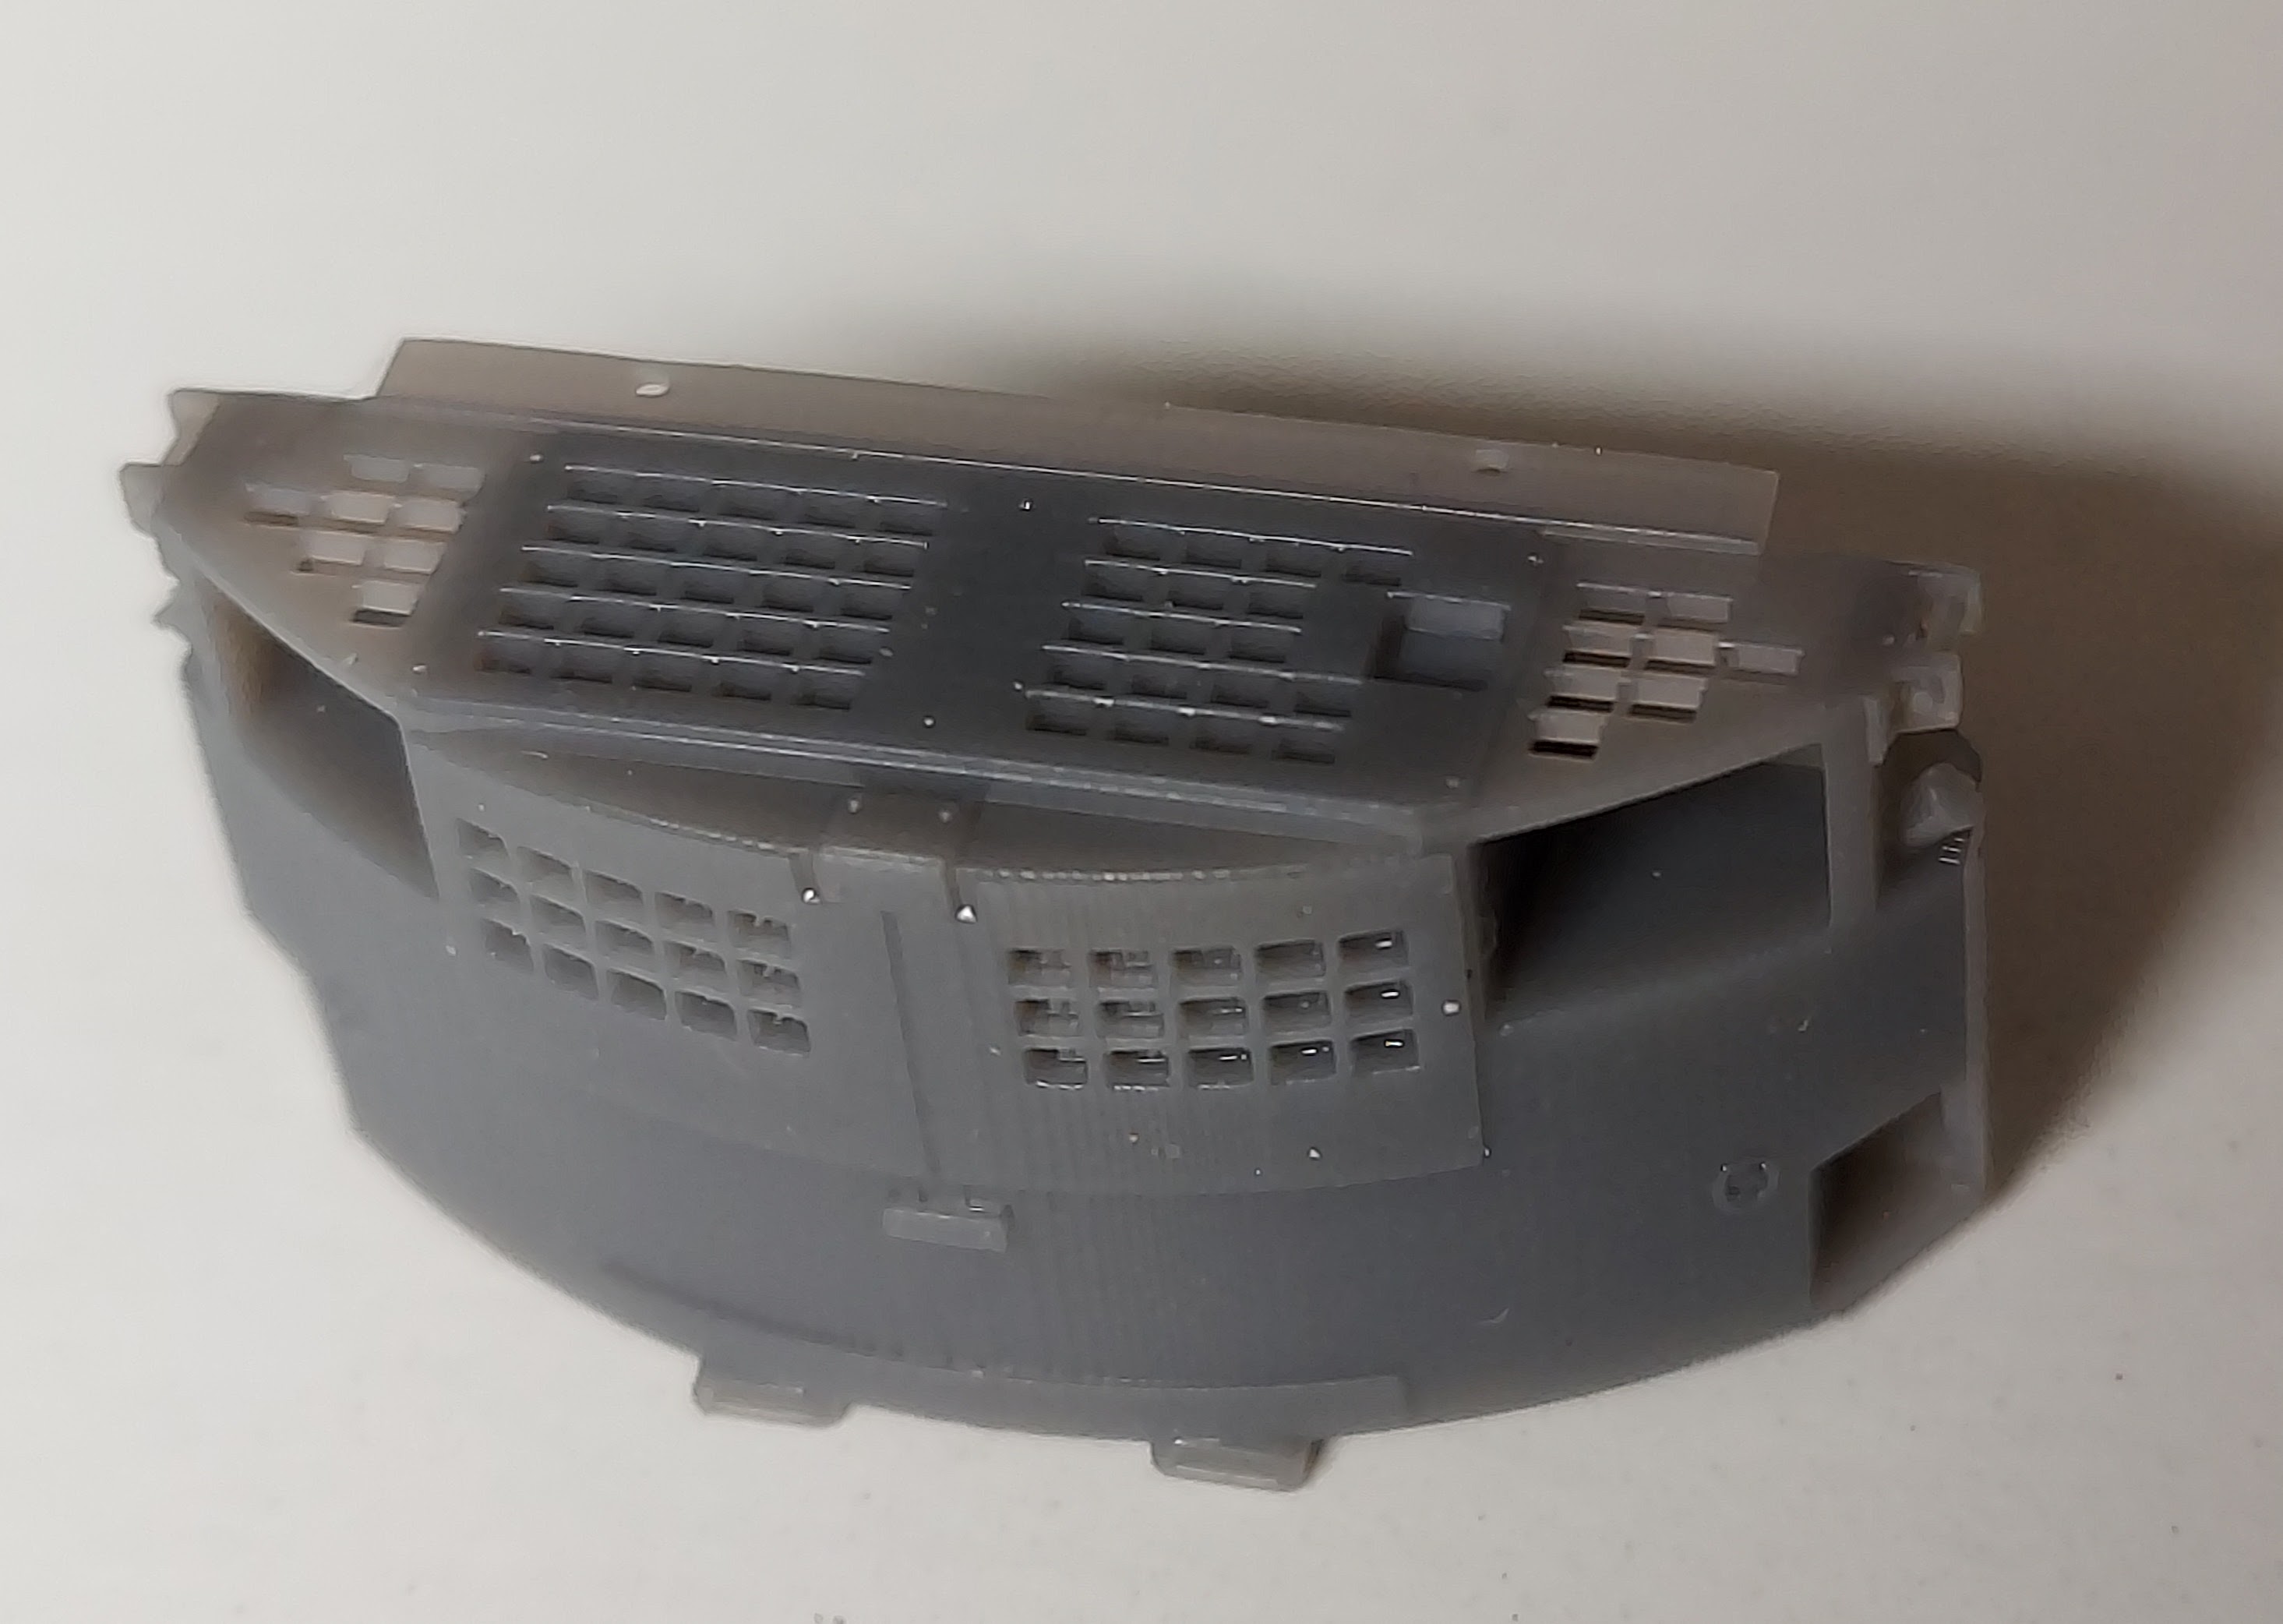
Another problem I decided to address is the fit of older Walthers, Athearn and A-line containers in each others' well cars. Basically, the problem is the pins representing IBCs on these containers aren't the same size, shape and location from brand to brand. I decided to standardize on the Athearn pin size and placement. In order to do this I needed a tool to locate the drill holes for the pins consistently from container to container. I could have cut some sheet styrene to make it and been pretty close. But another issue I'm always trying to resolve is thickness vs. strength as it pertains to Frosted Ultra Detail plastic, so I decided to print the tool. And it actually holds up pretty well. I've drilled new pin holes on a dozen or more containers and so far no wear in the holes that I can tell.

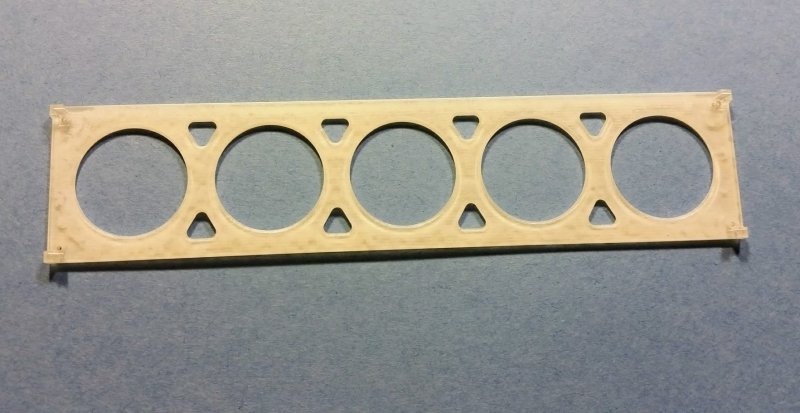
3D printed container pin drill tool

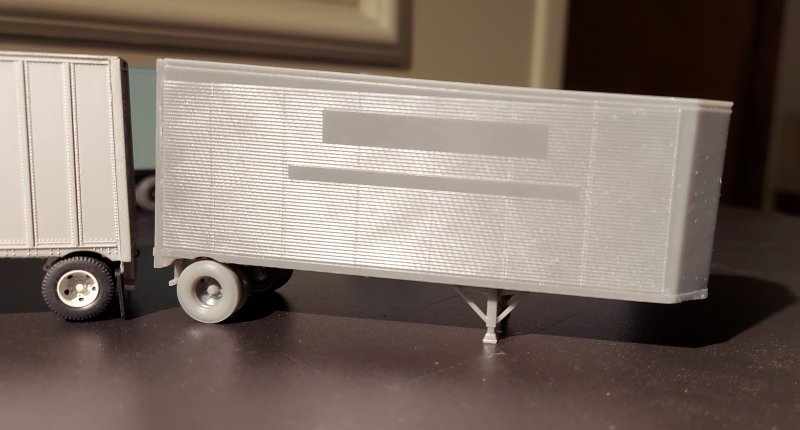
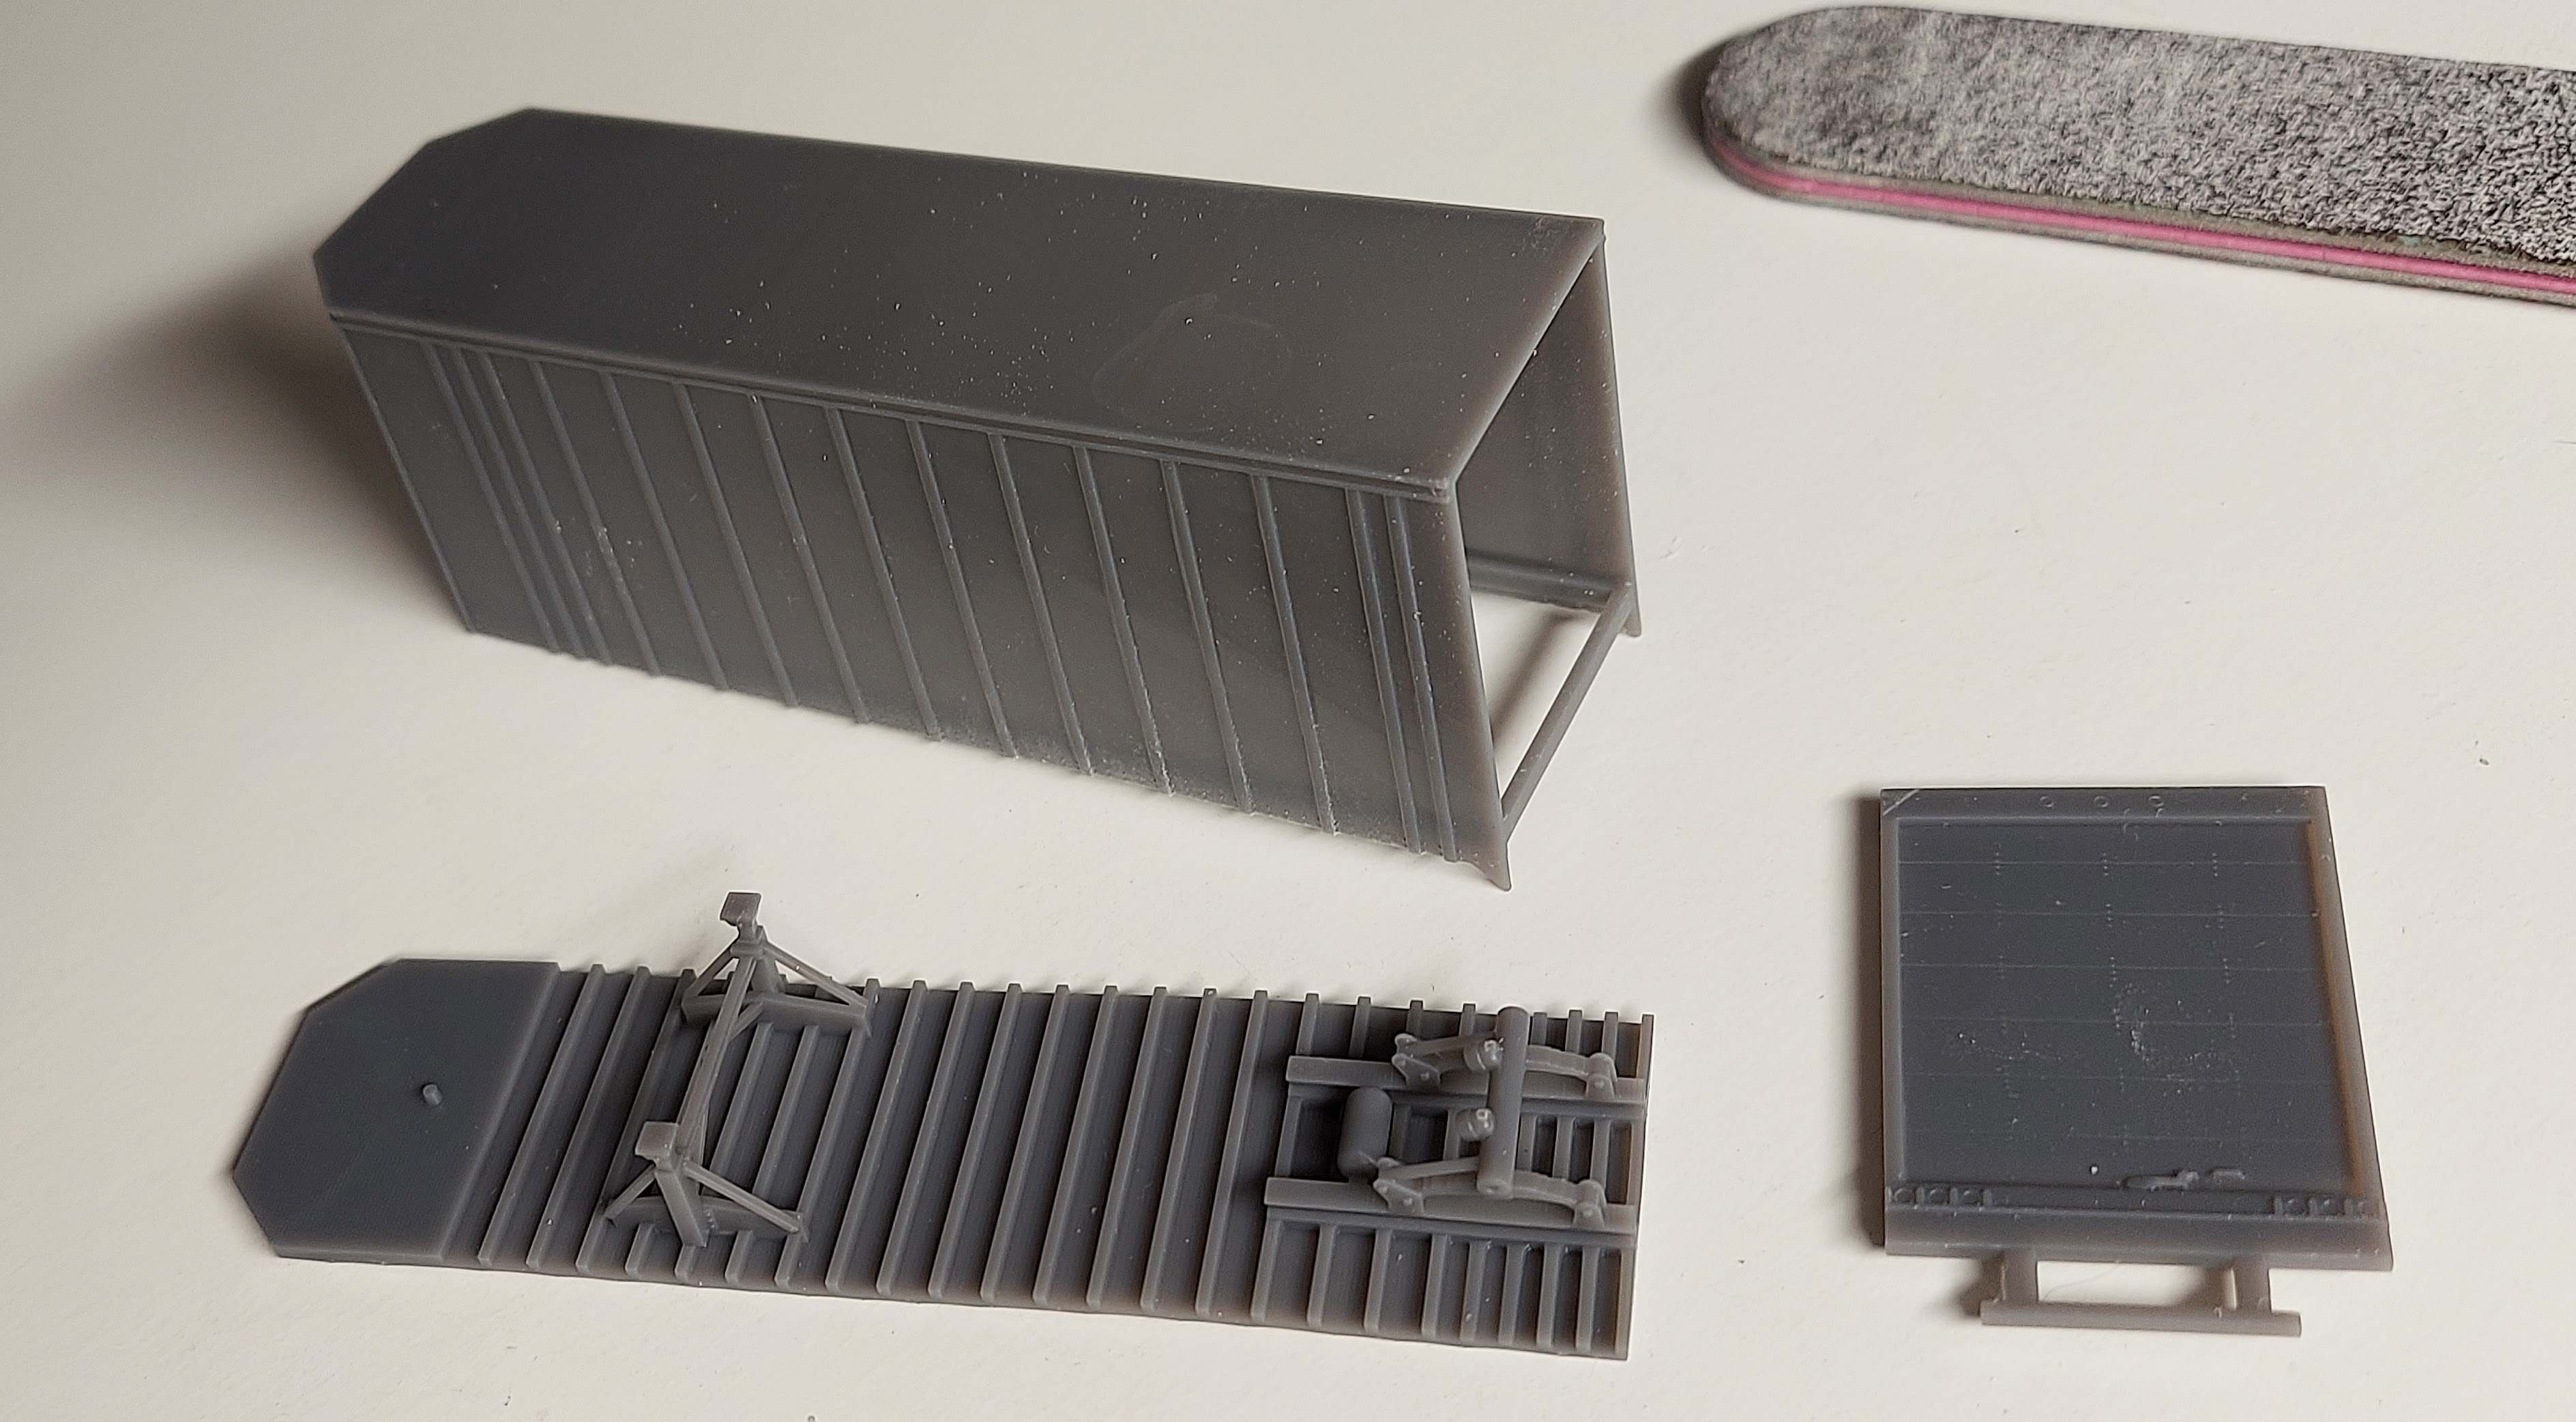
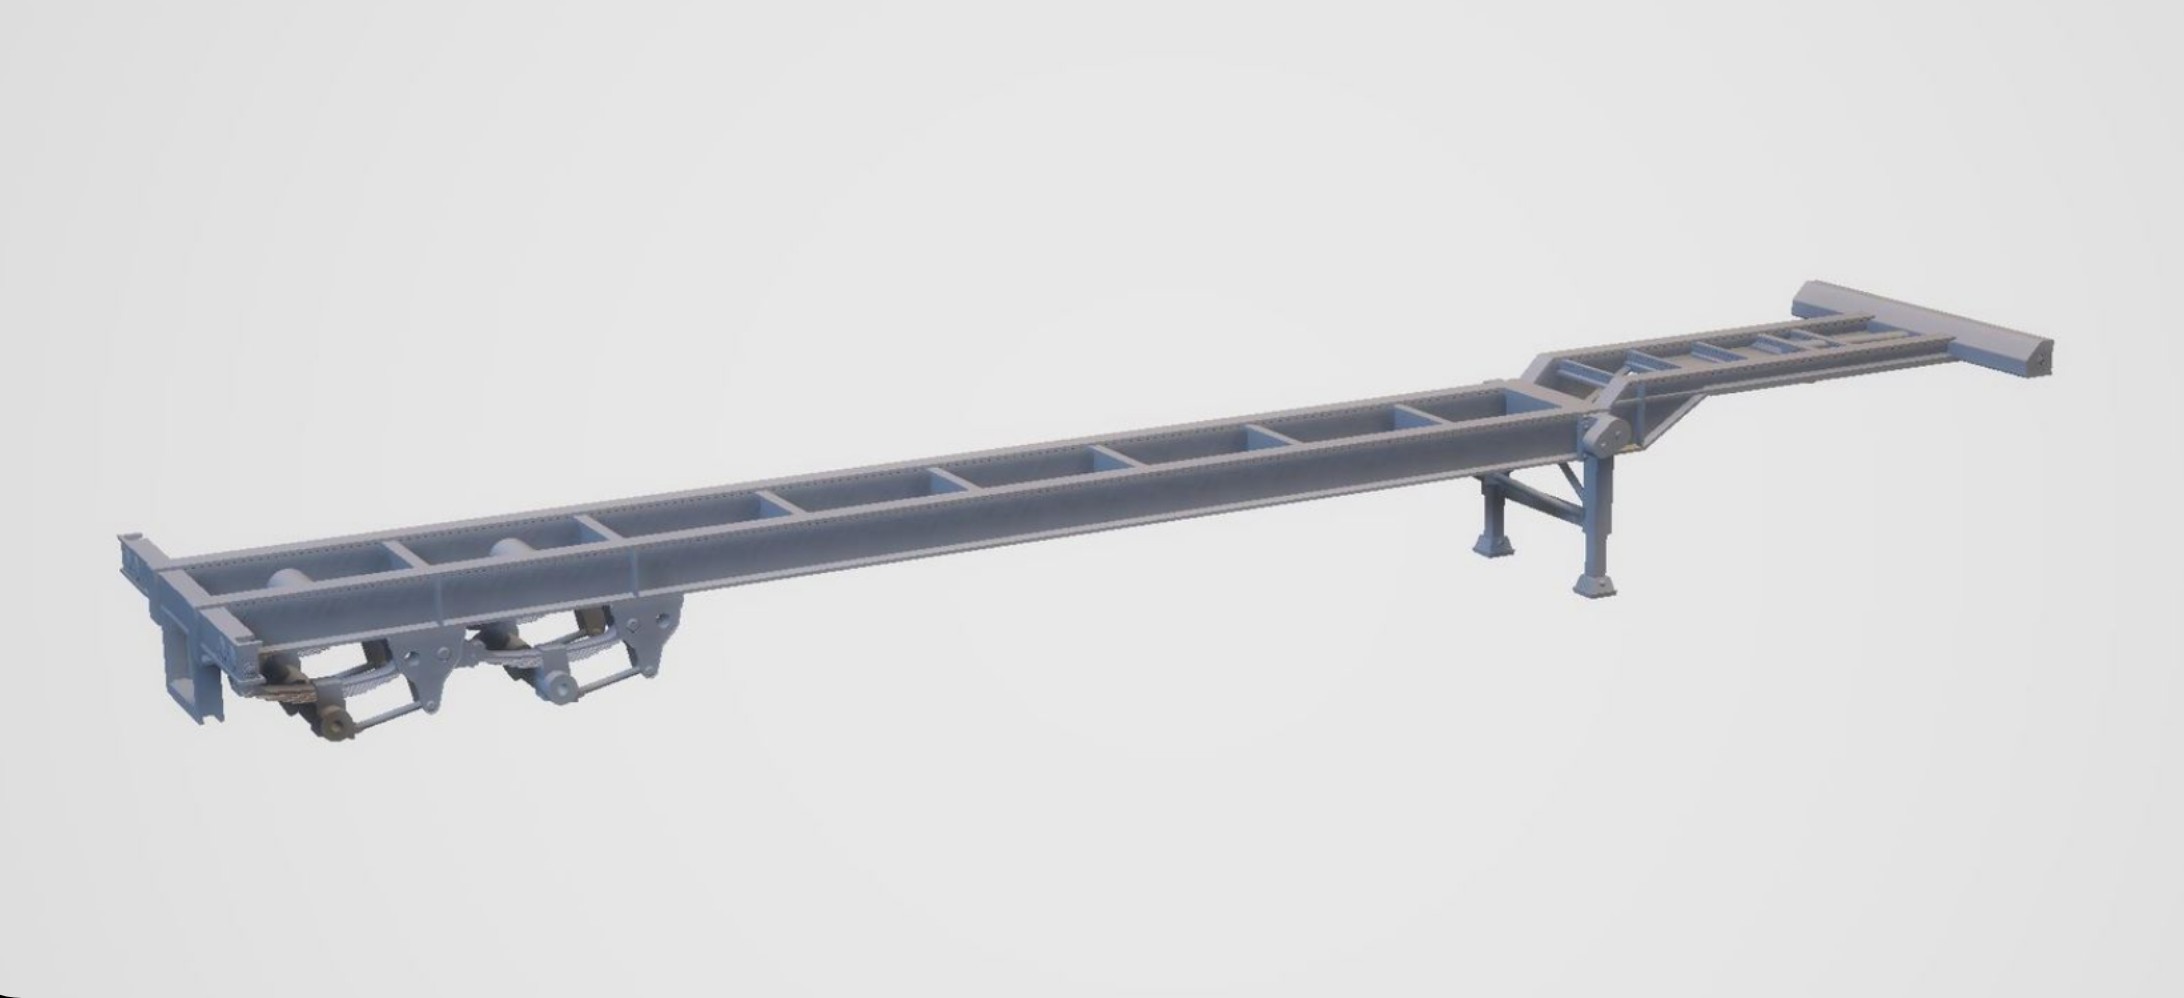
I've mainly focused on parts, but I have gone so far as to design entire cars, like the Santa Fe wallboard flats that were converted to TOFC and COFC service in the early 80s. I'm toying with the idea of drawing up some of the early experimental, short-lived or lesser-known designs that helped shape intermodal service as we know it today. I'm hopeful that I'll be able to get enough photos together to build the original Trailer Train UTTX spine cars, for example. Not there yet, though.